


A Homeowner’s Guide to Flat Roof Leak Repair in Texas
A flat roof leak usually starts small. You might find it at a seam, near a vent, or in a low spot where water gathers. The fix seems simple enough: find the spot, clean it up, and slap on a patch. But for anyone with a flat roof in Texas, this is a familiar battle against intense sun, surprise hail, and torrential downpours that constantly test your roof's integrity.
The real key is moving fast. A minor drip that you put off until next weekend can quietly cause serious, expensive structural damage.
Why Texas Is So Tough on Flat Roofs
Let's face it, flat roofs in Dallas-Fort Worth and East Texas are up against some of the most brutal weather in the country. A pitched roof is designed to shed water fast, but a flat roof has to manage every single drop perfectly. Our climate's extremes—from scorching summer heat to violent hail storms—put these systems under constant stress, leading to predictable weak spots and, eventually, leaks.
To really fix a leak for good, you need to understand why it happened. It’s not just about patching a hole; it’s about figuring out what caused it in the first place.
The Unforgiving Texas Sun
The number one enemy of a flat roof around here is the sun. Day after day of intense UV radiation and extreme heat cycles takes a toll. This thermal shock forces the roof membrane to expand during the hot day and contract as it cools at night.
Over time, all that movement puts immense strain on the seams, causing them to pull apart. The material itself can become brittle and crack, creating perfect little entry points for rain. Many common flat roofing materials, like the ones you can read about in our guide on modified bitumen roof systems, lose their flexibility under this constant assault, making them much more likely to fail.
When Water Won't Go Away
Flat roofs aren't truly flat. They're built with a subtle slope to direct water toward drains or scuppers. But when that system isn't working right, you get ponding water—those stubborn puddles that are still there 48 hours after a storm.
Ponding water is a huge red flag. Here's why:
- It cooks your roof. Standing water acts like a magnifying glass for UV rays, accelerating the breakdown of the membrane underneath.
- It adds a ton of weight. Water is heavy. A seemingly small puddle can add hundreds of pounds of stress, causing the roof deck to sag and making the ponding even worse.
- It becomes a swamp. Puddles collect dirt, leaves, and other gunk. This debris holds moisture against the roof, creating a perfect environment for algae and mold to grow.
This is almost always a sign of a bigger issue, like a clogged drain or a structural problem. A simple patch won't solve the root cause.
Common Failure Points on Flat Roofs
Before you even start looking for a leak, it helps to know where they love to hide. This table breaks down the most common culprits we see out in the field.
Common Flat Roof Leak Causes and Their Symptoms
| Leak Source | Common Symptoms | Typical Repair Approach |
|---|---|---|
| Failed Seams | Water stains running in lines on the ceiling; visible gaps or peeling between membrane sheets. | Cleaning the area and applying a new layer of compatible adhesive, sealant, or seam tape. |
| Ponding Water | Persistent puddles 48+ hours after rain; discoloration, algae, or debris buildup in low spots. | Addressing the drainage issue (clearing drains, adding crickets) and reinforcing the membrane. |
| Damaged Flashing | Leaks around vents, pipes, HVAC units, or along parapet walls; visible cracks or gaps in sealant. | Removing old sealant, repairing or replacing the damaged metal flashing, and applying new sealant. |
| Punctures/Cracks | Isolated water spots on the ceiling; often caused by foot traffic, hail, or dropped tools. | Cleaning the damaged area and applying a high-quality patch kit or liquid-applied membrane. |
Knowing these signs can help you communicate more effectively with a roofing professional and understand what kind of repair might be needed.
Beyond sun and water, certain parts of the roof are just natural weak spots. Improperly installed or damaged flashing—the metal strips sealing the joints around pipes, vents, and AC units—is probably the most frequent cause of leaks we find. As the roof expands and contracts, the seals around these penetrations break, creating a direct highway for water to get inside.
Likewise, the seams where rolls of roofing material overlap are always vulnerable. All it takes is one tiny gap or a spot of failed adhesive to let water seep under the membrane. From there, it can travel a surprisingly long way before it finally shows up as a stain on your ceiling. The financial stakes are high. In fact, water damage costs property owners in the U.S. over $12 billion every year. A small drip today can quickly become a five-figure problem tomorrow.
Finding the True Source of a Flat Roof Leak
So you've spotted a water stain on your ceiling. That’s the first clue, but it’s almost never the real crime scene. On a flat roof, water is a sneaky traveler. It can work its way under the membrane, following the roof's slight slope or even the building's structural supports, before finally deciding to drip down.
This means the actual breach on your roof could be ten or even twenty feet away from where you see the damage inside.
Simply slapping a patch on the roof directly above the ceiling stain is one of the most common mistakes I see—and it's a surefire way to guarantee the leak comes back. You have to think like a detective and trace the water's path all the way back to its origin. It all starts with a careful, and most importantly, safe inspection.
Your Initial Visual Inspection from the Ground
Before you even think about climbing a ladder, grab a pair of binoculars. A thorough visual sweep from the safety of the ground can often reveal the most obvious culprits without putting you at risk.
You're looking for the tell-tale signs of trouble:
- Blisters and Bubbles: These look like raised pockets or bumps in the roofing membrane. They’re a dead giveaway that moisture is trapped underneath.
- Visible Cracks or Punctures: Scan for any obvious tears, splits, or holes in the surface. This is especially important after one of the hailstorms we get here in the Dallas-Fort Worth area.
- Separated Flashing: Pay very close attention to the areas around vents, pipes, skylights, and anywhere the roof meets a wall. Damaged or peeling flashing is an incredibly common source of leaks.
- Clogged Drains or Scuppers: If you can see a pile-up of leaves, dirt, or other gunk around drainage points, that's a problem. It’s a clear sign water isn't escaping like it should, which leads to ponding.
This flowchart really shows how the brutal Texas sun and our heavy downpours team up to cause this kind of damage over time.

As you can see, that cycle of intense heat followed by rain causes thermal shock and lets water pool up. Those two things are the biggest enemies of a flat roof membrane.
Conducting a Controlled Water Test
If you can't spot the source from the ground, a controlled water test is your next move. Now, do not just blast the whole roof with a power washer. That’s a great way to force water into new places and make your problem much, much worse.
Instead, grab a garden hose and use a low-pressure setting.
Start at the lowest point of the roof, usually near the drains, and slowly work your way up. You'll need a helper inside on standby, ready to communicate by phone. Gently soak one small section of the roof at a time for about 15-20 minutes. Then, wait. If nothing happens inside, move to the next section up the slope and do it again. The moment your helper yells that the dripping has started, you've found your culprit. Mark that spot immediately.
Pro Tip: Always start your water test around roof penetrations—think vents, skylights, and HVAC units. From my experience, a huge percentage of all flat roof leaks trace back to improperly sealed flashing around these features.
When Interior Clues Tell the Story
Sometimes, the clues inside your building are just as telling as what you find on the roof. The location and shape of the water damage can point you in the right direction.
- A Single Drip Spot: An isolated, circular stain on the ceiling often points to a simple puncture or a small failure in the membrane directly above or just a bit upslope.
- Long, Linear Stains: When you see water stains that run along a wall or follow a ceiling joist, it suggests water is getting in at a failed seam or a breach along the roof's edge and then traveling.
- Stains Around Fixtures: See discoloration around a light fixture or ceiling fan? The leak is very likely coming from a nearby roof penetration, like a plumbing vent or an electrical conduit that passes through the roof.
Whatever you find, document it with photos. Take clear pictures of the stains inside and any problem areas you've identified on the roof. This isn't just for your own records; it's absolutely essential if you end up filing an insurance claim. When you have this information ready, you can have a much more productive conversation when you call in a professional like Hail King Professionals for an expert assessment.
DIY Fixes for Minor Flat Roof Leaks
Spotted a small drip? Don't panic. Some minor flat roof leak repair jobs are well within the reach of a determined homeowner. With the right supplies and a bit of confidence, you can tackle a small-scale problem before it turns into a four-figure headache.
The trick is knowing your limits. A single, obvious puncture from a stray screw is one thing; widespread blistering or a leak near a seam is a different beast entirely. We'll focus here on the fixes you can realistically and safely handle yourself.
Step Zero: Know Your Roof Type
Before you even think about buying sealant, you absolutely must know what kind of roof you're working with. Using the wrong product isn't just ineffective—it can cause serious damage. A petroleum-based sealant, for instance, will literally melt an EPDM rubber roof.
- EPDM (Rubber): Looks and feels like a heavy-duty inner tube. You have to use water-based sealants and primers made specifically for EPDM. No exceptions.
- TPO/PVC (Plastic Membrane): These are usually white or light gray plastic-like sheets. A DIY patch here is really just a temporary band-aid, as a permanent fix requires a pro to heat-weld the seams.
- Modified Bitumen: This is a very common material that looks like asphalt rolled out and covered in granules, almost like a flat shingle. It’s pretty forgiving for DIY repairs and works well with standard roofing cement and fiberglass mesh.
- BUR (Built-Up Roof): An old-school roof made of layers of asphalt and fabric, often topped with gravel. Repairs can get complicated quickly, so these are almost always best left to a professional roofer.
If you're stumped, just snap a good, clear photo with your phone and show it to the folks at a local roofing supply store. They'll get you pointed toward the right materials.
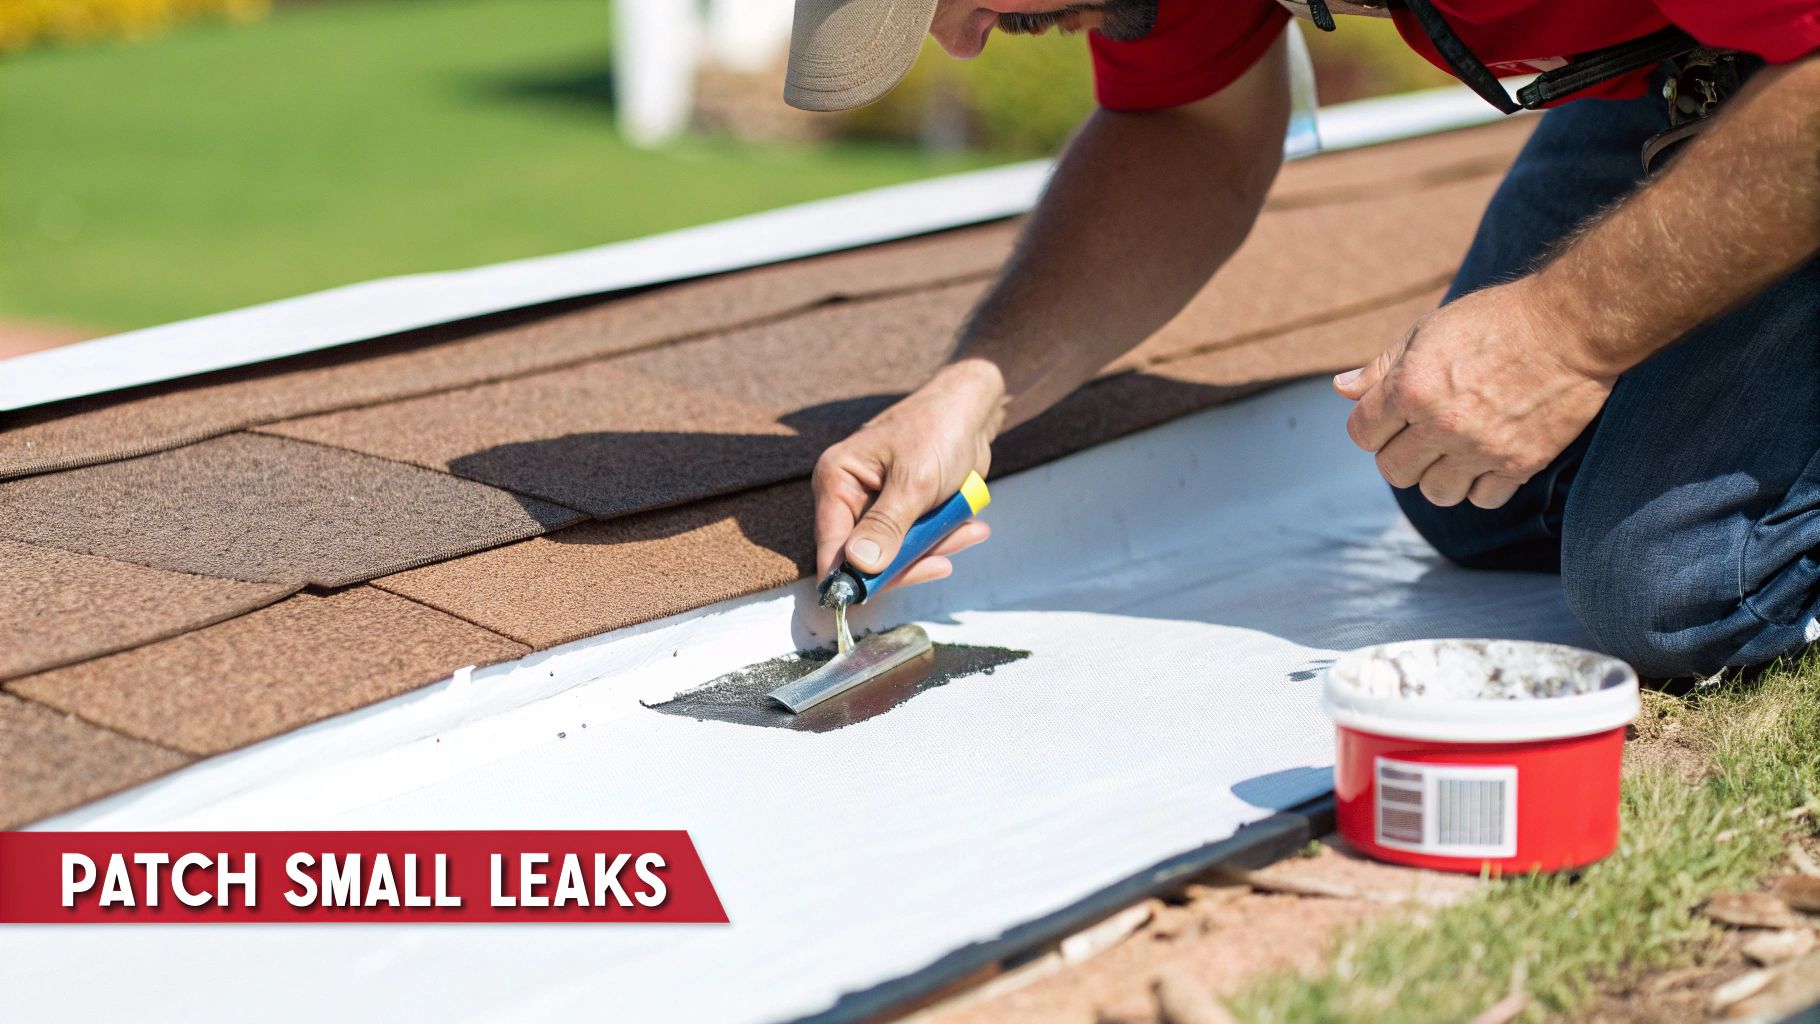
Patching Small Cracks and Punctures
For the little stuff—a tiny hole from a dropped tool or a stress crack under two inches long—a direct application of the right roofing cement is often all you need. This is the most common DIY flat roof leak repair out there.
First, you have to get the area spotlessly clean. Any dirt, debris, or moisture will ruin the bond. I use a stiff-bristle brush and maybe a mild cleaner, then let it dry completely. Don’t rush this part.
Using a trowel, smear a thick, even layer of your compatible roofing cement right over the damage. The key is to extend the sealant at least two to three inches past the edges of the hole or crack. If the crack seems a bit deep, lay a small piece of fiberglass mesh into the wet cement, then trowel another layer over the top. This adds some serious reinforcement.
A Quick Pro Tip: Don't just plop down a big glob of roofing cement. It won't cure correctly and will probably crack later. Spread it in smooth, even layers, almost like you're frosting a cake.
Applying a Larger Roof Patch
When you're up against a gash or tear bigger than a couple of inches, you'll need to step up to a full-blown patch. You can buy ready-made patch kits, or you can get a piece of matching membrane material to cut your own.
The prep work is identical: clean the surface like your repair depends on it (because it does).
Next, cut your patch so it overlaps the damaged area by at least six inches on all sides. This gives you a wide margin for a solid, waterproof seal. Another good tip is to round the corners of your patch; sharp corners are more likely to peel up over time.
Once the patch is cut, apply the appropriate primer or adhesive to the roof surface and to the back of the patch. Carefully lay it down, working from the middle outwards to press out every last air bubble.
The final, and most critical, step is sealing the perimeter. Run a generous bead of roofing sealant all the way around the edges of the patch. Use your trowel to feather that sealant out, creating a smooth, seamless ramp from the patch down to the roof.
The Line in the Sand: DIY vs. Calling a Pro
So, when should you put down the trowel and pick up the phone? Your ability to handle a flat roof leak repair comes down to the scale and complexity of the problem.
Use this as a quick gut-check:
- Is it just one or two small, easy-to-find leaks? Go for it.
- Are there multiple leaks popping up all over? That’s a sign of a bigger issue. Call a pro.
- Is the damage in the middle of a clear, flat area? That’s much more manageable for DIY.
- Is the leak right at a seam, a vent pipe, or where the roof meets a wall (flashing)? These are high-failure areas and are tricky. Best to get an expert.
- Does the roof membrane feel solid? Great.
- Does the area around the leak feel squishy or soft? Stop. That means the insulation underneath is saturated, and this is now a job for a professional.
Trying to tackle a repair that's over your head can turn a small problem into a massive, expensive one. When in doubt, getting a professional opinion is always the smartest (and safest) move.
When You Absolutely Need a Professional Roofer
While tackling a small, straightforward puncture can be a satisfying weekend project, many flat roof leak repair scenarios demand a level of skill, equipment, and knowledge that goes far beyond the average DIYer. I've seen it countless times: a homeowner tries to fix a complex problem themselves, and it quickly turns a manageable issue into a catastrophic failure, leading to far more extensive and expensive damage.
Recognizing the line between a simple fix and a system-wide problem is crucial. When certain red flags appear, putting down the tools and calling a licensed professional isn't just a good idea—it's the only responsible choice.
Signs of Widespread Membrane Failure
A single blister or a small crack is one thing; multiple problem areas are a different story entirely. If your visual inspection reveals widespread issues across the roof surface, you're likely looking at the end of your roof's service life, not just an isolated leak.
Keep an eye out for these indicators of systemic failure:
- Widespread Blistering: Lots of large bubbles or blisters across the roof mean moisture is trapped extensively beneath the membrane. This is often a dead giveaway of a bad initial installation or widespread material breakdown.
- Alligatoring: This term describes a pattern of interconnected cracks that look like alligator skin. It’s a clear sign that the roofing material has become brittle and lost its flexibility from age and sun exposure.
- Multiple Leaks in Different Areas: If you're chasing leaks in the living room one week and the kitchen the next, the problem isn't a single hole. It's a sign the entire roofing system is compromised.
A professional roofer doesn't just patch these symptoms. We use diagnostic tools like infrared moisture scanners to map the full extent of hidden water saturation, giving you a complete picture of your roof's health.
Complex Structural and Flashing Issues
Some of the most vulnerable parts of any flat roof are where the membrane meets other structures. These junctions require an expert’s touch because a failed seal here provides a direct path for water to get into your building's framework.
Calling a professional is non-negotiable if you find leaks around:
- HVAC Units and Large Vents: Flashing around heavy equipment is tricky. An improper repair can not only fail to stop the leak but could also damage expensive HVAC components.
- Parapet Walls and Scuppers: The edges of your roof are critical failure points. Leaks here can lead to water running down inside your walls, causing hidden mold and rot that you won't see until it's a huge problem.
- Structural Ponding Water: If large pools of water stick around for more than 48 hours, it may indicate a sag in the roof deck itself. This is a structural problem that patching will never solve and requires an expert to diagnose and correct the underlying drainage issue.
Knowing when to call for help is key. For homeowners trying to make that call, understanding the broader professional roofing industry can provide context and help in making informed decisions.
DIY vs Professional Repair: When to Make the Call
Figuring out whether to grab your tool belt or your phone can be tough. The key is to honestly assess the scope of the problem. Small, isolated issues on an otherwise healthy roof are often manageable, but anything systemic or structural is firmly in professional territory. This table should help you decide.
| Repair Scenario | Recommended DIY Action | When to Call Hail King Professionals |
|---|---|---|
| Small Puncture (<1 inch) | Clean the area thoroughly and apply a high-quality sealant or patch kit following the manufacturer's instructions. | If the puncture is near a seam, flashing, or if you are unsure of the membrane type. |
| Minor Seam Separation | For a very small, accessible section, you can clean and re-seal it with the appropriate adhesive and sealant. | If the separation is longer than a few inches, appears in multiple areas, or keeps reopening. |
| Small Ponding Area | If the area is small and dries within 48 hours, you can monitor it. Ensure drains and scuppers are clear. | If ponding is deep, widespread, or persists for more than 48 hours—this indicates a structural problem. |
| Flashing Around a Small Pipe | You may be able to reseal a minor gap around a simple vent pipe if the existing flashing is in good shape. | For leaks around HVAC units, skylights, parapet walls, or if the flashing itself is damaged or pulling away. |
| Surface Cracks | Small, isolated surface cracks can sometimes be sealed with a compatible roof coating or sealant. | If you see "alligatoring" (widespread cracking) or if the cracks go all the way through the membrane. |
Ultimately, if you have any doubt, calling us is the safest bet. A quick inspection from an expert can save you from a costly mistake down the road.
The Professional Advantage
Hiring an expert like Hail King Professionals brings more than just experience; it gives you access to resources and guarantees a DIY job simply can't match. A professional assessment can uncover hidden damage that would otherwise go unnoticed until it becomes a major disaster. For more on what to do right when you discover a leak, check out our guide on what you should do if your roof is leaking.
The numbers don't lie. The flat roofing systems market highlights the sheer scale of this issue, valued at $59.19 billion in 2024 and projected to hit $111.44 billion by 2035. Leaks are a massive part of that, making up 40% of all roofing complaints nationwide. They often stem from neglected maintenance or simple overexposure to the brutal Texas sun and freeze-thaw cycles.
Here in Dallas-Fort Worth, where hail is a constant threat, pros like us at Hail King Professionals have been providing code-compliant flat roof repairs, impact-resistant upgrades, and protective coatings since 1991. We even handle complex jobs like solar detach-and-reset for modern homes.
Preventing Future Leaks with Proactive Maintenance
Fixing a leak is one thing; making sure it doesn't happen again is another. Once you’ve patched the immediate problem, the smartest move you can make is to shift from reactive repairs to proactive care. A little bit of routine maintenance doesn't just prevent water damage—it can add years to your roof's lifespan and save you a small fortune in replacement costs down the road.
Preventative care isn't about complicated, expensive tasks. It's really about consistency and catching small problems before they spiral out of control. A clogged drain or a tiny crack in a sealant might seem minor, but under the Texas sun or during a heavy downpour, those are the issues that turn into major headaches.
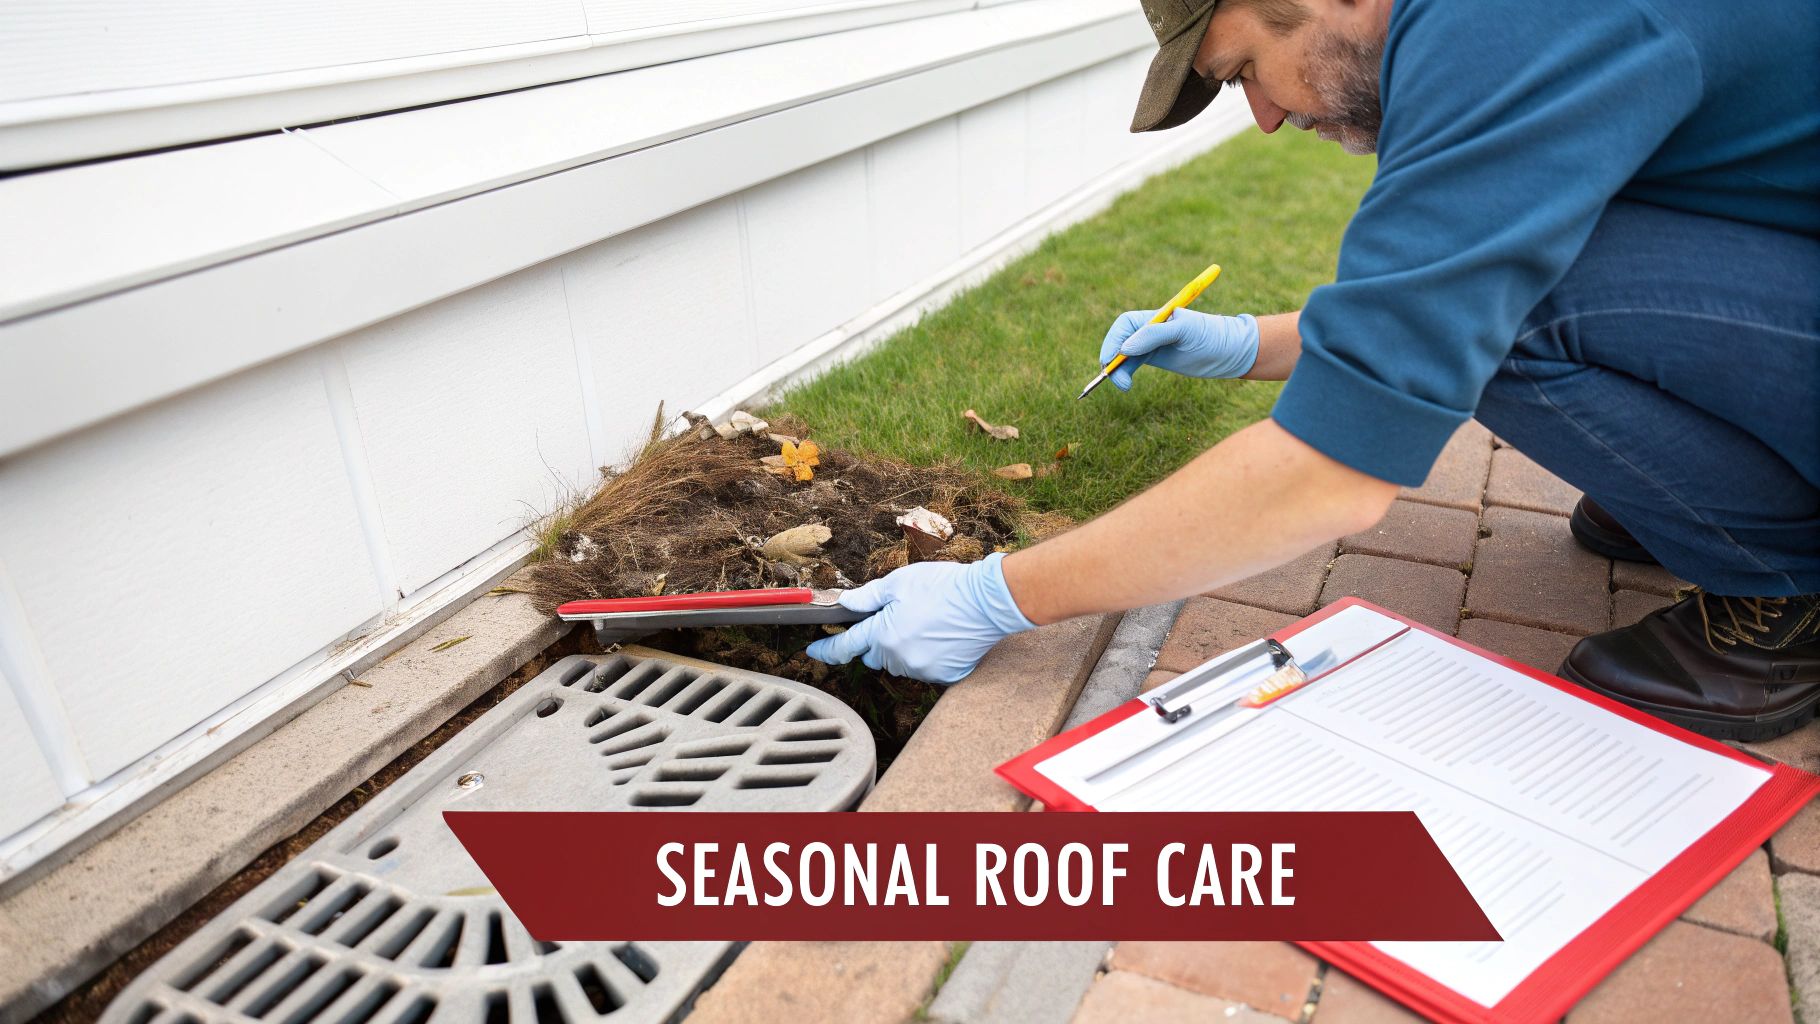
Your Seasonal Maintenance Checklist
To keep your flat roof in fighting shape, all you really need is a simple seasonal rhythm of inspections. This routine helps you get ahead of weather-related stress and spot the weak points before they fail.
Spring (Pre-Summer Prep):
- Inspect All Seams and Flashings: Before the summer heat really kicks in, walk all your seams and check for any signs of separation. You'll want to pay extra close attention to the flashing around vents, HVAC units, and parapet walls, as this is where sealant often dries out and cracks.
- Look for Blisters: Scan the membrane for any new blisters or bubbles that might have popped up over the winter. These little pockets trap moisture and can get much worse under intense summer UV exposure.
Fall (Post-Summer Recovery):
- Clear All Debris: This is probably the single most important job. Get all the leaves, branches, and dirt off the roof surface, especially around your drains, scuppers, and gutters. Clogged drainage is the number one cause of ponding water, period.
- Check for Punctures: Summer often means foot traffic for HVAC servicing or other work. Take a careful look for any new punctures or scuffs on the membrane that weren't there before.
This kind of proactive approach is critical. It’s a sobering fact that leaks are behind a massive 40% of all roofing complaints worldwide. For flat roofs, particularly in the commercial world, that problem is amplified, leading to an estimated $12 billion annual repair bill just from hidden water damage. You can explore these roofing industry statistics to see just how big of an issue this really is.
The Long-Term Value of Roof Coatings
Beyond just keeping your roof clean, applying a reflective roof coating is one of the best investments you can make for a flat roof here in Texas. These aren't just paint. They are thick, elastomeric coatings that create a seamless, waterproof shield over your entire roof system.
A high-quality silicone or acrylic roof coating does more than just plug potential leaks. By reflecting the sun’s brutal UV rays, it can drop your roof's surface temperature by up to 70-80 degrees. That's a difference you'll feel in your energy bills during our scorching summers.
This massive reduction in heat also protects the roof membrane itself. It keeps the material flexible and prevents it from becoming brittle and cracking prematurely. It’s a win-win: you get immediate waterproofing and long-term protection all in one.
Why a Professional Maintenance Plan Makes Sense
Doing your own inspections is a great habit, but there's no substitute for a trained eye. A professional maintenance plan from a team like Hail King Professionals takes the guesswork out of the equation. We’ve seen it all, and we can spot the subtle signs of trouble that are easy to miss.
Our plans are straightforward and effective:
- Scheduled Inspections: We come out twice a year for a thorough top-to-bottom roof assessment.
- Debris Removal: We handle the dirty work, professionally cleaning the entire roof surface and clearing all drainage systems.
- Minor Repairs: If we find small cracks in sealant or vulnerable flashing, we take care of it right then and there.
- Detailed Reporting: You get a full report with photos, so you know exactly what condition your roof is in and what work was done.
For property owners in Dallas-Fort Worth and East Texas, who have been doing battle with hail for decades, this level of proactive care is essential. With expertise going all the way back to 1991, our team at Hail King Professionals specializes in the kind of diagnostics and preventative maintenance that keeps Texas flat roofs performing exactly as they should.
Answering Your Top Questions About Flat Roof Leaks
After finding a leak, you're bound to have questions. It's your property, a huge investment, and you need straight answers. We've been fixing flat roofs in the Dallas-Fort Worth area for decades, and we've heard it all. Here are the most common concerns we help property owners tackle every day.
How Long Should a Flat Roof Last in Texas?
That really depends on the material and how well you take care of it. A quality TPO or PVC roof, if properly maintained, can give you 20-30 years of service. Modified bitumen is usually a bit less, around 15-25 years.
But here in Texas, we have to be realistic. The relentless sun and pop-up hail storms can definitely cut that lifespan short.
That's why regular inspections and preventative measures aren't just a good idea—they're essential. A reflective coating, for example, does wonders to fight off UV damage and the stress from constant temperature swings. The difference between a roof that's looked after and one that's ignored can easily be a decade or more of performance.
Can My Flat Roof Be Repaired or Does It Need to Be Replaced?
This is the million-dollar question, isn't it? The honest answer comes down to the extent of the damage. If you've got a single puncture from a piece of storm debris or one bad seam that's letting water in, a professional repair is often the perfect solution. A solid patch or seam repair can seal things up tight and get you back in business.
However, if you're dealing with leaks all over the place, soft or spongy spots that indicate saturated insulation, or a membrane that's brittle and cracking everywhere, a full replacement is the smarter long-term play. Throwing good money after bad on endless patches just doesn't make sense. A professional inspection is the only surefire way to know which path to take. To get a better handle on your options, you can dive into the differences between flat roofs and pitched roofs in our detailed guide.
Expert Insight: I always tell clients to think of it like a tire. You can plug a single nail hole, no problem. But if that tire has multiple punctures, dry rot, and bald treads, you replace it. Your roof is no different—it's about safety and reliability.
Will My Insurance Cover a Flat Roof Leak Repair?
This is where things can get confusing for a lot of people. Insurance coverage almost always depends on the cause of the leak, not just the fact that there is one.
Typically, your policy will step in if the leak was caused by a specific, covered event like:
- Hail Impact: Hailstones punching holes or cracking the roof membrane.
- Wind Damage: High winds tearing open seams or blowing debris into the roof surface.
- Falling Objects: A big tree limb crashing down during a storm is a classic example.
What's almost never covered? Leaks from simple old age, wear and tear, or obvious neglect. This is exactly why getting a professional assessment right after a storm is so critical. A key question for anyone with a leak is understanding whether house insurance will cover a leaking roof, as the answer directly impacts your next steps.
It's vital to get an expert to document the cause of loss. We specialize in helping Dallas-Fort Worth homeowners navigate the insurance claims maze, making sure every bit of covered damage is found and properly reported. Don't make the mistake of assuming a leak is just "old"—you could be leaving your insurer's money on the table.
When your flat roof is leaking, you need a team with the skill to find the true source of the problem and the integrity to give you an honest solution. For decades, Hail King Professionals has been the go-to name for flat roof leak repair across Dallas-Fort Worth and East Texas. We deliver accurate assessments and build repairs that last.
Don't wait for a small drip to become a huge headache. Contact Hail King Professionals today for a free, no-obligation roof inspection.