


DIY Roof Repair: Expert Tips & When to Call Pros
There’s a certain satisfaction that comes with fixing something yourself, especially on your own home. But when the problem is literally over your head, you have to ask: is tackling a roof repair on your own a smart move? The answer really comes down to the size and scope of the job.
A single shingle that went rogue in a windstorm or a tiny crack you spotted during a gutter clean-out? That’s likely something a confident homeowner can handle. But widespread damage or mysterious leaks popping up in your living room? That’s a different story entirely and usually points to bigger trouble.
Should You Really DIY Your Roof Repair in Texas?
That famous Texas can-do spirit is something to be proud of, but our weather doesn't play fair. When you’re thinking about a DIY roof repair in Dallas-Fort Worth or out in East Texas, you have to weigh that enthusiasm against the very real risks. This isn’t just about saving a few bucks; it’s about understanding what can go wrong.
Knowing when to grab your toolbelt and when to grab the phone is the most important skill you can have. A single lifted shingle after a gusty day is one thing. But seeing multiple discolored spots on your ceiling after a hailstorm? That’s a huge red flag that a simple patch won’t fix the underlying damage.
Weighing the Risks and Realities
Jumping into a roof project that’s beyond your skill set can turn a small problem into a costly disaster. The numbers don't lie. In major markets like DFW, where 31% of homes have needed roof work in recent years, very few homeowners attempt a full replacement themselves for good reason.
Surveys consistently show that over half of homeowners find DIY projects to be much harder and more time-consuming than they anticipated. Even worse, a surprising 8% actually cause more damage to their homes while trying to fix simple things. On a roof, those stakes are incredibly high. You can see more data on homeowners' real-world DIY experiences at iko.com.
This flowchart can help you visualize where your problem falls on the DIY-to-Pro spectrum.
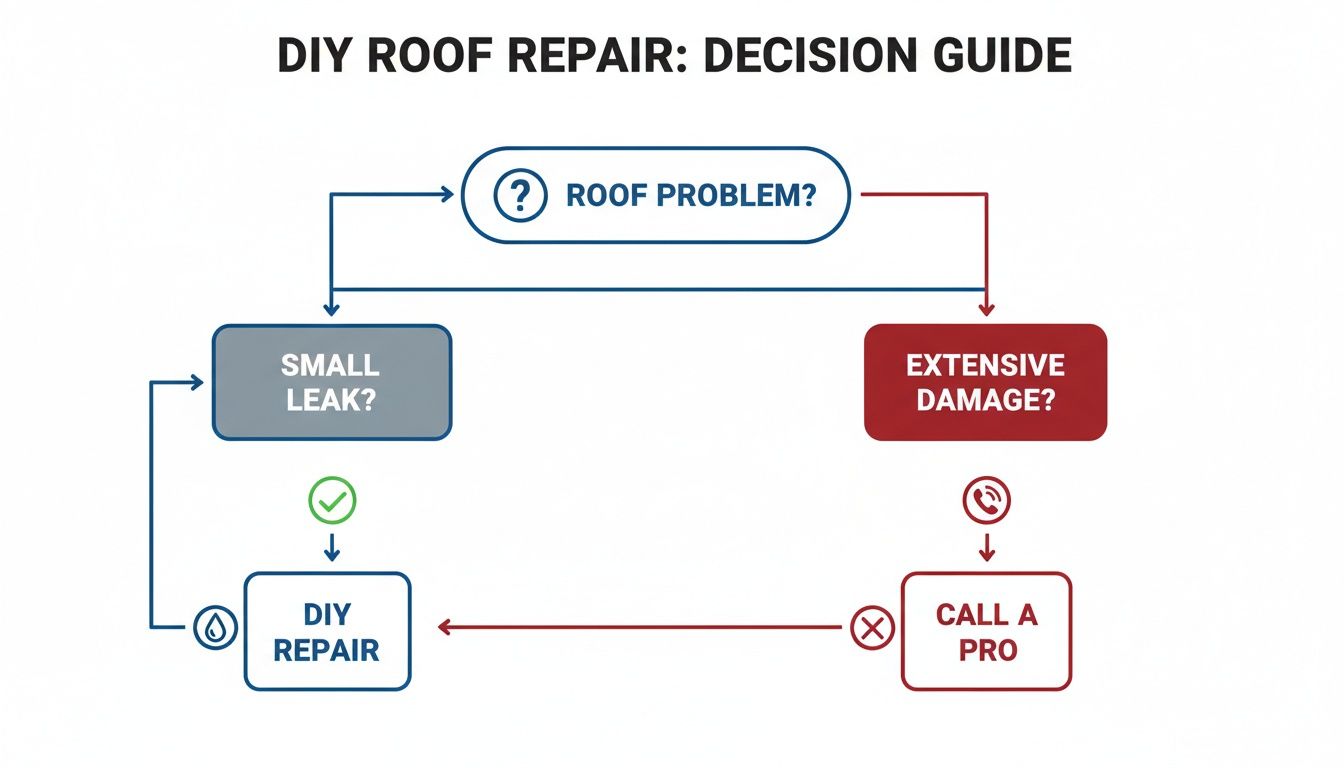
The takeaway here is simple: small, contained issues are often manageable. But if you see any signs of a bigger, system-wide problem, your first and only call should be to a licensed roofing contractor.
To make it even clearer, here’s a quick-reference table to help you decide on your next move.
DIY Task or Call a Pro?
| Roof Problem | DIY Feasibility | When to Call Hail King Professionals |
|---|---|---|
| 1-5 Missing/Damaged Shingles | High. This is a classic DIY job if you're comfortable on a ladder and have the correct matching shingles. | When you have large sections of missing shingles, or if the underlying wood decking is exposed and looks soft or rotted. |
| Popped-Up Nail Heads | High. A simple fix involving prying the nail, sealing the hole, and driving a new nail nearby. | If you see dozens of popped nails across the roof, as this can indicate improper installation or deck movement. |
| Minor Flashing Crack | Moderate. You can reseal a small, visible crack in the caulking around a vent pipe or chimney with roofing cement. | If the flashing is bent, rusted, or pulled away from the roof, or if the leak persists after your repair. |
| Granule Loss in Gutters | Low. While it seems minor, heavy granule loss signals your shingles are at the end of their life. | Always. This is a clear sign your roof's protective layer is gone, and a full inspection is needed immediately. |
| Active Leak in the Attic | Low. Finding the source of a leak from the inside is notoriously difficult and often far from the drip point. | Immediately. Water in the attic means it has bypassed all layers of protection, risking mold and structural damage. |
| Any Suspected Hail Damage | None. Identifying hail damage is a specialized skill. Bruises and impacts are often invisible to the untrained eye. | Immediately after any hailstorm. We can identify damage you can't see and help you with the insurance claim process. |
Ultimately, calling a professional for an inspection, even for what seems like a small issue, gives you peace of mind. We can confirm if it’s a simple fix or catch a developing problem before it becomes a catastrophe.
When DIY Makes Sense
A DIY roof repair is a great option for a few specific, minor problems—the kind that don’t put the entire roofing system at risk and have a low chance of failure if you do them right.
If you’re comfortable with heights and have the right safety gear, consider tackling these jobs yourself:
- Replacing a Few Missing or Damaged Shingles: A storm blew off a couple of shingles? This is a textbook DIY task, as long as you can get an exact match.
- Sealing Popped Nail Heads: Over time, thermal expansion can cause nails to back out. Cleaning the area and covering the nail head with a dab of quality roofing sealant is a great preventive fix.
- Patching Minor Cracks in Flashing: Found a small crack in the sealant around a vent? If the flashing itself is sound, cleaning the old sealant and applying a fresh, continuous bead can stop a small leak in its tracks.
The goal of a good DIY fix is to solve a tiny problem before it grows. It's not a long-term solution for a failing roof. If you find yourself climbing up there more than once a year for these "minor" repairs, that’s your roof telling you there's a much bigger issue that needs a professional diagnosis.
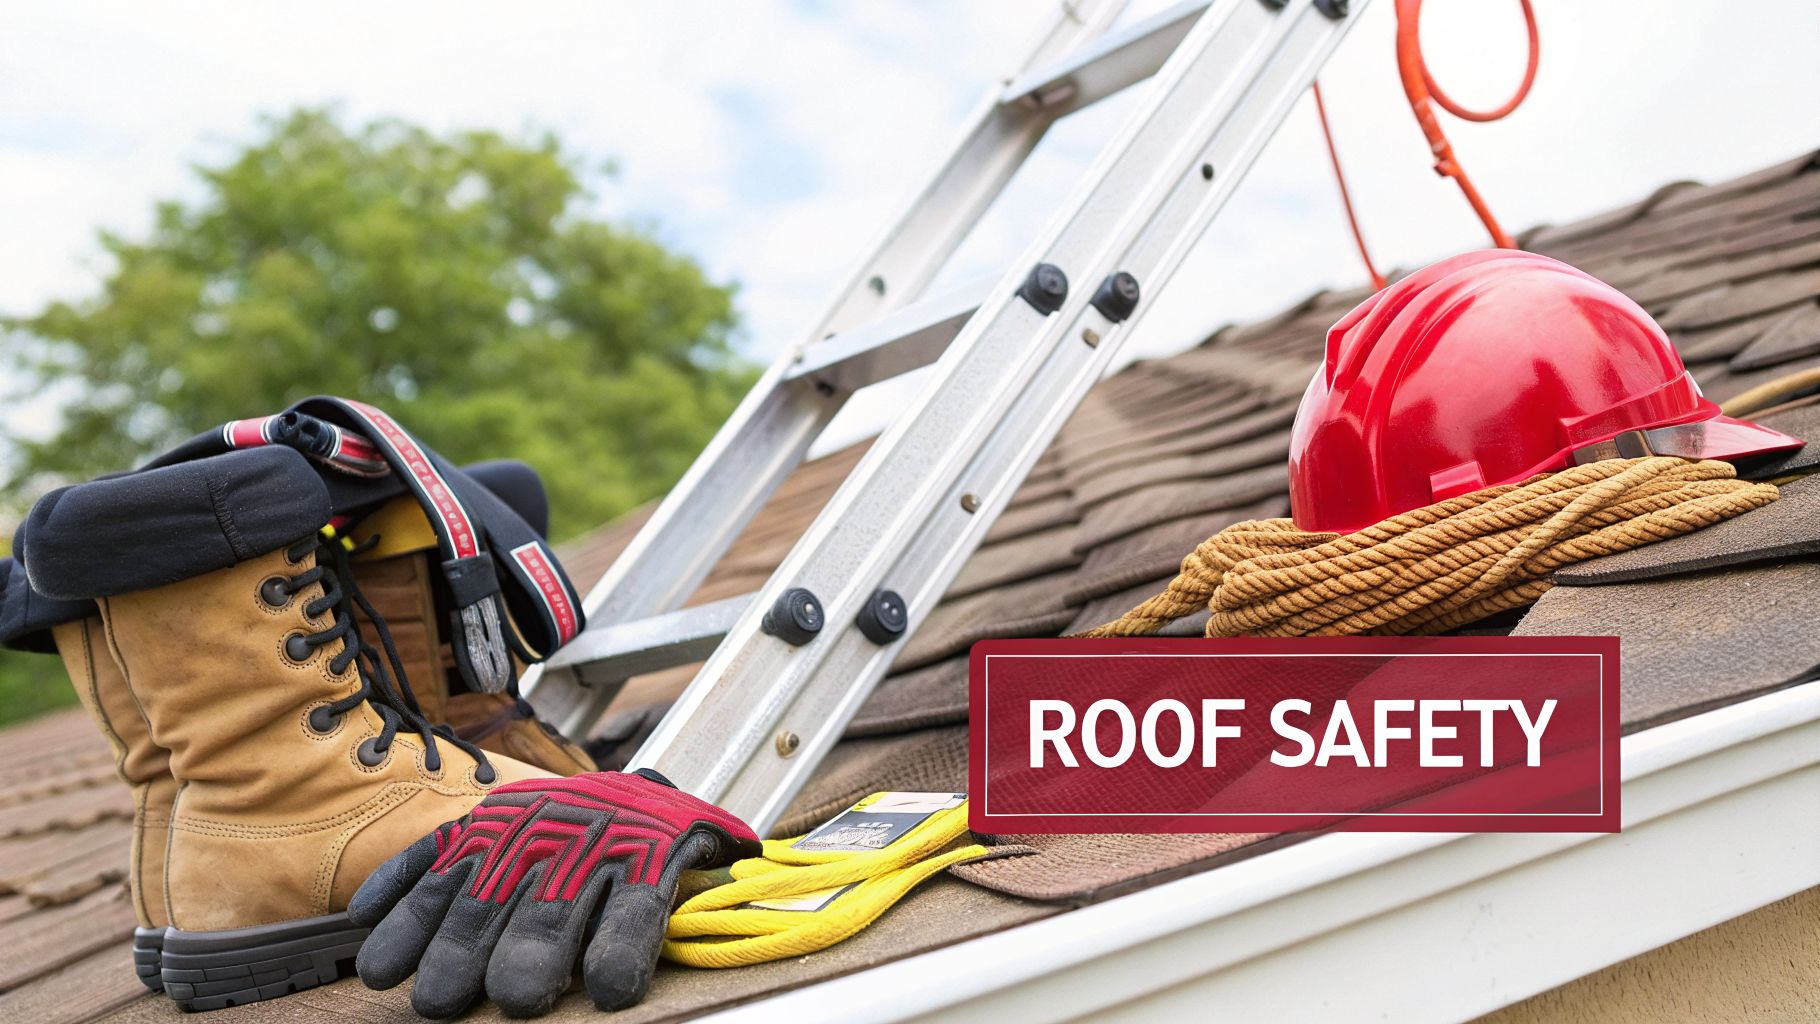
Essential Safety Gear for Working on Your Roof
Alright, before we even touch a shingle, let’s talk about what really matters: staying safe up there. I can't stress this enough. Getting on your roof is not like any other DIY project around the house. It's the most dangerous spot on your property, and a little bit of overconfidence can have devastating results.
Gravity is unforgiving, and there are no do-overs. This isn’t just about having the right gear; it’s about creating a complete safety system for yourself before you even set foot on the ladder. You want to be able to focus on the repair, not on just trying to keep your balance.
Your Personal Fall Arrest System
You might hear pros talk about a Personal Fall Arrest System (PFAS). Don't let the jargon intimidate you. For a homeowner, this usually comes in a simple roofer's safety kit you can buy or rent. If your roof has any kind of slope, this is an absolute must.
Here’s the breakdown of what's in a kit:
- A Full-Body Harness: This isn't your granddad's safety belt. A modern harness wraps around your shoulders, waist, and legs to distribute the force of a fall evenly, which can be the difference between a scary moment and a catastrophic injury. Make sure it’s snug, but not so tight you can't move comfortably.
- A Rope and Rope Grab: The rope connects you to a solid anchor point. The rope grab is a brilliant little device that slides freely along the rope as you move, but will lock up instantly the second it detects a sudden downward pull.
- A Secure Anchor Point: This is the heart of the whole system. The anchor has to be drilled into a structural part of your roof, like a rafter or truss. Never, ever attach it just to the plywood sheathing—it will rip right out.
Think of it like this: the anchor is the frame of your car, the rope is the seatbelt, and the harness is what holds you securely. You wouldn't drive down the highway without a seatbelt; don't work on a roof without being tied off.
Setting up a PFAS might feel like overkill just to swap out a few shingles. It’s not. The one time you lose your footing from a loose granule or a gust of wind, it's the only thing standing between you and the ground.
Choosing the Right Gear for the Job
Beyond fall protection, the rest of your equipment is all about preventing that slip in the first place. You need gear that gives you stability and confidence.
Your Ladder Setup
Your ladder is your gateway to the roof, and it's where a surprising number of accidents begin.
- Pick the Right Tool: An extension ladder is what you need. Make sure its duty rating can handle your weight plus at least 50 pounds of tools and materials.
- Follow the 4-to-1 Rule: It’s simple but crucial. For every four feet of height the ladder reaches, the base should be one foot away from the house. This creates the safest climbing angle.
- Secure It Properly: The top of the ladder needs to extend at least 3 feet above the edge of the roof. This gives you something solid to grab onto when you’re getting on and off. Always tie it off at the top and make sure the feet are on firm, level ground.
Footwear and Other Essentials
Your connection to the roof starts at your feet. Here in Texas, this is doubly important. Shingles on a Dallas summer afternoon get scorching hot, making the asphalt soft and surprisingly slippery. Likewise, an early morning start in East Texas means dealing with slick dew.
- High-Traction Footwear: I swear by soft-soled work boots or even skate shoes. The gummy rubber provides a much better grip on asphalt shingles than hard, stiff heels. Never even think about wearing open-toed shoes or anything with a worn-out tread.
- Safety Glasses and Gloves: Prying up old, brittle shingles sends granules and sharp bits flying. Protect your eyes. A solid pair of work gloves will save your hands from getting chewed up by the rough shingle surfaces and protect you from hot roofing tar.
The numbers don't lie. The Bureau of Labor Statistics reported 107 roofer deaths in a single year from falls alone. For homeowners, the risk is even higher. Considering that surveys show a 16% self-injury rate on even basic DIY jobs, you can see how roofing is in a league of its own. It’s a risk that’s just not worth taking, a point driven home in this article on the dangers of improper DIY roof repairs.
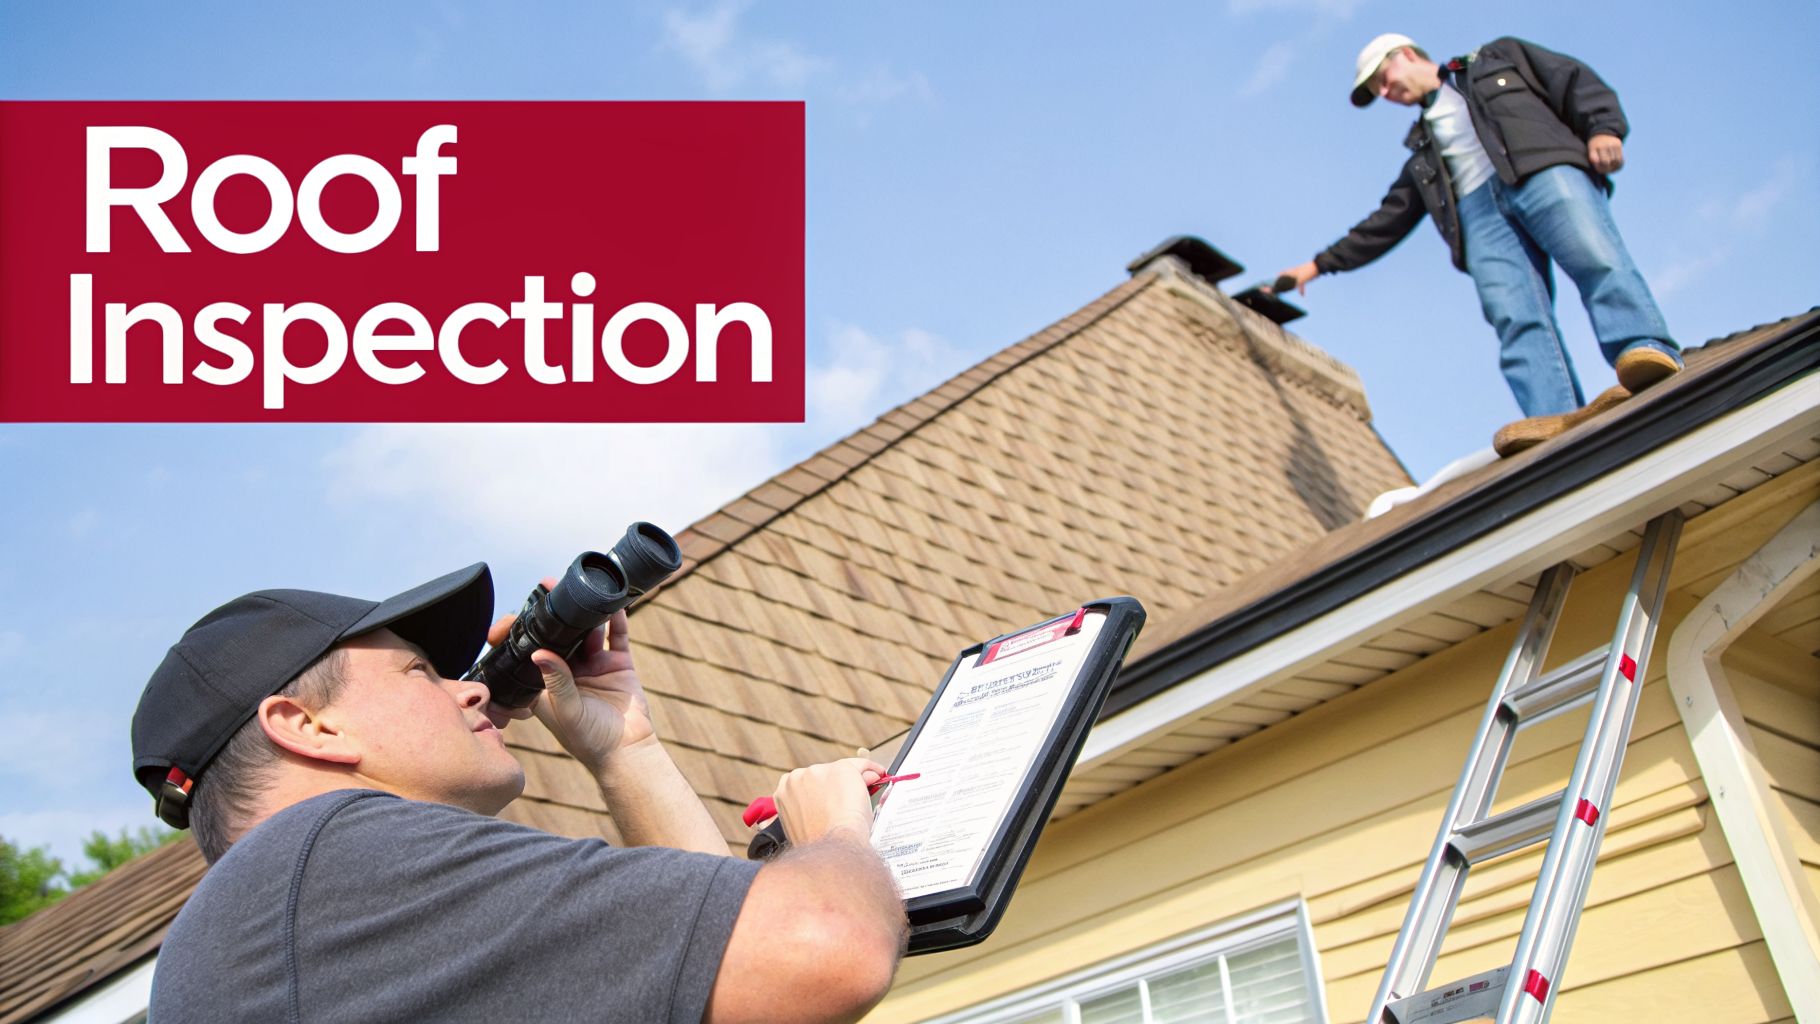
How to Inspect Your Roof Like a Professional
Any good roof repair starts long before you touch a tool. It begins with a solid diagnosis. You can't fix what you can't find, so learning to spot trouble like a pro is the most important skill you can have. This isn't about taking risks; it's about being smart and methodical, starting from the safety of the ground and then confirming what you find up close.
The first thing I always tell homeowners is to start with a "walk-around." Grab a pair of binoculars and take a slow lap around your house. You’d be surprised what you can see from down here—often, the big-picture problems are obvious from the ground in a way they aren't when you're standing right on top of them.
Scanning Your Roof From the Ground
With your binoculars, treat your roof like you're reading a book. Scan it slowly, left to right, top to bottom. Don't just hunt for one glaring issue. Your job right now is to build a complete mental map of your roof’s condition.
Keep an eye out for these tell-tale signs:
- Curled or Buckling Shingles: Are the edges turning up? Do entire sections look wavy or distorted? That's often a dead giveaway for old age, but it can also point to poor attic ventilation cooking your roof from the inside out.
- Missing Shingles: This one's easy to spot. Make a note of where they are and how many are gone. A few missing after a classic North Texas thunderstorm is one thing. Big patches missing all over suggest your shingles are losing their grip entirely.
- Dark Streaks or Algae Growth: Those ugly black streaks, especially on the north-facing side of your roof where the sun doesn't hit, are a type of algae called Gloeocapsa magma. While it's mostly a cosmetic problem here in humid East Texas, it means moisture is hanging around, and a heavy buildup can slowly eat away at your shingles.
If you’re seeing widespread problems like these across more than 20-30% of your roof, you should pause. A simple DIY repair might be putting a small bandage on a much larger wound.
A Closer Look From the Ladder
Now that you have your list of trouble spots, it’s time to get a little closer. Let me be clear: you should not walk on your roof. For a DIY inspection, your safest bet is to get on a sturdy ladder (extended at least three feet past the roof edge!) and inspect from there. You can see almost everything you need to from the eaves.
Here’s what you’re hunting for up close:
- Cracked Sealant: The Texas sun is brutal on the rubber boots and sealant around pipes, vents, and chimneys. Look for material that's dry, brittle, or has visible cracks. I've seen more leaks caused by a $5 tube of failed sealant than almost anything else.
- Popped Nails: Scan the shingle field for any nail heads that have backed themselves out. They might look small, but each "nail pop" is a miniature highway for water to get right under your shingles and into the wood decking.
- Damaged Flashing: Flashing is the metal that seals the deal where your roof meets a wall, chimney, or in the valleys. Look for rust, dents from hail, or any place where it looks bent or has pulled away. Bad flashing is practically a guarantee of a future leak.
It's no secret among roofing pros: the spots where things poke through your roof are almost always where the leaks start. The National Roofing Contractors Association (NRCA) pushes for twice-a-year inspections for this exact reason. Shingles are simple, but penetrations—vents, chimneys, skylights—are where the real action happens.
Don't Forget the Interior Inspection
Sometimes the most undeniable proof of a roof problem is waiting for you inside. Water is tricky and can travel a long way from the entry point, so checking your attic is non-negotiable for finding the true source of a leak.
On a bright, sunny day, head up to your attic with a good flashlight. The first thing to do is turn your light off. Look up. See any tiny pinpricks of daylight? If light can get in, you better believe water can.
Next, turn your light back on and scan the underside of the roof deck for:
- Water Stains or Streaks: They’ll look like dark spots or lines on the wood, often running down the length of a rafter.
- Damp or Sagging Insulation: If you suspect a leak in a certain area, gently press on the insulation. If it feels wet, heavy, or compressed, you're on the right track.
- Mold or Mildew: A musty smell is your first clue. Visible black or grey splotches are your confirmation. This means you’ve had a slow, persistent leak for a while and it needs to be addressed immediately.
Even if you don't have an attic, look for brownish stains or bubbling paint on the ceilings of your top floor. That’s a classic sign of an older leak. To make sure you cover all your bases, using a structured guide can be a huge help. We’ve put together a roof inspection checklist template that mirrors the process pros use.
A Practical Guide to Common Roof Repairs
Alright, you've done your homework and pinpointed the trouble spot. Now comes the part where you actually fix it. This is where the right technique can mean the difference between a five-year repair and a five-day headache that shows up again after the next big Texas thunderstorm.
Here at Hail King Professionals, we handle these small jobs all the time. Let’s walk through the repairs you can realistically tackle yourself: swapping out a bad shingle, fixing a popped nail, patching up some flashing, and resealing around a vent pipe. If you’re patient and do it right, you can get a professional-quality seal that lasts.
Replacing a Damaged Asphalt Shingle
A single cracked, torn, or missing shingle is probably the most common repair we see. It’s an eyesore, but thankfully, it’s a straightforward fix. First, make sure you have the right gear on hand.
Tools and Materials Needed:
- A flat pry bar (a "cat's paw" is perfect for this)
- Hammer
- Sharp utility knife
- One matching replacement shingle
- Four 1 ¼-inch galvanized roofing nails
- A tube of quality roofing cement
Your first challenge is breaking the seal on the shingles above the damaged one without causing more problems. Those shingles are bonded together with a tar strip. On a hot afternoon, they'll be pretty flexible, but on a cool morning, they can snap. Gently work your pry bar under the edges, lifting just enough to get to the nails holding your target shingle in place.
Once the nails are exposed, slide the pry bar underneath the shingle and pop them out. There will be four of them. Go slow so you don't tear the good shingles around it. After the nails are gone, the old shingle should pull right out.
Now, take your new shingle and slide it into the empty spot, aligning its top edge with where the old one sat. Knowing how to properly nail roofing shingles is everything here; it’s what keeps the water out. Drive your four new nails in the same spots as the old ones. The goal is to get the nail heads flush with the shingle—not sunk in so deep they tear it, and not sticking up where they can catch water.
To finish the job, put a small dab of roofing cement under the tabs of the shingles you lifted. This replaces the seal you broke and covers the new nail heads. Just press them down firmly, and you're all set.
Pro Tip: Let your new shingle sit out in the sun for about 20 minutes before you climb up there. A warm shingle is a flexible shingle, and it's much less likely to crack while you're working it into position.
Sealing a Popped Nail Head
A nail that has worked its way up might look small, but it’s a tiny highway for water to get right to your roof deck. Luckily, fixing this is one of the quickest repairs you can do.
First, gently lift the shingle covering the nail head. You just need enough room to work. Use your pry bar to pull that popped nail all the way out.
Don't reuse the hole! That's the weak point. Instead, squeeze a bit of roofing sealant directly into the old hole to plug it for good.
Then, drive a new galvanized roofing nail about an inch away from the original spot. Finish by covering the new nail head with a dime-sized dot of sealant and pressing the shingle tab back down. Simple as that.
Patching a Minor Flashing Leak
Flashing—the metal strips in roof valleys and around chimneys—is a frequent source of leaks. Years of intense sun can make the sealant brittle and cause it to pull away from the metal. If it's just a small crack, it's an easy DIY fix.
Tools and Materials:
- Wire brush
- Putty knife or 5-in-1 tool
- Tube of flashing sealant (make sure it's for exterior use)
- Caulk gun
- Shop rags
You have to start with a completely clean surface, or the new sealant won't stick. Use your wire brush and putty knife to scrape away every bit of the old, failing caulk. Get rid of any rust or dirt, too. Wipe it all down with a rag to make sure it's clean and dry.
With the area prepped, apply a solid, continuous bead of flashing sealant right into the joint. Don't be shy with it. Then, use a gloved finger or a putty knife to "tool" the bead, pressing it firmly into the gap. This ensures there are no air bubbles and creates the strong, waterproof bond you need. Getting these protective layers right is key; for a deeper dive, our guide on what roof underlayment is explains how the whole system works together.
Resealing Vents and Pipes
Those rubber "boots" around the pipes on your roof are notorious for failing. UV radiation bakes them until they get brittle and crack, opening a direct path for rainwater.
The fix here is almost identical to repairing flashing. You need to get the area spotless, cleaning away all the old, crusty sealant from where the boot meets the pipe and where its metal base sits on the shingles.
Once it's clean, run a thick, unbroken bead of roofing sealant around the entire base of the vent. Then, do the same thing at the top of the boot where it meets the vertical pipe. Hitting both of these spots gives you a double defense against those heavy Dallas-Fort Worth downpours.
It's tempting, isn't it? You spot a couple of loose or damaged shingles and think, "I can handle that. A quick trip to the hardware store, a few hours on a Saturday, and I'll save a bundle." On paper, the math seems simple. But as someone who's been on countless roofs across Dallas-Fort Worth and East Texas, I can tell you that the real costs are often hidden.
What begins as a money-saving weekend project can quickly morph into a serious financial headache. That small patch you sealed might look fine from the ground, but if it wasn't done just right, it can fail silently. By the time you spot a water stain spreading across your living room ceiling, that "tiny" leak may have been seeping into your attic for months, creating the perfect environment for rot, mold, and structural damage that costs thousands to fix.
This isn't just a scare tactic; it's a scenario we see play out all the time. In fact, it’s not uncommon for a botched DIY repair to double the final repair cost. The initial few hundred dollars for materials balloons into a multi-thousand-dollar bill when a professional has to be called in to undo the faulty work and then fix the original problem correctly. To make matters worse, an insurance adjuster can spot shoddy workmanship from a mile away, which can seriously complicate a future claim. You can find more roofing facts and statistics at thisoldhouse.com that back this up.
The Warranty and Insurance Trap
Here’s one of the biggest financial landmines in DIY roof repair: you can accidentally void your warranties. Those shingle manufacturers offer warranties that can last 20, 30, or even 50 years, but they all have a critical fine-print requirement: the shingles must be installed exactly to their specifications.
A DIY job almost always breaks these rules. Here’s how:
- Improper Nailing: Using the wrong type of nail, placing it too high or too low on the shingle, or driving it in too deep can void the warranty for that entire section of your roof.
- Mismatched Materials: You can't just slap any brand of sealant or underlayment on with any shingle. Certain products are chemically incompatible and can cause the materials to degrade much faster.
- Causing Collateral Damage: It's incredibly easy to tear an adjacent shingle or puncture the underlayment while you're trying to lift a damaged shingle. This collateral damage can also negate your warranty coverage.
If that section of the roof fails later—even in a major hailstorm—the manufacturer won’t be obligated to cover it. Your homeowner's insurance carrier will likely take a similar stance on damage resulting from faulty workmanship. If your patch fails and your attic floods, that secondary damage is probably coming straight out of your pocket.
Think of it this way: when you hire a licensed contractor like Hail King Professionals, you aren't just paying for labor. You're buying the assurance that the work is done to code, manufacturer specs are met, and you're protected by both a workmanship warranty and the company's insurance.
DIY vs. Professional Repair Cost Breakdown
To put it in perspective, let's break down how the costs can compare over the short and long term. While the initial DIY outlay is lower, the potential for expensive secondary repairs and voided warranties creates a significant financial risk.
| Cost Factor | DIY Repair | Professional Repair (Hail King) |
|---|---|---|
| Initial Outlay | $100 – $300 for materials and basic tools. | $400 – $1,200+ depending on the repair size and complexity. |
| Labor Cost | $0 (your own time, often a full weekend or more). | Included in the professional quote. |
| Warranty Risk | High. Very likely to void manufacturer and workmanship warranties. | None. Professional installation maintains all warranties. |
| Insurance Risk | High. Damage from faulty repairs is typically not covered. | Low. The contractor's liability insurance covers any accidental damage. |
| Long-Term Cost | Can be $2,000+ if the repair fails and causes water damage, mold, or rot. | The initial quoted price. The repair is guaranteed by a workmanship warranty. |
| Safety Risk | High. Risk of falls and serious injury without proper training or equipment. | Low. Professionals have the required safety gear and experience. |
Looking at the table, it's clear that hiring a pro is an investment in certainty. You're paying to ensure the job is done right the first time, protecting your home's value and your own peace of mind.
Time Is Not on Your Side
Finally, don't underestimate the value of your own time. A repair that a professional crew can knock out in a few hours can easily eat up your entire weekend. And here in Texas, that extended project timeline introduces a huge risk: the weather.
A sudden thunderstorm can pop up with little warning. If a section of your roof is open when that happens, you could get more water inside in 10 minutes than the original leak would have caused in 10 years. Professionals live by the weather radar and work efficiently to keep that window of exposure as short as possible. For a DIYer, a project that drags on is a gamble against our unpredictable sky.
When to Call a Roofing Professional
The smartest thing any DIYer can do is recognize their own limits. When it comes to your roof, pushing past your skill level doesn't just lead to a bad patch job—it can cause thousands in new damage. Knowing when to put down the tools and pick up the phone is the most important repair skill you can have.
Think of it this way: there's a big difference between swapping out a few cracked shingles and dealing with a problem that affects the whole system. Let's talk about the signs that tell you the job has gotten too big for a weekend project.
Red Flags That Mean It's Time to Call a Pro
If you spot any of these issues during your inspection, it’s a clear signal to stop what you're doing and contact a licensed DFW roofing contractor.
- A Sagging Roof Deck: Look for any dips, bows, or a "swayback" appearance in the roofline. This isn't a shingle problem; it's a huge red flag for structural failure in the underlying rafters or decking. This is a serious safety hazard.
- Widespread Damage: If a hailstorm or high winds have left their mark on more than 25-30% of your roof, you're past the point of spot repairs. Chasing individual fixes will be a frustrating, expensive, and ultimately losing battle. A full replacement is almost certainly the smarter financial move.
- Leaks in Multiple Places: One leak is a manageable problem. But when you find water stains in the living room and the upstairs bedroom, it points to a systemic failure. The water could be getting in from anywhere, and it takes an expert to trace multiple entry points back to their source.
- A Steep Pitch: Safety has to be your top priority. If your roof has a steep slope (typically anything over a 6/12 pitch), the risk of a serious fall skyrockets. Professionals have the specialized safety harnesses, scaffolding, and training to work on these angles safely. Don't risk it.
Major events, like the violent storms we get here in North Texas, can cause damage that’s far more complex than it appears on the surface. A detailed storm damage roof repair guide can offer more insight, but it's no substitute for a professional evaluation.
A professional roofing contractor does more than just fix leaks. At Hail King, our free inspections provide a complete diagnostic of your entire roofing system. We understand Texas weather patterns and can recommend solutions—like impact-resistant Class 4 shingles—that stand up to our climate.
Our expertise means the job gets done right the first time, and it's backed by a real warranty that protects your home and your investment. Plus, with financing options available, a professional repair is often more affordable than you might think—and certainly cheaper than fixing a failed DIY job.
When you're facing a complex situation, learning how to choose a roofing contractor is the most critical next step you can take.
You’ve got the steps, but a few questions are probably still rattling around in your head. That's completely normal when you're about to climb up on your roof. Let's tackle some of the big questions we hear all the time from homeowners across Dallas–Fort Worth and East Texas.
Is It Okay to Do My Own Roof Repairs in Texas?
The short answer is yes, Texas law generally allows you to work on your own home's roof.
However, there’s a big "but" you need to be aware of. Cities like Dallas, Fort Worth, and many others have specific building codes. A simple patch might not require anything, but more involved work could require a permit. An unpermitted, non-compliant repair can turn into a major headache when you eventually sell your house. Imagine a home inspector flagging your work—it can derail a sale or force you to pay for a professional fix at the worst possible time.
How Do I Get New Shingles to Match My Old Ones?
This is one of the trickiest parts of a DIY repair, and something that trips up a lot of homeowners. The Texas sun is relentless, and UV exposure fades shingles over time. That means a brand-new shingle, even if it's the exact same brand and color, will almost never be a perfect match on a roof that's a few years old.
Your best bet is to take a decent-sized piece of a damaged shingle to a dedicated roofing supply house. The folks there see this stuff all day and have a much better chance of identifying what you have. Even then, expect a slight difference. A pro tip we use is to pull a few shingles from a less visible part of the roof (like the back slope) for the patch, and then use the new, slightly-off shingles to replace those. It hides the repair in plain sight.
Will My Insurance Cover a DIY Repair If It Fails?
This is a critical question, and the answer is almost always no.
Most homeowner's insurance policies contain a "faulty workmanship" clause. If your DIY patch fails and causes a much bigger problem—like a major leak that ruins your attic insulation and drywall—the insurance company can deny the claim for all that resulting water damage. You tried to save a few hundred dollars, but now you're on the hook for thousands. It’s one of the biggest financial risks you take when doing the work yourself.
For any job that feels a bit out of your league, or if you just want a professional opinion you can trust, don't hesitate to reach out. The team at Hail King Professionals is here to help.
Get your free, no-obligation inspection today by visiting us at https://hailkingpros.com.