


Do It Yourself Roof Repairs: 2026 Guide
Fixing a minor roof issue on your own can seem like a great way to save a few bucks. But when it comes to roofing, a small mistake can lead to a very expensive, and dangerous, disaster. For anything more complex than patching a tiny gap or swapping out one obviously loose shingle, the risks almost always outweigh the reward.
Should You DIY Your Roof Repair?

It’s easy to look at a single curled shingle and think, "I can handle that." And honestly, for a very small, isolated problem on a low-slope roof, a skilled homeowner might just pull it off.
But here’s the reality check: your roof is the single most important barrier protecting your entire home from the weather. A botched repair, no matter how small, can channel water directly into your home’s structure. I’ve seen it countless times—an improperly seated shingle or a poorly sealed flashing leads to rotted roof decking, rampant attic mold, and water-stained ceilings. The cost to fix that secondary damage dwarfs what the original professional repair would have been.
Before making a decision, it helps to see where your issue falls on the DIY spectrum. This checklist can give you a quick idea of whether you should gear up or just pick up the phone.
DIY Feasibility Checklist: Is This Repair for You?
| Repair Type | DIY Feasibility | Key Considerations |
|---|---|---|
| Replace 1-2 Missing Shingles | Possible | Low-slope roof, no other visible damage, you have exact matching shingles. |
| Seal Minor Flashing Gap | Possible | Small, accessible gap (e.g., around a vent pipe); requires proper sealant. |
| Patch a Tiny Leak | Maybe | Only if you can 100% identify the source from inside the attic. Patching from the top is guesswork. |
| Replace Large Sections of Shingles | Not Recommended | Risk of improper alignment, water intrusion, and creating more damage. |
| Repair Flashing Systems | Not Recommended | Flashing is complex; improper installation is a leading cause of major leaks. |
| Address Structural/Decking Damage | Call a Pro | This is major structural work requiring professional expertise and tools. |
| Any Repair on a Steep or High Roof | Call a Pro | The fall risk is extremely high and not worth the potential savings. |
Even if your repair seems "possible," any doubt should be a sign to consult a professional.
Understanding the True Risks
Before you even think about grabbing a ladder, you need to have a serious talk with yourself about the danger. There's a reason roofing consistently ranks as one of the most hazardous jobs out there.
To put it into perspective, the U.S. Bureau of Labor Statistics documented 107 professional roofer fatalities in 2017, with most of those coming from falls. These are trained experts using specialized fall-arrest systems. Thousands of homeowners get hurt every year trying to do the same work, often from a simple slip or misjudging a weak spot on the roof. You can learn more about the significant differences between professional and DIY roofing risks to fully grasp what's at stake.
A missing shingle might just be a symptom of a much larger, hidden issue. Without a trained eye, you could easily patch the spot you can see while completely missing the compromised decking or ventilation problem causing it.
Here in Dallas-Fort Worth and across East Texas, this is even more critical. Our frequent hail storms can leave a roof looking okay from the ground but dangerously compromised up close. Walking on a hail-damaged or wet roof is just asking for trouble.
Warranty and Insurance Considerations
Beyond the immediate physical danger, a failed DIY repair can hit you hard in the wallet. Most roofing material manufacturers will void their warranty the second their products are installed by anyone other than a certified professional. If that repair fails a year later, the cost is entirely on you.
Worse yet, your homeowner's insurance won't bail you out. Policies almost universally exclude damage that results from faulty or uncertified workmanship. So, if your DIY patch gives way and causes a massive leak, your claim for the interior water damage will be denied.
This is exactly why working with a licensed, insured roofer is so important. Their work is guaranteed, which protects your home and your investment. When dealing with widespread issues like hail damage, their expertise in documenting everything for the insurance company is invaluable to ensuring your claim actually gets approved.
Assembling Your Roofing Toolkit
Let's get one thing straight: tackling even small do it yourself roof repairs without the proper equipment is a recipe for disaster. This isn't just about getting the job done right; it's about getting back on the ground safely. The right tools and safety gear aren't optional—they're the only things that make a DIY repair a smart move instead of a dangerous gamble.
Before you even think about the repair itself, your first investment has to be in safety. Trying to save a few bucks by skipping a harness or using an old ladder is a terrible idea. I’ve seen what can happen. When you’re working at height, your gear is what separates a job well done from a trip to the emergency room.
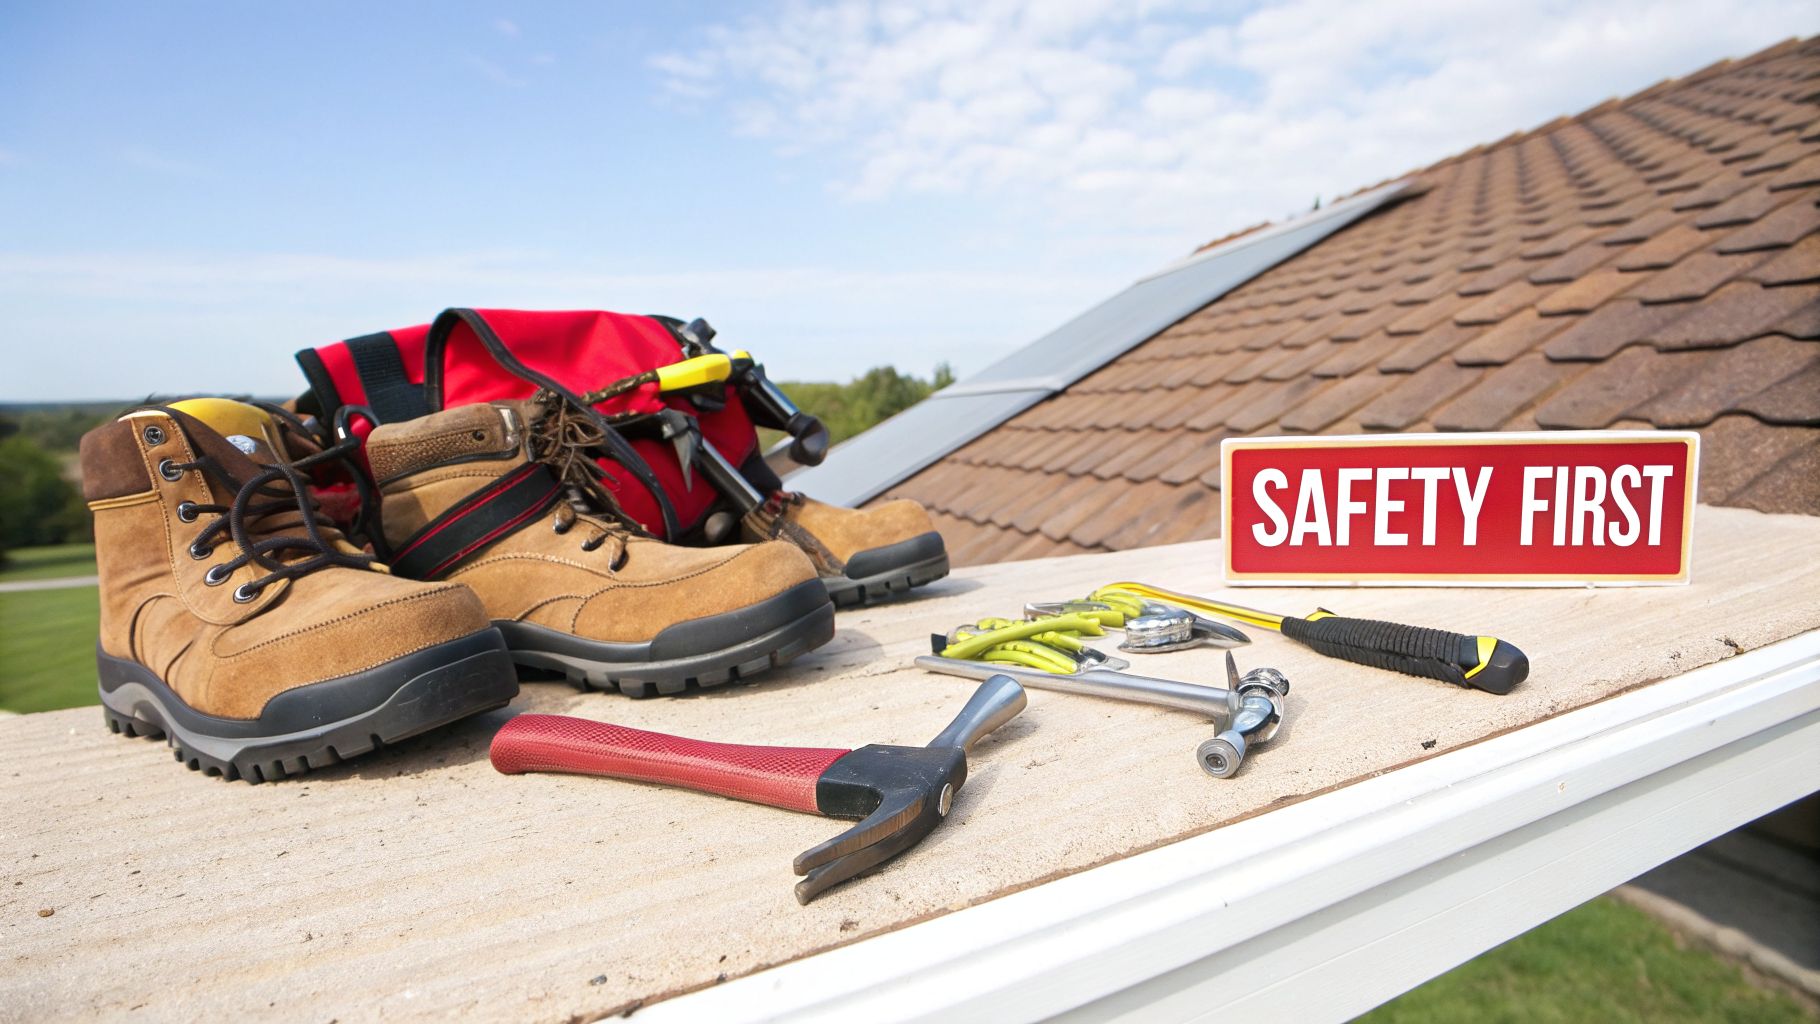
Non-Negotiable Safety Gear
Don’t even think about climbing that ladder without every single one of these items. Seriously.
- Personal Fall Arrest System (PFAS): This isn't just a rope from the hardware store. A real PFAS includes a full-body harness, a shock-absorbing lanyard, a rope grab, and a rock-solid roof anchor. Professionals are required by OSHA to use one, and you should hold yourself to the same standard. It's your last line of defense.
- Heavy-Duty Extension Ladder with Stabilizers: Think of your ladder as your lifeline to the ground. It needs to be rated for your weight plus the gear you're carrying. Ladder stabilizers (or "standoffs") are a must—they give the ladder a much wider and more secure footing against the house and prevent it from kicking out sideways.
- High-Grip Footwear: Your regular work boots or sneakers won’t do. You need boots with soft, high-traction rubber soles that are made to grip asphalt shingles. One slip is all it takes.
Always, and I mean always, inspect your gear before you use it. A frayed strap or a tiny crack in a ladder rung makes the equipment unsafe and useless.
A simple but crucial guide for ladder placement is the 4-to-1 rule. For every four feet you go up, the base of the ladder should be one foot away from the wall. This gives you the safest and most stable climbing angle.
Essential Repair Tools and Materials
Once your safety is locked in, it's time to gather the tools for the actual repair. What you'll need depends on the job, but for most minor shingle work, this is the go-to list.
- Flat Pry Bar: This is your best friend for gently popping the seal on shingles without ripping the ones you want to keep. A regular crowbar is too aggressive.
- Hammer or Roofing Nailer: For small repairs, I prefer hand-nailing with a hammer. It gives you a better feel and more control. A roofing nailer is much faster, but if you’re not used to one, it’s easy to overdrive the nail and cut right through the new shingle, or under-drive it and create a bump that will wear out the shingle above it.
- Utility Knife with Hook Blades: A hook blade is specifically designed to slice through shingles with a clean, smooth pull. A straight blade will just snag and make a mess.
- Caulking Gun and Roofing Sealant: You'll use this to seal down shingle tabs and flashings. Make sure you get a quality, asphalt-based sealant made for roofing—not just any all-purpose caulk.
- Measuring Tape and Chalk Line: Absolutely necessary if you want your repair to look like a pro did it. Nothing screams "amateur" like a crooked line of shingles.
When putting together your kit, a supplier that gets what homeowners need can make all the difference. That's why many people find Truitt & White is the best choice for DIYers who need both quality materials and solid advice.
Materials You Will Need on the Roof
Don't try to juggle an armload of supplies up a ladder. It’s clumsy and dangerous. Get everything you need for the specific fix ready beforehand.
For a Single Shingle Replacement:
- Matching Shingles: This sounds obvious, but getting an exact color and style match is key. A mismatched shingle sticks out like a sore thumb and might not interlock correctly.
- Roofing Nails: Use 1 ¼-inch galvanized steel roofing nails. They have to be long enough to bite firmly into the wood decking underneath.
- Roofing Cement/Sealant: You'll need a dab of this under the tabs of the new shingle and any surrounding ones you disturbed to create that critical watertight seal.
Keep these items in a tool belt or a bucket that you can hoist up with a rope once you're securely in position on the roof. A little prep saves a lot of hassle and keeps your hands free for a safe climb.
How to Spot Roof Problems From The Ground
The smartest do it yourself roof repairs start long before you ever set foot on a ladder. A thorough inspection from the safety of the ground not only keeps you out of harm's way but also gives you a realistic idea of what you're up against. It helps you answer the most important question: "Is this something I can actually fix myself?"
Your best friend for this job is a good pair of binoculars. Seriously. They let you get a close-up look without taking a single risky step, turning a distant, blurry roofline into a clear, detailed picture. Take your time and methodically scan your entire roof, section by section. You're looking for anything that just doesn't look right.
Inspecting Shingles and Surfaces
The most obvious signs of trouble are almost always on the shingles themselves. From a distance, your roof might look fine, but a closer view can tell a completely different story of wear and tear.
Keep a sharp eye out for these tell-tale signs:
- Curling Shingles: Pay close attention to the edges and corners of your shingles. If they're starting to lift and curl upwards, that’s a clear sign of age and moisture getting underneath. A curled shingle is just waiting for a strong gust of wind to tear it clean off.
- Cracked or Bald Shingles: Scan for shingles with obvious cracks running through them or dark, smooth patches where the protective granules have worn off. Those "bald" spots expose the raw asphalt to the sun's UV rays, which causes the shingle to break down incredibly fast.
- Missing Shingles: This one is hard to miss. Make a mental note of any gaps where shingles have been blown away entirely. This is a direct entryway for water. One or two missing shingles might be a manageable weekend fix, but if you see a random pattern of them missing all over the roof, you're likely looking at a much bigger problem.
Here’s a critical clue most people miss: check your gutters for shingle granules. If you see a pile of what looks like coarse black sand where your downspouts empty, it’s a sure sign your shingles are losing their protective layer and reaching the end of their life.
Checking Key Penetration Points
Next, aim your binoculars at the areas where your roof is most vulnerable—any spot where something pokes through the roof deck. These are the usual suspects for leaks.
Look closely at the flashing, which is the metal stripping used to seal around chimneys, vent pipes, skylights, and dormers. Flashing is designed to channel water away, but it doesn't last forever. It can rust, crack, or pull away from the roof, creating a small gap. And a small gap is all water needs to get in.
Looking for Clues Inside Your Home
Sometimes, the most undeniable evidence of a roof problem isn't on the roof at all. Your home's interior can show you exactly where a leak has been active, even if it's hard to spot from the outside.
Be on the lookout for these interior red flags:
- Water Stains: Look for any yellowish or brown circles on your ceilings or running down the top of your walls. If the stain feels damp, you have an active leak.
- Peeling Paint: Moisture seeping into the drywall or plaster near the ceiling will cause the paint to bubble, flake, or peel away. This often happens in corners or around window frames.
- Sagging Ceiling: This is a major alarm bell. A drooping section of your ceiling means a significant amount of water has pooled up, soaking the drywall and potentially compromising its structural integrity. Do not ignore this.
If you're just learning how to spot these issues, a structured guide can be a huge help. You might find our comprehensive roof inspection checklist template useful for making sure you don’t miss any critical steps during your ground-level assessment.
Identifying Hail Damage in Texas
For those of us in hail country like Dallas-Fort Worth and East Texas, spotting damage requires a more trained eye. Hail rarely punches clean holes in shingles. What it usually does is create subtle "bruises" or pockmarks that knock the protective granules loose. These can be nearly impossible to see from the ground.
You’re more likely to see the secondary signs, like dents on your metal flashing, gutters, downspouts, or roof vents.
Because this kind of damage is often subtle but widespread, this is one of those times where calling a professional is a must. A certified roofer knows exactly how to spot hail impacts that an untrained eye would miss, which is absolutely essential for filing a successful insurance claim.
Tackling Minor Asphalt Shingle Repairs
So, you've done your homework from the ground and spotted a small, manageable problem on a low-pitched section of your roof. This is exactly the kind of thing a proactive homeowner can often handle. Let's get into two of the most common do it yourself roof repairs: sealing a curled shingle and replacing one that's damaged.
Before we grab the tools, let's have a frank talk about expectations. While these jobs are doable, they aren't always the quick five-minute fix you see online. A recent homeowner survey found that over 50% of people thought their DIY project was way harder than they anticipated. Worse, about 8% admitted they actually caused more damage. Industry data backs this up, showing that botched DIY work can easily double what a professional repair would have cost in the first place. It's worth understanding the hidden financial risks of DIY roof repair before you climb that ladder.
How to Seal a Curled Shingle
A shingle tab that’s curling up at the edges is basically a welcome mat for wind and water. It's only a matter of time before it tears off or, even worse, starts funneling rain right underneath its neighbors. Thankfully, sticking it back down is one of the simpler fixes.
You'll need a good-quality asphalt roofing sealant and a standard caulking gun. The real trick here is patience, especially if you're working on a cool day. Cold asphalt shingles get brittle and will snap if you force them. If it’s below 60°F, you need to gently warm the shingle with a heat gun on its lowest setting. You’re not trying to cook it—just make it pliable enough to work with.
Once it's flexible, carefully lift the curled tab just enough to get the tip of your caulking gun underneath. Apply a dime-sized dab of sealant under each corner. Now, press the tab down firmly and hold it for a minute or so to help it grab. If you want to be extra sure, you can lay a brick on it for an hour to keep the pressure on.
Pro Tip: Resist the urge to go crazy with the sealant. A huge glob will create a lump that keeps the shingle from sitting flat. This can actually trap water and cause the shingle above it to fail prematurely. A little goes a long way.
Remember what you were looking for during your initial inspection? This diagram is a great refresher on spotting those key problem areas.
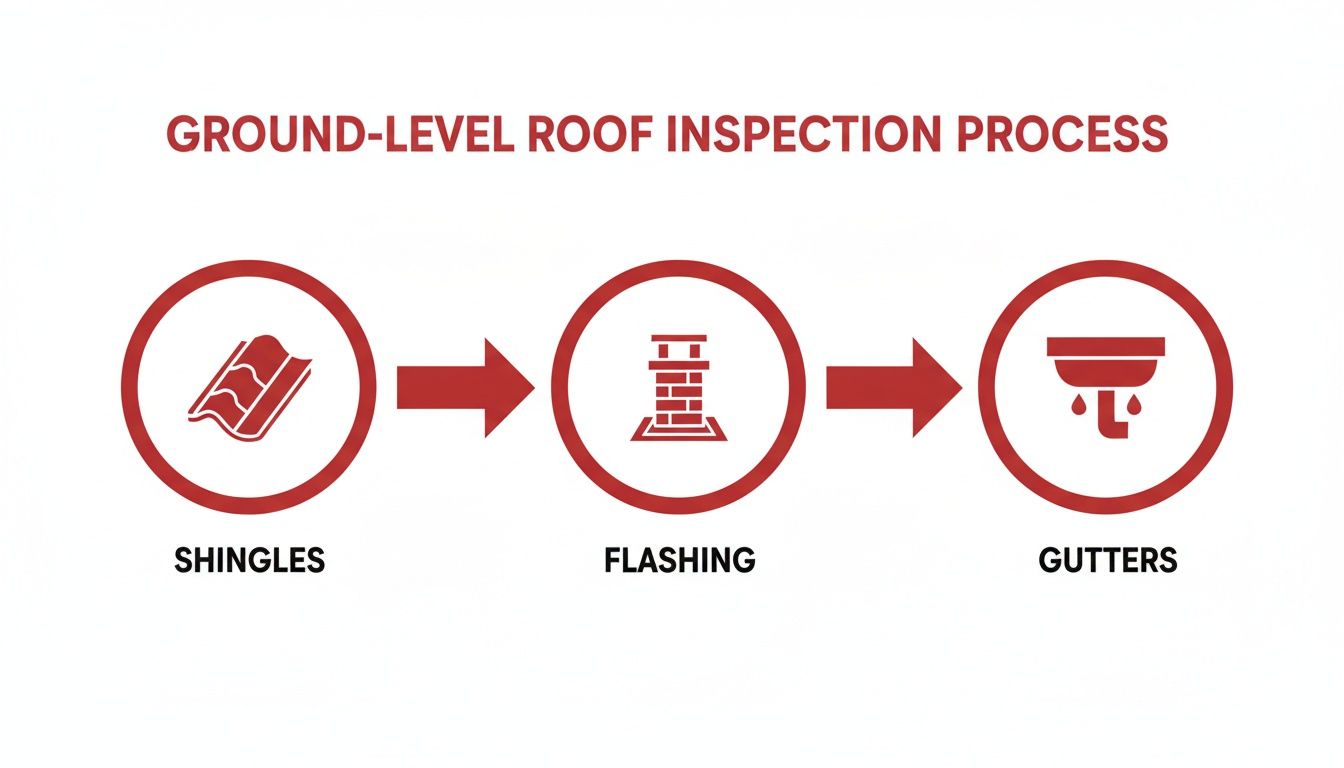
It’s all about focusing on the most common failure points—the shingles themselves, the flashing around vents and valleys, and your gutters—which is exactly where most minor leaks start.
How to Replace a Damaged Shingle
Replacing a shingle that’s completely cracked, missing, or torn is a bit more involved, but it's the only right way to fix that kind of damage. For this, you’ll need a flat pry bar, a hammer, a utility knife (a hook blade works best), and some 1 ¼-inch galvanized roofing nails.
First, you need to break the seal on the shingles above the damaged one. Gently work your flat pry bar under their bottom edges and slide it back and forth to pop the old sealant bond. You’ll have to do this for the shingle directly above and the ones flanking it to create enough room to work.
With the overlying shingles loosened, you can see the nail heads holding the bad shingle in place—usually four of them. Use your pry bar to gently lift the shingle just enough to get under the nail heads and pop them out. Take your time here to avoid tearing the good shingle above it. Once the nails are out, the old shingle should slide free.
Next, slide the new shingle up into the empty spot. Line it up carefully with its neighbors. You'll use four new roofing nails to secure it, driving them in roughly the same location as the old ones. Nail placement is absolutely critical:
- Drive the nails just below the black sealant strip on the new shingle.
- The nail heads must be driven perfectly flush with the shingle surface—not too deep and not sticking up.
- Never drive a nail through the sealant strip itself.
If you overdrive a nail (cutting into the shingle) or underdrive it (creating a bump), you’ve just created a brand-new leak point. Pull it out and try again in a clean spot.
Finally, squeeze a small dab of roofing sealant under the corners of the shingles you pried up earlier. Press them down firmly onto your new shingle to restore that critical watertight seal. While you're at it, choosing the right replacement matters. This is a good time to learn about the best roofing shingles for Texas and see if a more resilient shingle makes sense for our tough climate.
Trying to save a few bucks with a quick fix can sometimes backfire spectacularly. As someone who's seen the aftermath of well-intentioned but flawed DIY repairs, I can tell you that small mistakes on a roof have a way of becoming big, expensive problems.
Here’s a quick look at how common errors can add up.
Common DIY Roofing Mistakes and Their Costs
| DIY Mistake | Potential Consequence | Estimated Professional Repair Cost |
|---|---|---|
| Using the Wrong Nails | Nails rust out, back out, or fail, causing shingles to lift or blow off. This leads to leaks. | $300 – $1,000 |
| Improper Nailing | Overdriven nails cut the shingle; underdriven nails create bumps and leak paths. Both void warranties. | $400 – $1,200 |
| Misaligning Shingles | Creates gaps and exposed seams, allowing water to penetrate the roof deck directly. | $500 – $1,500+ |
| Forgetting to Seal Tabs | Wind can easily lift the unsealed shingles, leading to tear-offs and widespread water intrusion. | $250 – $800 |
This isn't meant to scare you off, but to highlight the importance of doing the job right the first time. A little extra care and the right materials go a long way in preventing a much bigger headache down the road.
Knowing When to Call a Roofing Professional
The most important tool in any DIYer's kit isn't a hammer or a pry bar—it's good judgment. Knowing the difference between a simple weekend fix and a problem that’s way over your head is what separates a successful repair from a catastrophic failure.
It’s tempting to think a single missing shingle is just that: one shingle to replace. But on a roof, what you see is often just the tip of the iceberg. That one flawed spot could be a symptom of a much bigger issue, like failing underlayment or trapped moisture that’s been slowly rotting the wood beneath. If you just slap a patch on the visible problem, you’re ignoring the root cause, and that's a recipe for much bigger, more expensive headaches down the line.
Structural Red Flags You Cannot Ignore
If you run into any of these issues during your inspection, it's time to put the tools down and get on the phone with a licensed roofer. These aren't minor repairs; they're signs of serious trouble.
- Soft Spots or "Spongy" Decking: As you carefully walk the roof, pay close attention to how it feels under your feet. If any area feels soft, spongy, or seems to give way, stop immediately. That's the classic sign of rotted roof decking, the wood sheathing that forms the foundation of your roof. Fixing this means tearing everything off down to the rafters, and that's a job for a professional crew, period.
- Widespread or "Leopard Spot" Damage: One or two failed shingles in a small area can often be handled. But if you're seeing cracked, curling, or missing shingles scattered all over the roof—what we sometimes call "leopard spots"—you're looking at systemic failure. The roof has likely hit the end of its service life, and patching it is like putting a band-aid on a broken leg.
- Multiple Layers of Old Shingles: This is an immediate deal-breaker. If you lift a shingle and find another roof underneath, your DIY project is over. Roofing over an old layer is a shortcut that adds a tremendous amount of weight and traps heat, cooking the new shingles from below and drastically shortening their lifespan. The only right way to fix this is with a complete tear-off, and that’s a massive job.
Job Conditions That Require a Pro
Sometimes, the problem isn't the repair itself, but the environment. Your personal safety is always the top priority.
A good rule of thumb is the 6/12 pitch rule. If your roof rises 6 inches for every 12 inches of horizontal distance, it's considered a steep-slope roof. Walking on these requires specialized safety gear and, frankly, years of experience to do safely.
Even on a lower-slope roof, height is a major factor. If your roof is two or more stories up, the risk of a fall becomes exponentially more dangerous. A fall from that height can be life-altering. Unless you are a professional with a proper fall arrest system, it's just not worth the risk.
Navigating Hail Damage and Insurance in Texas
Here in the Dallas-Fort Worth area and across East Texas, we live with hail. And hail damage is a completely different animal. To an untrained eye, it might just look like a few dark smudges or "bruises" on the shingles.
But those seemingly small impacts have likely fractured the shingle's core and voided its ability to protect your home. This is where a DIY approach can cost you thousands.
Insurance carriers have very specific requirements for documenting a hail damage claim. A licensed, local roofer who deals with this all the time knows exactly what adjusters need to see, how to photograph the evidence, and how to build a case for a full replacement. If you try to handle the claim yourself, you're almost guaranteed to get a lowball offer or even an outright denial. A good roofer acts as your advocate, making sure every bit of damage is accounted for so you get the full replacement value you're owed.
If you have any doubt about what you're seeing up there, the smart money is always on calling in an expert. Our guide on how to choose a trustworthy roofing contractor can help you find a qualified pro for an honest assessment. They bring a trained eye that spots the hidden problems a DIYer might miss, ensuring the job is done right once and for all.
A Few Questions I Hear All The Time
Even with a step-by-step guide, I know you probably have a few specific questions running through your mind. It’s smart to be cautious. Getting up on your own roof isn't something to take lightly, and some common assumptions can lead to major headaches down the road.
Let's walk through a few of the most important questions I get from homeowners. These aren't just hypothetical—I've seen these situations play out in the real world, and getting the right answer from the start can save you a world of trouble.
Can I DIY a Repair on a Roof with Solar Panels?
Let me be crystal clear on this one: absolutely not. Working on or around solar panels is a job that should only ever be handled by trained professionals. This isn't just about the roofing; it's about a high-voltage electrical system integrated directly into your home.
A pro will need to perform what’s called a "detach-and-reset." They have the specific training to safely disconnect the electrical system, carefully remove the panels and their mounting racks, and then reinstall everything to code after the roof work is done. If you try this yourself, you’re almost guaranteed to void your solar warranties, and you risk creating serious leaks or a dangerous electrical hazard.
Think of it this way: your solar array is a complex appliance sitting on your roof. You wouldn't try to fix your HVAC system's compressor or rewire your home's main breaker panel, would you? This requires the same level of specialized expertise.
Will Insurance Cover a Failed DIY Roof Repair?
This is a hard lesson some homeowners learn too late: it's highly unlikely. Your standard homeowner's insurance policy covers damage from sudden, accidental events—what the industry calls "acts of God," like hail or a tree falling on your house. It does not cover damage caused by improper or faulty workmanship.
So, if you try to patch a small leak and end up making it worse, causing water to pour in and ruin your drywall and insulation, your insurance provider will almost certainly deny that claim. The new damage is a direct result of the failed repair, not the original problem. This is exactly why a licensed, insured roofer who backs their work with a workmanship warranty is your best protection.
Does My Roof Repair Need to Follow Building Codes?
Yes, 100%. Every bit of roofing work, whether it’s patching one shingle or replacing the whole roof, falls under local building codes. These aren't just friendly suggestions; they are legally enforced standards designed to keep your home safe and structurally sound.
Here in East Texas and the DFW area, inspectors are particularly strict about a few things:
- Nailing Patterns: Codes dictate the specific number and placement of nails per shingle to ensure it can handle our high winds.
- Approved Materials: You can't just use any underlayment or flashing; it has to be a type approved for our climate.
- Layer Limits: Most Texas municipalities forbid having more than two layers of shingles on a roof for structural weight reasons.
You aren't expected to be an expert on the latest building codes. If you do the work yourself and it isn't compliant, an inspector can issue a stop-work order and force you to tear it all off and pay a pro to do it right. A licensed roofer’s job is to know these codes inside and out and guarantee the work passes inspection.
What Is the Difference Between Repairing and Replacing a Shingle?
This is a great question, and the answer comes down to whether you're looking for a temporary patch or a permanent fix.
A shingle repair is typically a quick, stop-gap measure. The classic example is using a bit of roofing cement to tack down a shingle tab that's started to curl or lift in the wind. You aren't actually removing anything; you're just trying to seal a minor flaw to buy some time.
A shingle replacement, on the other hand, is the real deal. This is when you physically remove a single shingle that is cracked, badly damaged, or completely missing. It’s a more involved process where you have to gently break the seals on the shingles above it, carefully pry out the old nails without damaging the surrounding area, slide the new shingle into place, nail it down correctly, and then reseal everything so it’s watertight again.
If you're dealing with roof issues, especially after a storm, the worst thing you can do is guess. The team at Hail King Professionals offers free, same-day inspections to give you an honest, no-obligation assessment of your roof's health. Schedule your free inspection and get the confidence that comes from an expert opinion.