


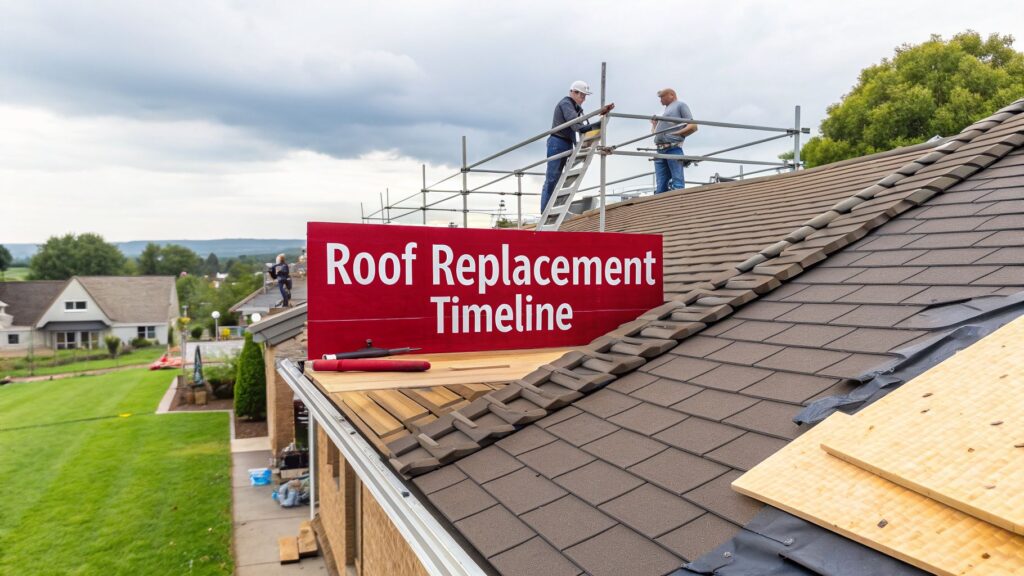
Roof replacement timeline: Your 2026 guide to a smooth roof project
When you find out you need a new roof, it’s natural to feel a bit overwhelmed. The big question on everyone's mind is, "How long is this going to take?"
The short answer is that a typical residential roof replacement timeline in the DFW area usually falls somewhere between 2 and 6 weeks. That's from the moment you first call a roofer to when the final invoice is paid. But here's the surprising part: the actual, on-site construction—the noisy part—is often done in just 1 to 3 days.
So, what fills up the rest of that time? The biggest delays usually happen before a single shingle is laid. We're talking about things like getting your insurance claim processed or waiting on the city for permit approvals.
What to Expect During Your Roof Replacement
A roof replacement isn't just a one-day affair. It's a full-blown project with several distinct phases. Think of it less like a quick repair and more like building a custom piece of furniture—there's a lot of planning, measuring, and prep work that has to happen before the final assembly. That behind-the-scenes work is what ensures the job gets done right.
This guide is your roadmap. We’ll walk through the entire process, specifically for homeowners here in Dallas-Fort Worth and East Texas. By the end, you'll know exactly what to expect at each step, helping you feel confident and in control from start to finish.
The Three Main Stages of a Roof Project
We can break down the entire roof replacement timeline into three main stages: Planning, Construction, and Finalization. Each one has its own set of tasks that are critical for keeping the project on track.
- Preliminary Steps (1–4 Weeks): This is where most of the clock gets eaten up, and for good reason. It involves the initial inspection, getting a detailed quote, working through the insurance claim, picking out your materials, and signing the contract. It's all the crucial prep work.
- Active Construction (1–5 Days): This is the main event! The crew is on-site, your property is prepped, and the old roof comes off. They'll inspect the underlying wood decking and then expertly install your brand-new roofing system.
- Finalization and Follow-Up (1 Week): Once the hammers stop, the project wraps up with a meticulous cleanup and a final walk-through with the project manager. This is also when you'll handle the final payment and receive all your warranty documents.
This graphic gives you a great visual of how these stages flow together.

As you can see, the planning and paperwork take up the lion's share of the time. The actual installation is a short, intense burst of activity. Knowing this upfront helps set realistic expectations, especially when you're waiting on an insurance adjuster or a city permit office. The takeaway is simple: a fast, smooth installation day is the direct result of careful and thorough preparation.
For a quick reference, here's a table summarizing what happens during each phase and how long it typically takes.
Quick Guide to Roof Replacement Phases and Durations
| Project Phase | Typical Duration | Key Activities |
|---|---|---|
| Planning & Prep | 1–4 Weeks | Initial inspection, estimate review, contract signing, material selection, insurance claim processing, and obtaining permits. |
| Construction | 1–5 Days | Property protection, tear-off of old roof, decking inspection and repair, installation of new roofing system components. |
| Finalization | 1 Week | Thorough site cleanup, final inspection with project manager, final payment processing, and delivery of warranty documents. |
This breakdown gives you a clear at-a-glance view of the entire journey. While every project is unique, this framework holds true for most residential roof replacements here in Texas.
Laying the Groundwork: The Pre-Construction Phase

Before a single nail is hammered, the most important work on your new roof gets done. This is the pre-construction phase, and honestly, it’s often the longest part of the entire roof replacement timeline. Think of it as the detailed planning before a major road trip—get the map right, and the journey is smooth. Get it wrong, and you're in for a world of delays.
This planning stage can take anywhere from 1 to 4 weeks, but don't be surprised if it stretches longer, especially if we're working through a complex insurance claim. It all kicks off the moment you realize you need a new roof, whether from a brutal North Texas hailstorm or just the tell-tale signs of age.
The Initial Inspection and Assessment
Your first real step is getting a professional out to your property for an inspection. A reputable roofer will do this at no cost, and it's far more than a quick look from the driveway. We get on the roof, walk every inch of it, and check the shingles, flashing, pipe jacks, and gutters up close, documenting all our findings with photos.
Afterward, we’ll sit down with you and go over a detailed report and a comprehensive quote. This document is your project blueprint; it should spell out the exact scope of work, the materials we recommend, and a full cost breakdown. No surprises.
Key Insight: A detailed, itemized quote is the hallmark of a transparent contractor. It lets you see exactly what you’re paying for and makes it easy to compare offers. Be wary of vague, one-line estimates—they’re often a recipe for hidden costs down the road.
Handling the Insurance Claim Process
For most folks here in Dallas-Fort Worth and East Texas, a new roof comes courtesy of a storm damage insurance claim. This adds a whole other layer to the timeline. Once you file your claim, your insurance company assigns an adjuster to come out and verify the damage.
Here’s how that part of the process typically plays out:
- Filing the Claim: You notify your insurance company about the roof damage.
- Adjuster Meeting: Your insurance adjuster schedules an appointment to inspect the roof. It is absolutely critical that your roofer is present for this. We're there to make sure every bit of damage is accounted for and properly documented.
- Claim Approval: The adjuster files their report, and the insurance company decides on the claim approval and payment. Just this step can take 1 to 2 weeks.
Delays often pop up here if the adjuster’s report doesn't match the contractor's initial assessment. This is where having an experienced storm-damage roofer in your corner really pays off. We act as your advocate, negotiating to ensure you get a fair settlement that covers the full cost of doing the job right. You can learn more about what to look for when you https://hailkingpros.com/2026/02/25/how-to-choose-a-roofing-contractor/ in our detailed guide.
Finalizing the Details Before Construction
Once your insurance claim is approved or you have your budget in order, the last few pre-construction pieces fall into place. For many homeowners, securing the right financing options is an important step that happens here, influencing everything from material choices to the project start date.
Next up is the fun part: material selection. You'll choose your shingle type—maybe a standard architectural shingle or upgrading to a Class 4 impact-resistant one—and pick the perfect color to match your home. With materials decided, you'll sign the contract, which gives us the official green light.
The final hurdle is getting the permit. Your contractor handles submitting all the paperwork to your local city or county. Depending on how busy they are, getting a permit in the DFW area can take a few days to over a week. Only after the permit is in hand and the materials are ordered can we get your project officially on the construction schedule.
The Nuts and Bolts of Active Construction

When our crew pulls up, you've officially entered the most dynamic phase of your roof replacement timeline. All the planning and paperwork give way to a flurry of organized chaos. While getting to this point can take weeks, the actual on-site work for a typical home in Dallas-Fort Worth or East Texas is surprisingly fast—usually wrapped up in just 1 to 3 days.
Think of it as a well-rehearsed pit crew for your house. Our team moves with precision and speed, following a step-by-step plan to get your home protected and back to normal as quickly as possible.
The first thing we do isn't grabbing hammers; it's protecting what’s yours. We meticulously cover your landscaping, AC unit, windows, and siding with heavy-duty tarps. This prep work is non-negotiable for us. It shields your property from the inevitable debris and sets the tone for a clean, professional job from start to finish.
Tearing Off the Old and Inspecting the Deck
With your property protected, we start the tear-off. This is exactly what it sounds like: we strip every last bit of old material off your roof until we're looking at the bare wooden deck. It's the loudest part of the whole process, as old shingles and felt paper are torn away and sent down into a dumpster we've placed in the driveway.
Once the old roof is gone, we conduct the most important inspection of the entire project. We walk every square inch of that exposed wood deck, checking for water damage, soft spots, and rot. This is the moment of truth, where we see the real condition of your roof's foundation.
Expert Insight: Finding damaged decking is pretty common, especially on older homes or roofs that have been leaking for a while. Fixing it is not optional. You wouldn't build a new house on a shaky foundation, and the same principle applies here. A brand-new roof on rotten decking is a recipe for disaster.
Building Your New Roof from the Deck Up
If we find any bad decking, we'll stop, take photos to document it, and walk you through the necessary repairs. If this is an insurance claim, these photos are crucial for filing a "supplemental request" to get the new decking covered. This might add a few hours to the job, but it’s an absolutely essential step for the long-term health of your new roof.
With a solid, sound deck ready to go, the real build begins. It's a methodical, layered process that creates a complete roofing system:
- Underlayment and Water Shields: We roll out a new synthetic underlayment across the entire roof deck, which acts as a critical secondary barrier against water. In valleys and around pipes—high-risk areas—we install a specialized ice and water shield for an extra layer of defense.
- New Flashing: All the old, tired flashing around chimneys, vents, and walls gets replaced. Leaky flashing is one of the most common reasons for roof failure, so we make sure the new metal is installed and sealed perfectly.
- Shingle or Panel Installation: Finally, the main event. Whether it's asphalt shingles or metal panels, we start at the bottom and work our way up. Our crews follow the manufacturer's installation guidelines to the letter, ensuring a perfect finish and, most importantly, a valid warranty.
How Solar Panels Fit into the Timeline
Have solar panels? That adds another specialized step into the mix. Before our roofers can even start, a dedicated solar crew performs a "detach and reset." They carefully remove the panels and their racking system.
Once the new roof is on and has passed our final inspection, that same solar crew comes back to reinstall the system. This process usually adds one full day to the active construction schedule. It takes a lot of coordination between our roofing and solar teams, but the result is a seamless project where your new roof and solar array work together perfectly for years to come.
Common Delays and How They Impact Your Timeline

Even with the best crew and a perfect plan, a roof replacement timeline can hit a few speed bumps. Knowing what these are ahead of time is the single best way to manage your own expectations and keep the stress from piling up. I always tell homeowners to think of it like planning a road trip—you hope for clear skies and open roads, but you still account for rush hour traffic and the chance of a downpour.
While the actual hands-on work of tearing off and installing a new roof is surprisingly quick, a few common factors can stretch the whole process from a couple of weeks to a month or more. Let's walk through what they are so you can work with your roofer to keep your project on track.
Navigating Weather Delays in North Texas
Here in Dallas-Fort Worth and East Texas, weather is the undisputed champion of roofing delays. For both safety and quality, no professional crew will work when the weather turns against them. Rain, high winds, and even extreme heat will bring a job to a standstill.
- Rain and Moisture: You can't install a roof on a wet surface. It's a recipe for trapping moisture, which leads to mold and rot in your brand-new roof deck. Even a classic Texas pop-up thunderstorm can shut down work for the rest of the day.
- High Winds: Once winds start gusting over 20-25 mph, it’s simply not safe for crews to be up on a roof. It also keeps new shingles from sealing down properly, which compromises the integrity of your entire system.
- Extreme Heat: That blistering Texas summer sun can actually soften asphalt shingles, making them easy to scuff and damage during installation. More importantly, it’s a serious health risk for the crew working up there.
Of course, aiming for a spring or fall installation can help, but Texas weather is famous for its unpredictability. The smartest move is to build a few extra buffer days into your mental timeline right from the start.
Insurance and Permitting Hold-Ups
After Mother Nature, the biggest delays almost always come from paperwork. Getting through insurance approvals and city permits takes patience, and a backlog on either end can easily tack weeks onto your project before a single shingle is delivered.
This has become a bigger issue as severe storms get more frequent. The U.S. roofing repair market shot up to $28 billion in 2023, and a huge chunk of that was storm-related. In 2026, for example, 27 major weather events—including some serious hail right here in DFW—caused widespread roof failures. With hail damage alone responsible for 40-50% of insurance payouts in our region, it’s no wonder the claims process gets bogged down. You can check out more roofing industry data to see these trends for yourself.
Expert Tip: This is where a seasoned local contractor becomes invaluable. Someone with strong relationships at the permit office and who speaks the language of insurance adjusters can cut through red tape, anticipate problems, and keep the whole process moving.
Unforeseen Structural and Supply Issues
Sometimes, the biggest hurdles are the ones you can't see until the old roof comes off. When these hidden surprises pop up, work has to stop until we have a solid plan to address them.
- Hidden Deck Damage: Once we tear off the old shingles, we might find that the wood decking underneath is full of rot or water damage. Fixing this is absolutely critical for the new roof, but it means pausing work. We have to document the damage for you (and potentially for a supplemental insurance claim) and get your go-ahead before proceeding.
- Material Backorders: We have great relationships with our suppliers, but huge events like a major hailstorm can create a run on certain materials. The most popular shingle color might suddenly be backordered for weeks. A good contractor can often pull some strings or find a suitable alternative, but sometimes, a wait is just unavoidable.
By understanding where delays come from, you can go into your roof replacement with a realistic game plan. A professional roofer will always keep you in the loop when issues arise and work with you to keep the timeline as tight as possible.
How Material Choice Affects Your Installation Timeline
One of the biggest decisions you'll make is what material will sit on top of your home for the next few decades. This choice goes way beyond curb appeal and your initial budget—it has a direct and significant impact on the roof replacement timeline. The difference between a standard asphalt shingle job and a premium metal roof can easily be a matter of days.
A good way to think about it is this: putting on asphalt shingles is like painting a room with a roller. It’s fast, efficient, and designed for quick coverage. Installing a metal roof, on the other hand, is more like laying custom tile. It demands specialized tools, painstaking cuts, and a level of precision that simply takes more time.
Asphalt Shingles: The Fast and Familiar Choice
There’s a very good reason asphalt shingles are the most popular roofing material in North Texas and across the country. They’re affordable, they look great, and—most importantly for many homeowners—they can be installed incredibly fast. An experienced crew can tear off an old roof and install a brand-new asphalt shingle system on a typical DFW home in just one day.
That speed comes from a very straightforward process. The shingles are uniform, easy to manage, and designed to be installed quickly with a nail gun. This efficiency is why they account for 75-80% of residential roofing projects, helping to minimize the disruption to your family's routine.
Metal Roofing: The Durable but Deliberate Option
Metal roofing is a completely different animal. While it offers incredible longevity and durability—a huge plus against Texas hail—the installation is far more complex and time-consuming. You should expect the on-site work to last anywhere from 2 to 5 days, and sometimes even longer for large homes or roofs with complex designs.
So, why the longer timeline? It breaks down into a few key factors:
- Specialized Labor: Installing a metal roof correctly requires a crew with specific training and expertise. Not every roofer is qualified for the job.
- Custom Fitting: Every single metal panel has to be measured and cut with precision to fit your roof’s unique dimensions, especially around tricky areas like hips, valleys, and chimneys.
- Meticulous Fastening: Unlike shingles that are rapidly nailed down, metal panels are secured with a system of screws and clips. These must be perfectly placed to let the metal expand and contract with our wild Texas temperature swings.
This shift toward stronger materials is a clear trend. The U.S. roofing market is massive, and while asphalt is still king, the demand for resilience is undeniable. In 2024, 67% of contractors reported selling metal roofs as more homeowners look for long-term solutions, especially when insurance can help cover an upgrade to impact-resistant materials. You can learn more about the factors driving roofing industry trends and what they mean for your home.
Ultimately, choosing between these materials is a balance of speed, budget, and long-term peace of mind. To get a closer look at all the options, you can explore our guide on the various roofing system types.
Asphalt Shingle vs. Metal Roof Installation Timeline Comparison
When you're weighing your options, it's helpful to see a direct comparison of how the material choice plays out on-site. The table below breaks down the key differences in the installation process for asphalt shingles versus metal roofing.
| Factor | Asphalt Shingle Roof | Metal Roof |
|---|---|---|
| On-Site Installation Time | 1–2 Days | 2–5+ Days |
| Labor Complexity | Standard; most crews are proficient. | Specialized; requires expert training. |
| Material Handling | Lightweight and easy to manage. | Panels are cumbersome and require careful handling. |
| Durability & Longevity | 20–30 years; Class 4 options available. | 50+ years; exceptional hail resistance. |
| Overall Project Impact | Minimal disruption to your household. | Longer on-site presence and noise. |
As you can see, the trade-off is clear: asphalt offers speed and convenience, while metal provides superior longevity at the cost of a longer, more involved installation.
Your Homeowner Checklist for a Smooth Project
Knowledge is power, especially when it comes to a major home project like a roof replacement. Having a solid plan is the single best way to keep things on schedule, manage your stress levels, and ensure you’re happy with the final result.
Think of this checklist as your personal roadmap. It breaks down what you need to do before, during, and after the project. By following it, you'll avoid common pitfalls and become an active partner in your own home's renovation. For some great general advice, check out this helpful homeowner’s checklist for hiring a service.
Pre-Construction To-Do List
This is all about getting your ducks in a row. A little prep work here saves a lot of headaches later.
- Verify Your Contractor's Insurance: Before anyone sets foot on your property, ask for a copy of your roofer’s general liability and workers' compensation insurance. This is non-negotiable—it protects you from liability if an accident happens.
- Know Your Deductible: Be crystal clear on the exact amount you're responsible for paying out-of-pocket. If you need help planning for this cost, our guide on how to finance a new roof is a fantastic resource.
- Clear Attic Access: Make sure the path to your attic is free of clutter. The crew or city inspector might need to get up there, and a clear path makes their job easier and safer.
- Discuss Key Logistics: Have a quick chat with your project manager. Figure out where they plan to stage materials and, just as importantly, where the dumpster will go.
Construction Day Checklist
When the crew arrives, your main job is to prep your home and yard for a very busy day.
- Move Vehicles from the Driveway: Clear all cars out of the driveway and garage. This not only makes room for work trucks and the dumpster but also protects your vehicles from falling debris.
- Secure Wall Hangings: The constant hammering and vibrations from the roof can easily shake things loose inside. Take a few minutes to remove pictures, mirrors, and any fragile decorations from your walls.
- Keep Pets and Children Indoors: A construction site is no place for kids or pets. For their own safety, keep them inside and well away from the work zone. The noise and falling debris are real hazards.
- Protect Outdoor Items: Anything around the immediate perimeter of your house should be moved. This includes patio furniture, grills, potted plants, and any other valuables you don't want covered in dust or hit by debris.
Did you know? A massive housing boom in the late 1970s and early 1980s means over 50 million homes across the country are now hitting their prime roof replacement timeline. The U.S. residential roofing market is even expected to reach $150 billion by 2025. Especially here in storm-prone DFW, this is a great time to consider upgrading to impact-resistant shingles.
Post-Construction Final Steps
Once the noise has stopped and the crew has packed up, there are just a couple of final tasks to officially wrap up your project.
- Do the Final Walk-Through: This is your moment. Walk the entire property with your project manager to inspect the new roof, the cleanup, and every last detail. Now is the time to ask questions or point out anything that needs attention.
- Collect All Warranty Paperwork: Don't let your roofer leave without handing over both the manufacturer's warranty for the materials and their own workmanship warranty.
- Settle the Final Payment: Only make that final payment when you are 100% satisfied with the job. A reputable contractor will insist on it.
Even with a clear plan, it's completely normal to have questions about your specific roof replacement timeline. We get these all the time from homeowners across Dallas-Fort Worth and East Texas, so let's tackle the big ones head-on.
How Long Does a Roof Replacement Really Take from Start to Finish?
It's a common misconception. While the actual hands-on work at your house is surprisingly fast—usually just 1 to 3 days—the entire project from your first call to the final sign-off is a bit longer. Plan on 2 to 6 weeks in total.
Why the big difference? That extra time is all about the behind-the-scenes prep. This includes navigating the insurance claim, which alone can eat up 1-3 weeks, plus ordering your specific shingles and getting permits from the city. If you're not going through insurance, the whole thing can be much faster, sometimes wrapping up in just a week or two.
Will My Insurance Claim Slow Everything Down?
Honestly, yes. Dealing with an insurance claim is the biggest wildcard in any roofing schedule. How quickly things move really depends on your insurance company's internal process, how busy their adjusters are, and whether your claim gets approved cleanly on the first go.
Expert Tip: This is where having a seasoned roofer in your corner makes a world of difference. We know how to speak the adjuster's language and can advocate for you, providing all the right documentation right away to keep things from getting bogged down.
What's the Deal with My Solar Panels?
If you have solar panels, we just add one extra step to the process called a 'detach and reset'. It’s exactly what it sounds like. A specialized solar crew comes out first to carefully remove your panels and the mounting racks before we touch a single shingle.
After your new roof is installed and passes inspection, that same solar team returns to put everything back exactly as it was. This service usually adds 1 to 2 extra days to the project. The key is coordinating the two teams, which is something we handle for you to make it seamless.
What Happens If You Find Rotted Wood Under the Old Shingles?
It’s more common than you might think, especially with older roofs or ones that have had a slow leak for years. If our crew tears off the old roof and finds soft or rotted wood decking, we stop everything right there.
We’ll immediately show you what we found, documenting it with photos. Then, we prepare a supplement to send to your insurance company to get the cost of replacing that decking covered. While it can add a few hours or even a full day to the on-site work, fixing it is non-negotiable. Your new roof needs a solid foundation to last.
Ready to get a clear and reliable timeline for your roof replacement? The team at Hail King Professionals provides free, same-day inspections and transparent project plans tailored to your home's specific needs. Get your free estimate today.