


Roof Repair Frisco TX: Free Inspections
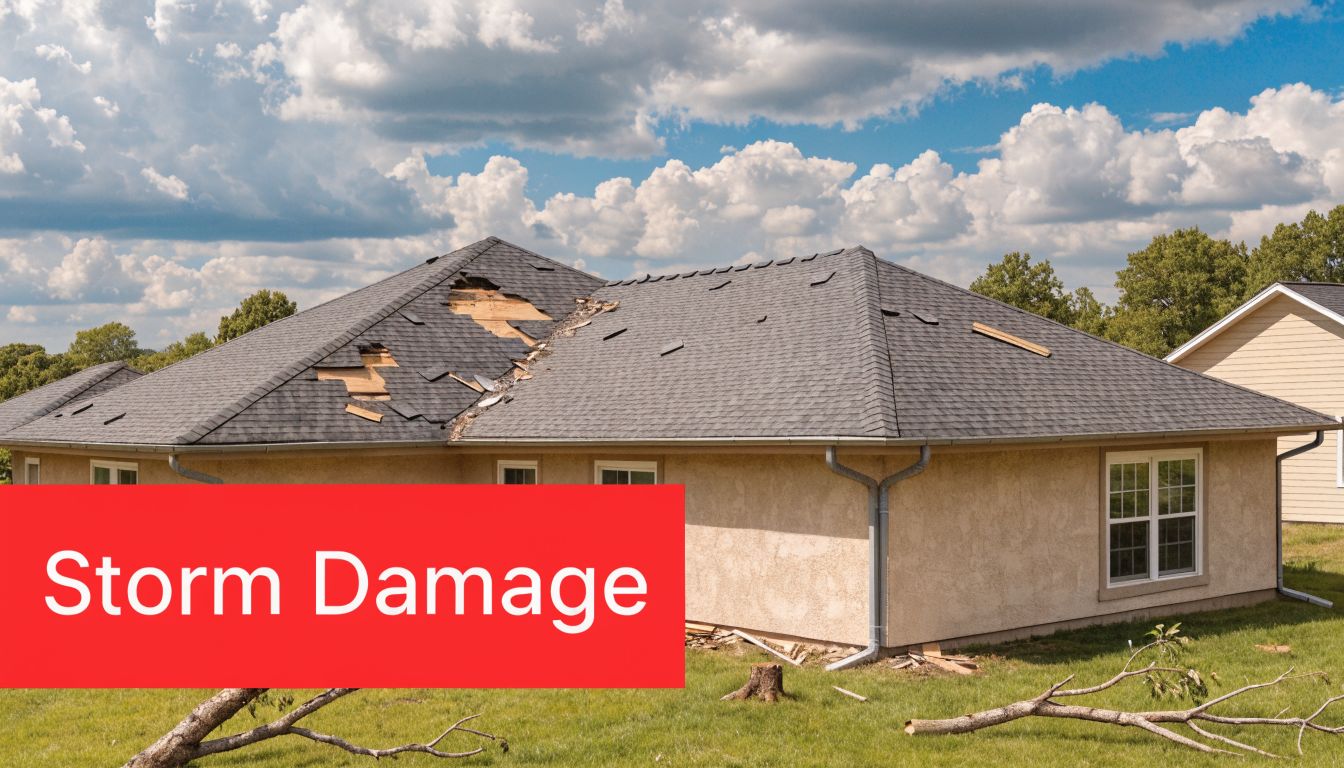
You heard the storm roll through Frisco overnight. By morning, the patio furniture is shifted, the driveway is littered with twigs, and now you’re standing in the yard looking up, trying to decide whether your roof took a hit or whether it just looks rough because you’re worried.
That uncertainty is normal. Roof damage rarely announces itself with a ceiling leak on day one. More often, it starts with subtle signs: granules near a downspout, a bent vent cap, a shingle tab that lifted and never sealed back down. If your home also has solar panels, the stress goes up fast because now you’re not just protecting shingles. You’re protecting a roofing system, an electrical system, and a major home investment that has to be handled in the right order.
A good roof repair frisco tx project isn’t just about patching visible damage. It’s about confirming what happened, deciding what’s salvageable, documenting everything clearly, and making sure the finished work holds up to the next round of Texas weather.
Decoding Storm Damage on Your Frisco Roof
Frisco homeowners don’t have to guess whether storms are a real roofing threat. North Texas sees over 30 major hail events annually, and since the 2015 Ping Pong Ball Hailstorm that affected 80% of Collin County homes, 65% of local roofing claims have been tied to hail-related granule loss and cracks, many of which only show up during a professional inspection, according to local hail damage reporting in Frisco.
What to check from the ground
Don’t climb the roof after a storm. Wet shingles, bruised decking, loose granules, and steep slopes make that risky fast. You can learn a lot from the ground and around the perimeter of the house.
Use this checklist:
- Check the gutters and downspouts: Look for dents, fresh impact marks, or separation at joints. Metal components often show hail strikes before shingles do.
- Scan the siding and garage door trim: Circular dings and chipped paint can signal the same hail path that hit the roof.
- Look below downspouts: If you see an unusual amount of black, gray, or sand-like granules, the shingles may have lost their protective surface.
- Notice anything on the lawn: Pieces of shingle tabs, torn ridge cap fragments, or bits of flashing usually mean wind got under something.
- Study roof accessories with binoculars if needed: Vent caps, pipe boots, flashing at walls, and turbine vents often show damage before the main field of shingles does.
Hail damage and wind damage don’t look the same
Hail and wind leave different fingerprints.
Hail damage is usually blunt. It often shows up as scattered impact marks, bruising, cracked shingle surfaces, or granule loss in small circular areas. Wind damage is more directional. It tends to lift tabs, crease shingles, break the seal strip, or remove pieces entirely.
Practical rule: If the storm was loud enough to make you pause and look outside, it was strong enough to justify a visual check around the home.
A lot of homeowners expect roof damage to be obvious from the street. It often isn’t. A roof can look mostly intact and still have enough granule loss, creasing, or flashing damage to justify repair work.
Signs that mean you should schedule an inspection
Some situations shouldn’t wait.
- Interior clues: A new water spot on drywall, attic dampness, or staining around a bath fan usually means water found a path in.
- Edge damage: Missing starter shingles, loose drip edge, or detached gutter apron can let water push under the first course.
- Accessory hits: If a vent cap or soft metal flashing is dented, the shingles nearby deserve a closer look.
- Debris impact: Fallen limbs don’t need to puncture the roof to break shingle seals or crack ridge material.
If you’re debating whether the damage is “bad enough,” that’s usually the moment to get a qualified inspection instead of waiting for the next storm to answer for you.
The Roof Inspection and Repair Process Step-by-Step
Most homeowner stress comes from not knowing what happens next. The repair process is easier to manage when it’s broken into clear stages and each stage has a purpose.

Step one starts before anyone touches the roof
The first call should establish the basics. What storm came through, what signs you’ve seen, whether there’s an active leak, and whether the home has anything special on the roof such as solar panels, satellite mounts, or steep sections.
A solid contractor also asks about interior symptoms. Staining over a bedroom ceiling means something different than a chimney flashing issue over a den. Those details help focus the inspection.
For homeowners who like to prepare, this roof inspection checklist template is a useful way to organize what you’ve noticed before the appointment.
What a proper inspection includes
A real inspection is more than a quick walk and a verbal opinion. The roof surface, penetrations, ridge, valleys, flashing details, and drainage paths all need attention. On some homes, drones help document steep or delicate areas. Thermal imaging can also help when moisture is suspected below the surface.
The point isn’t to make the process look high-tech. The point is to document conditions clearly enough that the homeowner can make a decision based on evidence instead of sales pressure.
A professional inspection usually produces:
- A photo record of key areas so damage isn’t left to memory.
- A condition summary that separates cosmetic wear from functional problems.
- A recommendation for repair, partial repair, or replacement.
- A scope of work showing exactly what work is proposed.
Repair planning is where shortcuts show up
Once the inspection is done, the next decision is whether the roof can be repaired cleanly and responsibly. Not every damaged roof needs replacement. Not every “small repair” proves to be small.
Here are the trade-offs that matter:
- Spot repair works well when damage is isolated: A few wind-lifted shingles, a pipe boot failure, or localized flashing damage can often be corrected without disturbing the whole roof.
- Matching can be difficult on older roofs: Even if a repair is technically possible, the replacement shingles may not blend well in color or profile.
- Underlying issues change the scope: If moisture has moved into decking or underlayment, the visible shingle problem may only be the top layer of the repair.
- Accessory details matter: Skylights, chimneys, valleys, and wall transitions are where poor workmanship shows up first.
A trustworthy contractor should be able to explain not only what they want to do, but what they can leave alone and why.
Execution and final sign-off
Once work is scheduled, a good crew protects landscaping, keeps materials organized, and works in a sequence that prevents open roof exposure. Repairs should end with seal checks, flashing confirmation, cleanup, and a walkthrough with the homeowner.
That walkthrough matters. It’s when you confirm that the original issue was addressed, review before-and-after photos, and get clear instructions on what was repaired, what was monitored, and what warranty documentation you should keep.
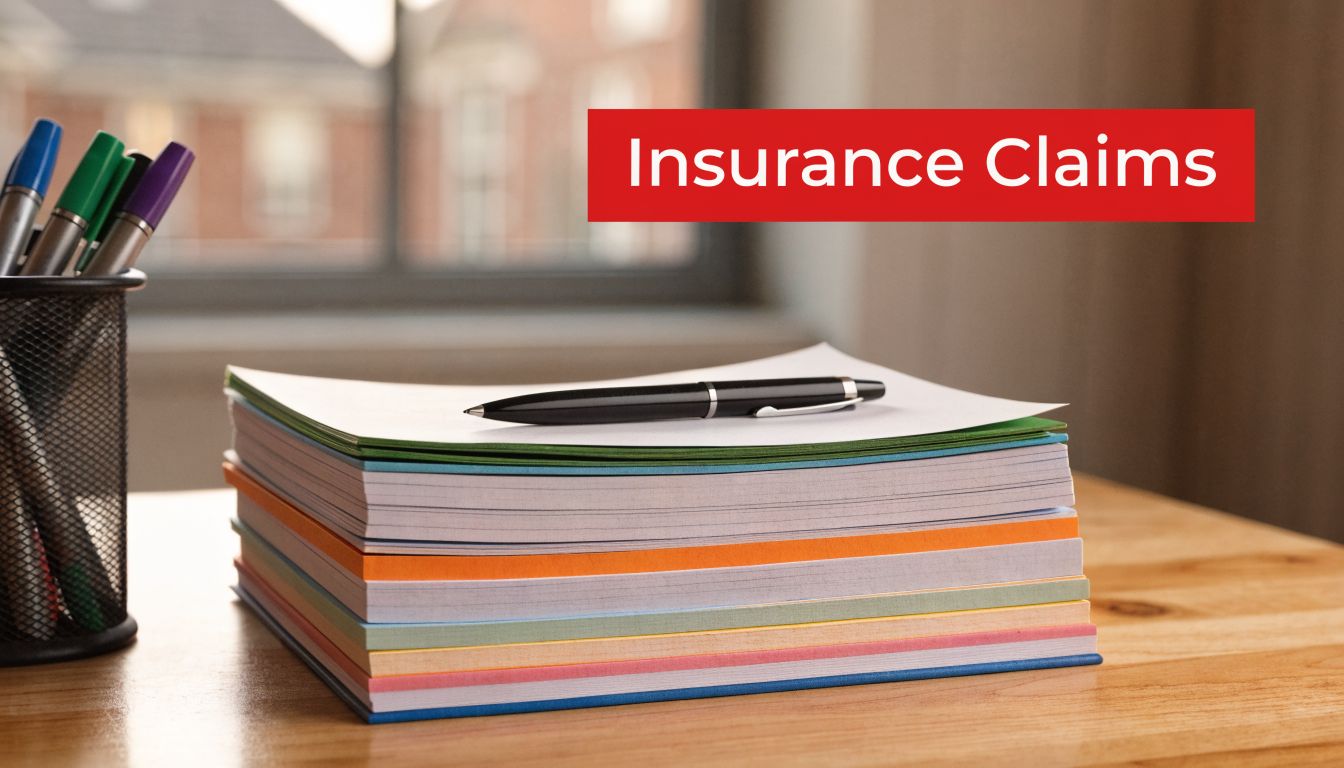
Navigating Insurance Claims for Your Roof Repair
Insurance claims feel complicated because they involve two different conversations at once. One is about roof damage. The other is about policy language, documentation, and payment terms. Homeowners do better when they understand both.
The terms that confuse most homeowners
Three policy terms come up again and again.
- Deductible: This is the portion of the loss you’re responsible for under your policy.
- ACV or Actual Cash Value: This usually means the carrier factors in depreciation when calculating the initial payment.
- RCV or Replacement Cost Value: This usually refers to the amount needed to restore the damaged item with like-kind materials, subject to policy terms.
The exact way those terms apply depends on your policy. That’s why homeowners shouldn’t rely on neighborhood advice alone. Read your declarations page, ask your carrier direct questions, and keep every claim document.
What helps a claim move more cleanly
The strongest claims are documented early and clearly. That means date-stamped photos, notes about the storm event, interior leak photos if applicable, and a detailed roofing assessment that identifies functional damage rather than vague “storm wear.”
If there’s water intrusion inside the home, it also helps to understand the broader documentation habits that support property claims. Some of the same habits apply in roofing, which is why these essential water damage insurance claim tips are useful for keeping records organized and avoiding mistakes that weaken your file.
A contractor can help by documenting the roof condition thoroughly and translating roofing findings into language an adjuster can review. That’s different from promising claim outcomes. No one should guarantee claim approval.
The adjuster visit matters
When the insurance adjuster comes out, the roof should already be documented from the contractor side. That keeps the conversation focused and specific.
Helpful documentation often includes:
- Marked photo sets: Clear images of affected slopes, soft metal hits, flashing issues, and interior signs if water entered the home.
- Repairability notes: Whether isolated repairs are feasible or whether matching, seal integrity, or broader storm impact make that unrealistic.
- Scope clarity: A line-by-line description of what the roofing work requires.
- Accessory concerns: Gutters, vents, flashing, and solar detach-and-reset needs when applicable.
Later in the process, many homeowners also ask broader policy questions. This guide on whether homeowners insurance covers storm damage helps frame the conversation before you call your carrier.
The video below gives a helpful overview of claim-related roof damage considerations.
Where homeowners get into trouble
The biggest mistakes are usually administrative, not technical.
- Waiting too long: Delays make it harder to tie damage to a specific storm.
- Letting someone knock doors and dictate urgency: A rushed opinion without documentation is a poor basis for a claim.
- Signing vague contracts early: You need a clear scope, not just a promise to “handle insurance.”
- Assuming the first decision is always final: If a claim is underpaid or denied, there may be a path to challenge the result with better documentation.
Keep a dedicated folder for inspection photos, claim emails, estimate versions, and adjuster notes. That one habit saves a lot of confusion later.
Understanding Roof Repair Costs and Financing in Frisco
Cost matters, but the useful question isn’t only “How much?” It’s “What am I paying for, and what problem does that solve?” In roof repair frisco tx work, the cheapest line item can become the most expensive decision if it leaves hidden damage in place or uses materials that won’t last through the next hail season.
According to Frisco roof cost projections, a full roof replacement on a typical 2,000 square foot home ranges from $7,400 to $30,000, while roof repairs usually fall between $300 and $5,000. The same source notes that asphalt shingles commonly run $3.70 to $7.00 per square foot or $7,400 to $14,000 total, and metal roofing runs $10.00 to $15.00 per square foot or $20,000 to $30,000 total. It also notes that premium impact-resistant shingles can add 20% to 30% to asphalt pricing and may qualify for insurance discounts of up to 40% in hail-prone North Texas.
What drives the final number
Two roofs with the same square footage can price differently for good reasons. Steep pitch, complex valleys, chimney flashing, decking repairs, and solar panel coordination all change labor and sequencing.
Material choice changes the economics too. Asphalt is the most common option because it balances cost and availability. Metal offers durability and a different appearance, but the upfront cost is higher and repairs require a crew that knows how to work that system cleanly.
Here’s a practical cost snapshot.
| Service / Material | Typical Cost Range | Key Benefit |
|---|---|---|
| Roof repair | $300 to $5,000 | Lower upfront cost for isolated leaks, flashing issues, or limited storm damage |
| Asphalt shingle replacement | $7,400 to $14,000 | Common, cost-effective option for many homes |
| Full roof replacement overall range | $7,400 to $30,000 | Broad range that covers varying materials and project complexity |
| Metal roofing replacement | $20,000 to $30,000 | Durable roofing system with long-term performance appeal |
| Other roofing materials | $6,800 to $40,000 | Wider design and performance options depending on system selected |
Why better materials can be the smarter spend
The cheapest shingle isn’t always the best value in Frisco. The same Frisco roofing cost source states that Class 4 impact-resistant shingles can extend service life to 40 to 50 years, and that these shingles withstand impacts from 2-inch steel balls in testing. In a hail-prone market, that matters.
The trade-off is straightforward. You pay more upfront, but you may get a tougher roof and a better insurance position. For many homeowners, that’s a better long-term decision than repeating minor repairs on a roof that’s already vulnerable.
If a roof is already near the end of its useful life, pouring repair money into basic materials may only delay the larger decision.
A note for flat-roof commercial properties
Commercial roofs need a different conversation than steep-slope homes. In Frisco, TPO roofing systems are often a strong fit for flat or low-slope buildings because the membrane can be heat-welded at the seams and has a stated lifespan of 20 to 30 years with proper maintenance, compared with 10 to 15 years for traditional built-up roofing, according to Frisco TPO roofing performance details. That same source also notes the value of annual maintenance and coating strategies for extending service life.
Financing and claim shortfalls
Even when insurance is involved, homeowners still face deductibles, upgrade decisions, and non-covered items. Financing can make it easier to choose the correct repair instead of the bare-minimum fix.
Look for simple terms and clear disclosures. Soft credit checks, no prepayment penalties, and straightforward monthly options are often more useful than flashy teaser language.
If your claim decision doesn’t align with the documented damage, it helps to understand how property owners can dispute a denied or underpaid roof insurance claim. That kind of guidance can clarify your next move before you accept an outcome that doesn’t cover the actual scope of work.
Special Considerations for Solar-Equipped Homes
A standard reroof gets more complicated the moment solar panels enter the picture. Now the project involves roofing materials, attachment points, wiring, waterproofing, production continuity, and manufacturer warranty concerns. If you own a solar-equipped home, this isn’t a detail to mention late in the process. It should be part of the first conversation.
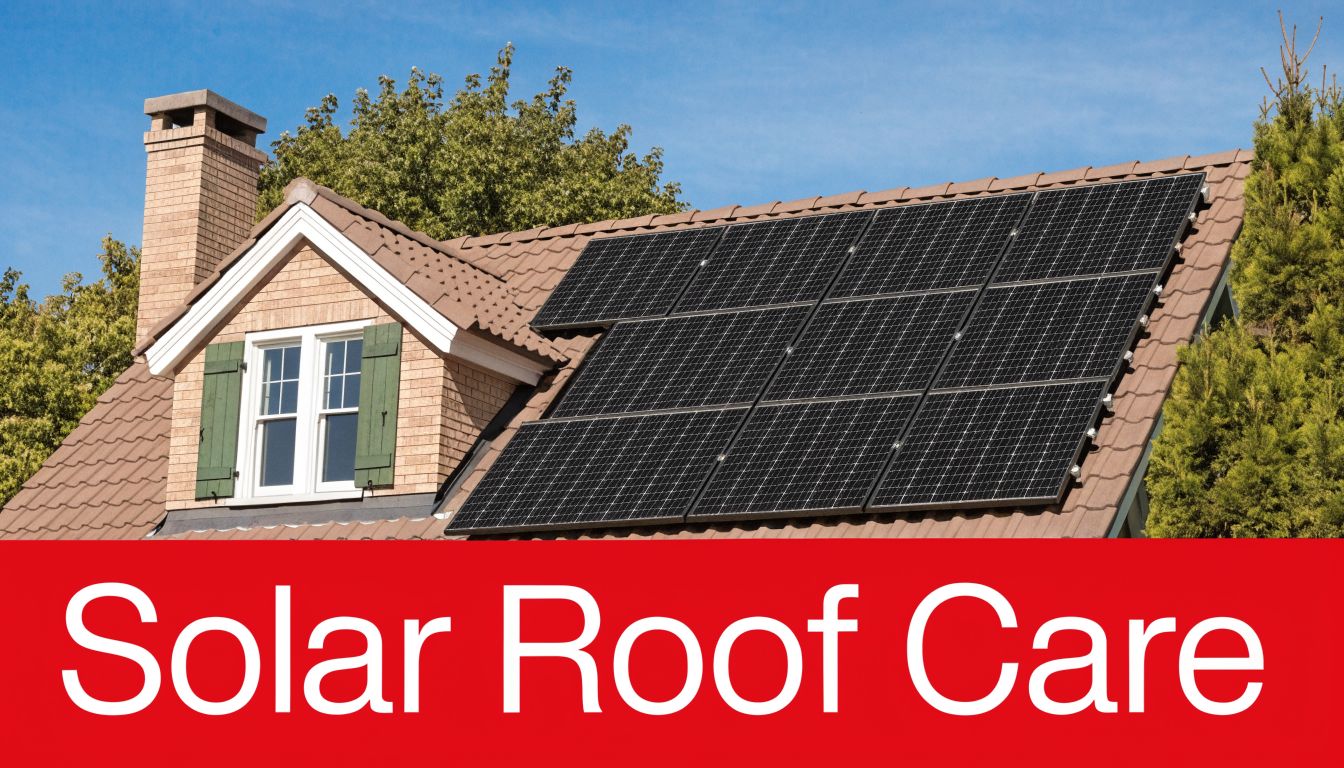
Texas has seen over 20% year-over-year growth in residential solar, and standard roofers often can’t handle the specialized detach-and-reset process. That puts homeowners’ $20,000+ solar investments at risk if the reroof is mishandled, as noted in this discussion of solar-related roofing gaps in Texas.
What detach-and-reset actually means
Detach-and-reset means the panel system is carefully removed before roofing work begins, then reinstalled after the roof is ready. That sounds simple until you look at what’s involved.
The crew has to account for:
- Panel and rail labeling: Components need to go back in the correct configuration.
- Roof penetration management: Every mount point has to be re-flashed correctly.
- Electrical coordination: Disconnect procedures and re-energizing steps have to be handled safely.
- Production protection: The goal is to preserve output and avoid damage during handling.
A roofer who says “we’ll just work around the panels” is usually telling you they don’t have a real plan.
Why this work gets mishandled
Roofers know roofing. Solar technicians know solar. Problems happen when neither side takes ownership of the interface between the two systems.
Common failure points include broken tile or shingle areas around mounts, reused flashing that no longer seals well, misplaced hardware, and panel handling that creates future performance or warranty issues. Even if the roof doesn’t leak right away, poor mount detailing can show up later.
For homeowners preparing for this kind of project, this guide to solar panel removal for roof repair helps explain what should happen before, during, and after the reroof.
Solar homes need one coordinated plan. If the roofing scope and the solar scope are treated as separate afterthoughts, the homeowner ends up carrying the risk.
The right mindset for solar reroofing
Treat the roof as the foundation for the solar system, not just the surface under it. If the roofing work is incomplete, the solar reset won’t stay trouble-free. If the solar reset is sloppy, the new roof can be compromised at every mount point.
That’s why the best detach-and-reset work feels organized rather than dramatic. Good labeling, clean sequencing, careful flashing, and final testing beat improvisation every time.
How to Choose a Licensed and Insured Frisco Roofing Contractor
The biggest difference between a reliable contractor and a storm chaser usually isn’t what they say on day one. It’s what they can still support months later if you need documentation, follow-up service, or warranty help.
A reputable Frisco roofer should welcome verification. If they seem irritated when you ask for insurance paperwork, a local address, or a written scope, move on.
What a dependable contractor should show you
Use this as an essential screening list:
- Proof of insurance: Ask for current general liability and workers’ compensation documentation.
- A real local presence: You want a company with an established service footprint, not a temporary hotel-room operation after a storm.
- A written scope of work: It should identify materials, affected areas, flashing details, cleanup expectations, and payment terms.
- Clear communication about repair versus replacement: You should hear the reasoning, not just a push toward the larger ticket.
- Experience with your roof type: Asphalt, metal, flat roofing, and solar-equipped roofs all demand different judgment.
What storm chasers tend to do
Storm chasers usually rely on speed and pressure. They knock doors right after weather events, promise to “cover your deductible,” rush signatures, and keep the paperwork vague enough to stay flexible later.
That creates avoidable risk.
| Reputable local contractor | Storm chaser warning sign |
|---|---|
| Explains scope in detail | Uses broad promises without specifics |
| Encourages insurance and contract review | Pushes immediate signature |
| Provides insurance documentation | Deflects when asked for proof |
| Has a stable service history | Appears only after storm events |
| Discusses repair limits honestly | Treats every roof like a total replacement |
Ask a simple question: “If I call you after the next storm, where will you be?” The answer tells you a lot.
Questions worth asking before you sign
A good contractor shouldn’t struggle with these:
- What exactly are you repairing, and what are you leaving in place?
- How will you handle flashing, penetrations, and accessories?
- Who supervises the work on site?
- What cleanup process do you use around driveways, beds, and fences?
- If my home has solar, who handles detach-and-reset responsibility?
- What workmanship coverage applies to the completed work?
The best contractors answer calmly and specifically. They don’t need a speech. They need a process.
Why local accountability matters
Roofing problems often don’t show up the same week the crew leaves. They appear during the next wind-driven rain, around a vent stack after sealant ages, or at a mount point after heat cycling. That’s why local accountability matters more than a polished sales presentation.
A contractor who plans to stay in the market has every reason to document carefully, build to code, and respond if something needs attention. A transient crew doesn’t.
Your Frisco Roof Repair Questions Answered
How long does a roof repair usually take
Many repairs can be completed in a day, especially when the issue is limited to shingles, flashing, or a roof penetration. Larger or more complex jobs can take longer if materials need to be matched, decking needs attention, or solar coordination is involved.
The right expectation is not speed alone. It’s controlled, weather-aware scheduling and complete cleanup at the end.
What should I do before the crew arrives
Move vehicles out of the driveway, clear patio items away from the work zone, and let your contractor know if you have pets that need extra caution around gates and noise. If you store valuables in the attic, it’s smart to cover them because roof work can shake loose dust and debris.
Inside the home, remove fragile wall décor from rooms directly below the work area if possible. Vibrations can travel farther than people expect.
Will the repair match my existing roof
Sometimes yes, sometimes only closely. Age, sun exposure, discontinued product lines, and color fade all affect match quality.
A responsible contractor should tell you early whether the goal is a near match, a functional repair with visible variation, or a broader scope to avoid a patchwork look.
What’s the difference between a workmanship warranty and a manufacturer warranty
A workmanship warranty covers errors tied to installation. A manufacturer warranty addresses defects in the roofing product itself, subject to that manufacturer’s terms.
Those are different protections, and homeowners should ask for both in writing when applicable.
Do I need to leave the house during roof work
Usually not. Most families stay home during repairs or replacement. That said, roof work is noisy, and it can be disruptive if you work remotely, have infants napping, or care for pets that react to pounding and foot traffic overhead.
How do I know the job is really finished
Don’t rely on “looks good from the driveway.” Ask for a final walkthrough, repair photos, and confirmation that the original issue was addressed. If your project involved documentation, claim paperwork, or solar coordination, make sure those loose ends are closed before final sign-off.
For homeowners who are curious about how contractors are adopting more organized communication and scheduling practices, these specialized services for Roofing Siding Contractors offer a useful look at the kinds of systems that can improve responsiveness and project coordination.
What if I’m still not sure whether I need repair or replacement
That’s common, especially after hail. The best next step is a documented inspection with photos and a written explanation of what’s damaged, what’s still serviceable, and where repair stops making practical sense.
You shouldn’t have to choose based on fear. You should be able to choose based on evidence.
If you need a calm, experienced second opinion on storm damage, leaks, insurance documentation, or a solar-panel reroof, Hail King Professionals is a strong place to start. Their licensed and insured team serves Dallas-Fort Worth and East Texas with free, same-day roof inspections, code-compliant repair and replacement options, and specialized detach-and-reset support for solar-equipped homes.