


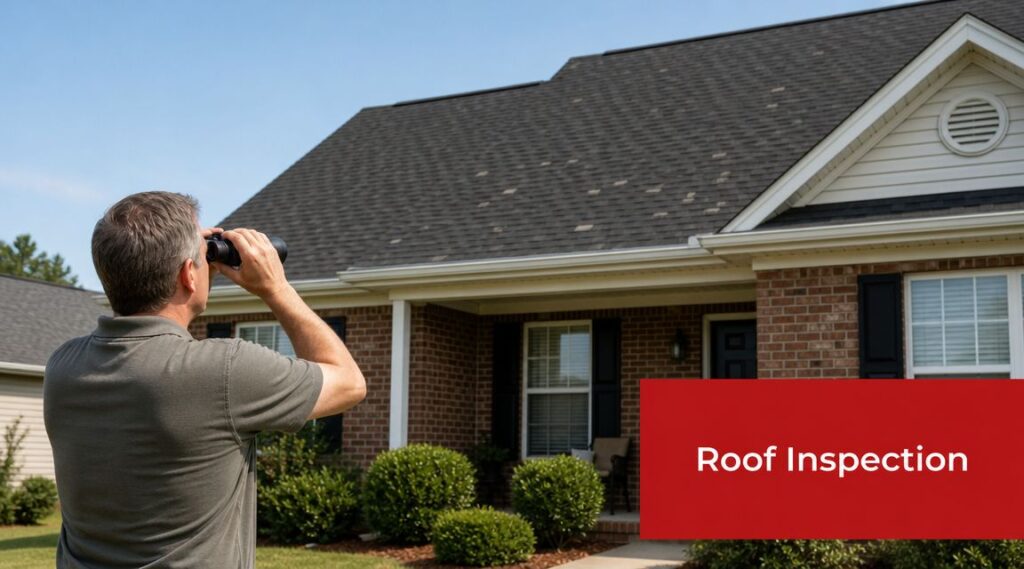
Roof Inspection After Storm: A Homeowner’s Guide
The storm has moved through. The hail stopped hammering the windows. You step outside and the whole neighborhood feels off. Branches are down, leaves are plastered against fences, and every homeowner on the block is staring up at a roof they can't really inspect from where they stand.
That's the moment when people make mistakes. They grab a ladder too fast, assume “no missing shingles” means “no damage,” or wait until a ceiling stain shows up weeks later. A smart roof inspection after storm starts slower than commonly believed. Safety first, evidence second, repairs third.
In North Texas, that approach matters. Hail, wind, heat, older materials, clogged drainage paths, and roof-mounted equipment can all change how a roof performs after bad weather. The goal isn't to panic. The goal is to make good decisions while the facts are still fresh.
First Steps After the Storm Passes
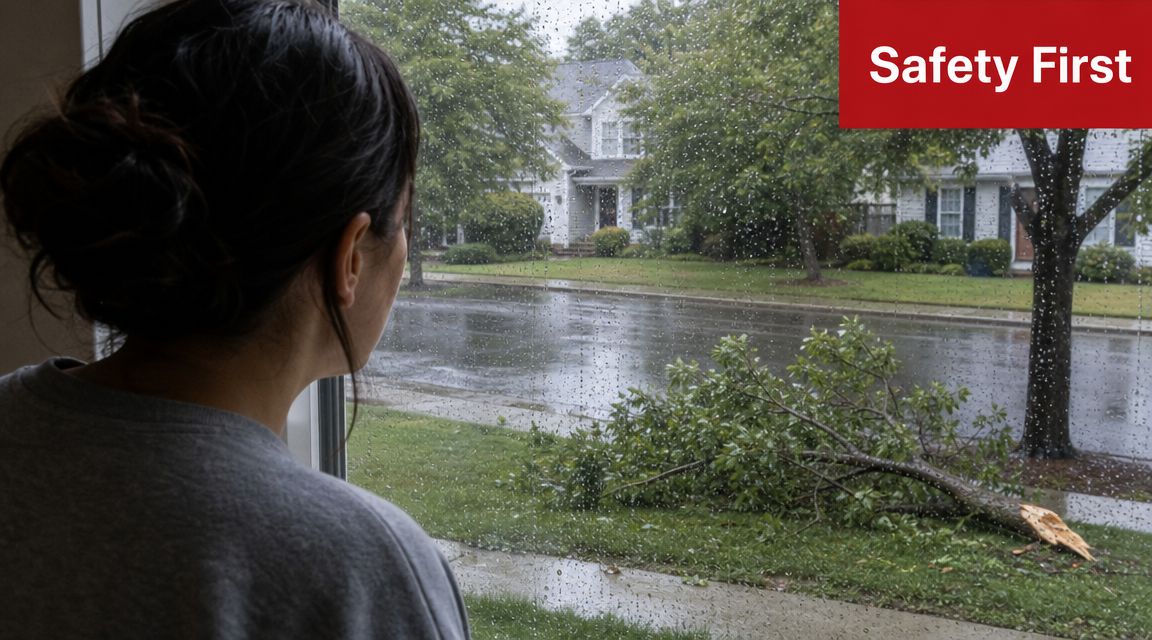
The first job isn't checking shingles. It's making sure your property is safe to walk around.
Start at a window or your front porch and scan the yard, driveway, and roofline. Look for downed power lines, hanging limbs, broken glass, displaced fence panels, and anything leaning where it shouldn't be. If a large branch is resting on the house or tangled near a service line, keep your distance and call the right trade before you start documenting roof damage.
If trees took a hit, a practical next read is this storm damage tree removal guide. It helps you think through unstable limbs and cleanup order before you put yourself under a damaged canopy.
Slow down before you inspect
A lot of storm damage gets worse because homeowners rush. Wet grass, hidden nails, slick concrete, and sagging gutters create enough risk on the ground. A storm-damaged roof is a different level of hazard.
The Texas State Office of Risk Management recommends that each roof be inspected at least once per year and that inspections also happen before and after inclement weather warnings. The same guidance says a quick walk-through should be done after a storm to confirm there's no known damage that could increase loss costs if left unaddressed, according to the Texas roof inspection guidance.
That's the right frame for homeowners too. This isn't a frantic emergency climb. It's a documented post-storm check.
What to do in the first hour
Use a simple order of operations:
- Check for immediate hazards. Power issues, tree damage, broken skylight glass, and active interior leaking come first.
- Walk the inside of the house. Look at ceilings, corners, attic access points, and around chimneys or vent penetrations for fresh moisture.
- Take broad exterior photos. Start before cleanup if you can do it safely.
- Avoid “testing” the roof yourself. Don't step on a surface that may be slick, bruised, or structurally compromised.
Practical rule: If you're debating whether it's safe to get on the roof, it isn't.
If you're dealing with hail specifically, this post-hail checklist for homeowners is useful for organizing your next moves without missing the basics.
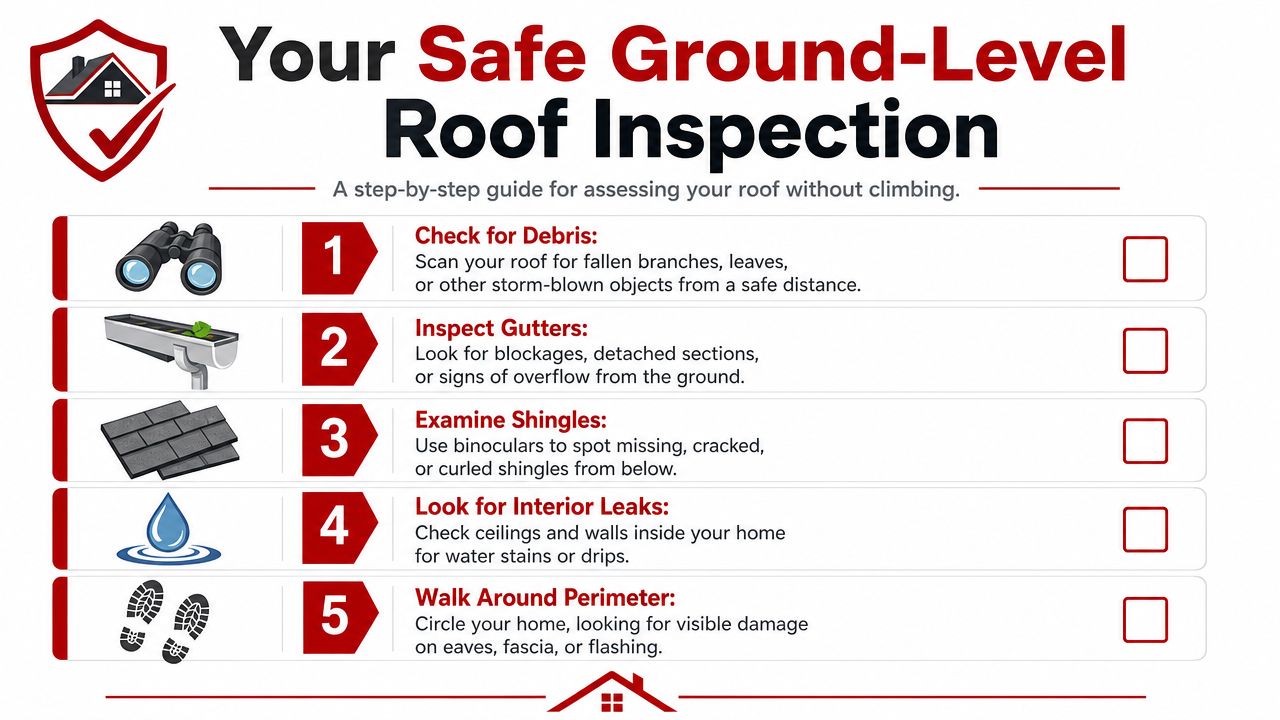
Your Safe Ground-Level Roof Inspection
Most homeowners can gather a lot of useful information without ever leaving the ground. That's how it should be.
A technically sound post-storm inspection starts with a ground-level perimeter survey, then documents collateral damage on gutters, downspouts, screens, siding, and vents before any roof access is attempted. Professionals also warn that the roof itself should be inspected only by a qualified pro because storm-damaged surfaces can be unstable, as explained in this post-storm roof damage assessment guide.
Don't climb onto a storm-damaged roof. A surface can look solid from the yard and still be slick, soft, shifted, or unstable.
What to look for as you circle the house
Make one slow lap around the property. Then make a second pass with your phone camera.
- Yard debris that came off the roof. Shingle tabs, chunks of ridge cap, metal flashing pieces, fasteners, and granules near downspouts all matter.
- Gutter and downspout problems. Look for fresh dents, separations at joints, sagging runs, bent screens, or overflow marks.
- Damage on soft metals and trim. Hail often leaves clues on vents, chimney caps, metal flashing, garage door trim, and window wraps.
- Screens and siding. Torn insect screens, chipped paint, cracked vinyl, and dinged fascia can support what happened above.
- AC fins and exterior equipment. If hail reached the condensing unit or roof accessories, that's useful context.
A lot of adjusters and inspectors pay close attention to that collateral evidence because it helps connect the event on the ground to conditions on the roof.
Use binoculars, not a ladder
From the driveway or backyard, use binoculars to scan roof planes. You're not trying to diagnose every issue. You're looking for visible irregularities that justify a closer professional review.
Watch for:
| Area | What you may notice from the ground |
|---|---|
| Shingle field | missing tabs, creases, dark impact spots, uneven lines |
| Ridge and hips | displaced cap shingles, exposed nails, lifted edges |
| Flashing zones | bent metal near walls, chimneys, skylights, and pipe boots |
| Valleys | trapped debris, torn metal, runoff paths that look disrupted |
| Eaves and soffits | water staining, sagging, loose trim, detached gutters |
Hidden damage often starts inside
One of the biggest mistakes after a hailstorm is assuming “the roof looks fine from the street, so we're good.” That isn't always how storm damage shows up.
Check the attic if you can do it safely. Look for water stains, damp insulation, mold, or sagging and buckling. Those are the kinds of hidden indicators that can appear even when the shingle surface doesn't obviously look torn up.
If you want a structured list to work from while you walk the property, this roof inspection checklist template gives you a cleaner way to note what you saw and where you saw it.
How to Document Damage for Insurance
A messy photo roll won't help much later. Good documentation tells a story. It shows where the damage is, what type of component was affected, and how widespread the issue appears to be.
Start with context shots before you zoom in.
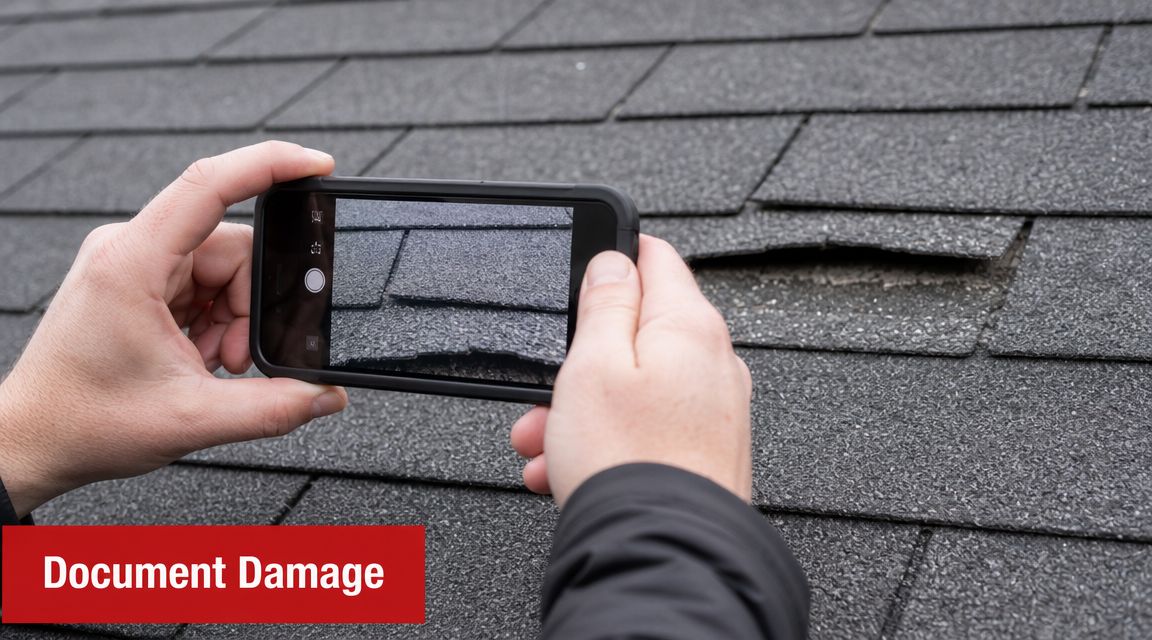
For insurance-quality assessment, the strongest benchmark is component-by-component documentation tied to cause and extent. Inspectors are trained to identify whether conditions are more consistent with hail or wind, record roof slope orientation, and capture close-up evidence of soft metals, vents, flashings, and shingle fields, as outlined in this insurance-focused roof inspection reference.
Build your photo set in layers
Think like a field inspector. Go wide first, then narrow.
Whole-house photos
Take one photo of each side of the house. Include roofline, gutters, siding, and any obvious storm debris.Elevation-specific damage
If the back slope looks worse than the front, document that separately. Same for one side that took more wind exposure.Collateral damage
Photograph gutters, downspouts, vents, screens, exterior AC equipment, fence lines, and detached accessories.Interior evidence
Ceiling stains, wet drywall corners, attic drips, and damp insulation belong in the file too.Close-ups with reference
If you can safely photograph a dented downspout or damaged screen from the ground, include a common object for scale.
Keep notes that match your photos
Photos are stronger when they're paired with simple notes. Write down the date, time, what part of the house you photographed, and what you think you're seeing. Don't guess beyond what you can observe. “Dent on rear downspout below west roof slope” is useful. “Total roof failure” isn't.
A helpful outside reference for homeowners navigating documentation and reporting is Awesim's insurance claims guide. It's worth reading because it reinforces the value of organized evidence rather than last-minute recollection.
Here's a short walkthrough that can help you think about what insurers and contractors usually need to see:
What doesn't work well
Some documentation habits create problems later:
- Random close-ups with no context. A tight shot of a dent means less if nobody can tell where it is.
- Cleaning everything before photos. Clear hazards if needed, but don't erase evidence first.
- One-angle reporting. Storm damage can be directional. Photograph multiple sides.
- Verbal memory only. If you saw water dripping once, write it down that day.
If you're preparing to open a claim, this storm damage insurance claim process guide can help you line up your photos, notes, and inspection timeline before the conversation starts.
When to Call a Professional Roofer
There's a point where a homeowner's visual check stops being enough. In my experience, that point comes sooner than often expected after a Texas hailstorm.
If you have active interior leaking, visible punctures, sagging areas, detached metal, repeated shingle displacement, or heavy collateral hits around the property, call a roofer. If the roof is steep, high, complex, or partially covered by trees or solar equipment, call a roofer. If you're not sure what you're seeing, that's also a valid reason to call.
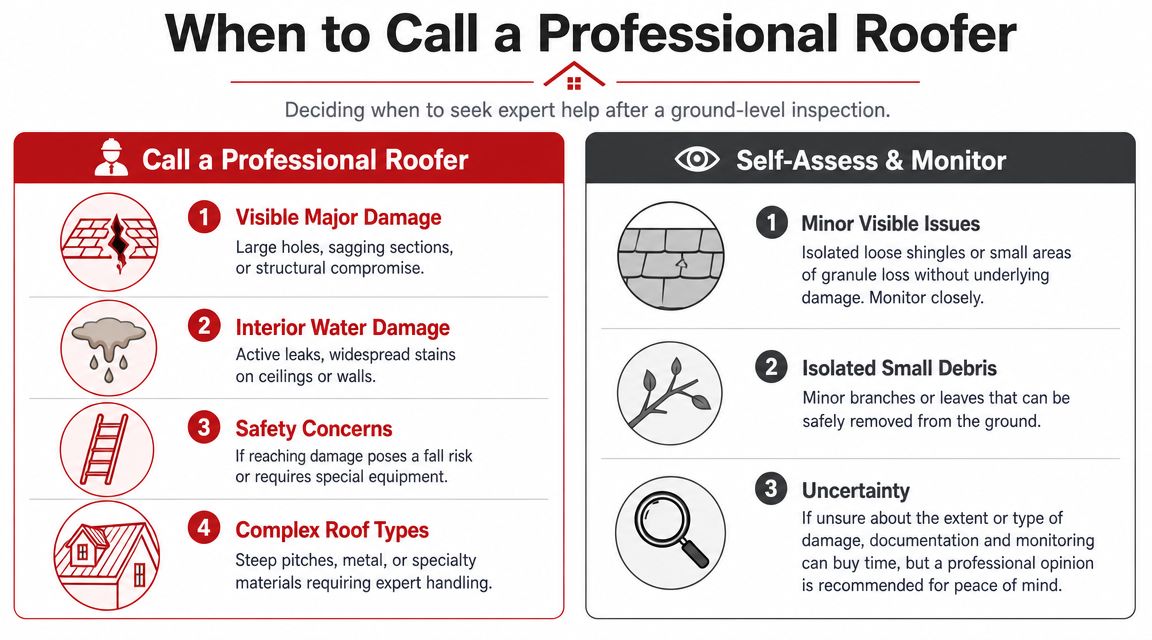
Good reasons to stop the DIY process
Some conditions deserve a professional inspection right away:
- Water is already inside. Once moisture is in the attic, ceiling cavity, or wall assembly, the roof issue isn't theoretical anymore.
- Damage appears subtle but widespread. Hail doesn't always rip shingles off. It can bruise surfaces, stress sealant lines, and show up more clearly on metal accessories than on the field itself.
- The roof has age-related vulnerabilities. Older systems, debris buildup, and roof-mounted equipment can all complicate drainage and wind performance after a storm.
- You need claim-grade evidence. A professional can connect what's visible to repair scope in a way a phone photo alone usually can't.
If you can see damage from the yard, assume there may be more that you can't see from the yard.
Cases where monitoring may be reasonable
Not every storm means immediate replacement. If all you have is light debris, no interior moisture, no visible displacement, and no collateral strikes you can identify, a documented watch period may be reasonable. The key word is documented.
That means photos, notes, attic checks, and a clear plan for what would trigger a call. New stain. New drip. Gutter separation. Granules collecting in unusual amounts. Those are the kinds of changes that move a roof from “monitor” to “inspect.”
Why local experience matters
DFW and East Texas roofs take a different beating than roofs in milder climates. Hail, high wind, heat cycling, and long storm seasons create weird mixed-damage situations. You might see a roof with no obvious missing shingles from the street, but impact marks on vents, dented gutters, and moisture starting in the attic.
That's why a local contractor should understand both roofing and storm documentation. Hail King Professionals provides roof inspections, repair or replacement options, and solar panel detach-and-reset services for homes where the roof can't be fully assessed until panel coordination is addressed.
What to Expect from a Professional Inspection
A proper inspection shouldn't feel rushed or salesy. It should feel organized.
Usually, the process starts with a conversation in the driveway. You explain what happened, where you noticed anything unusual inside, and whether you've already seen dents, debris, or leaks. The inspector then makes their own exterior pass before discussing roof access.
The inspection usually starts before anyone touches the roof
A good roofer doesn't jump straight onto the shingles. First, they walk the perimeter, look at gutters and downspouts, note damage on vents or screens, and compare exposures from one slope to another. That early read often tells them whether the event looks more like wind, hail, or a mix.
If the roof is unsafe to access immediately, modern crews may start with a drone survey. That matters because drones can rapidly inspect storm-damaged roofs without the safety risk of climbing unstable surfaces, and they can capture systematic imagery useful for reports and insurance support, as explained in this drone roof inspection overview.
What a thorough roofer is checking
From the homeowner's side, this is what you should expect to hear about after the inspection:
- Surface condition such as displaced shingles, impact areas, flashing movement, and ridge damage
- Accessories and penetrations including vents, pipe boots, chimneys, and metal details
- Drainage-related concerns like clogged valleys, backed-up gutters, and overflow evidence
- Interior or attic tie-in if your leak symptoms match a roof feature above that area
A credible inspection also separates storm-related damage from general wear. Those aren't the same thing, and blending them together doesn't help anyone.
A useful roof report answers three questions. What was damaged, what likely caused it, and what needs to happen next.
The end result should be clear
You should receive a plain-language explanation of findings and photos that support those findings. If repairs are possible, the roofer should say so. If replacement is the more realistic path, they should explain why without turning the conversation into pressure.
That clarity matters most on roofs where hidden damage is possible. A homeowner can't make a good insurance or repair decision from vague comments like “it's pretty rough up there.” You need specifics tied to actual components.
Your Next Steps for Solar Panels and Repairs
Solar changes the inspection and repair plan. That's the part many articles skip, and it's where homeowners can lose time.
On a solar-equipped home, the panels may hide impact points, flashing issues, and roof deck problems beneath the array. Existing guidance on post-storm roofs rarely covers this well, even though solar arrays can conceal damage and reroofing often requires coordination for detach-and-reset before a complete roof assessment or replacement can happen, as noted in this roof inspection discussion covering solar complications.
If your home has solar
Don't assume the panels “protected” everything underneath. They may shield some areas while making others harder to inspect.
Take photos of:
- Panel surfaces that show cracks, chips, or obvious impact
- Mounting points and visible hardware from accessible ground angles
- Conduit and wiring runs where disturbance is visible
- Inverter and related equipment if the storm affected that side of the home
If reroofing is needed, the work usually has to be sequenced. Panels come off, the roof work gets completed, then the solar system gets reinstalled and checked. That coordination should happen before material delivery day, not after a tear-off has started.
Temporary protection and repair planning
If water is entering the home, ask the contractor what temporary dry-in options are appropriate. The right short-term protection can limit interior damage while claim review or scheduling moves forward. Don't try to improvise major temporary repairs on a steep or wet roof.
For non-solar homes, the path is simpler but still needs order: inspect, document, determine scope, then schedule repair or replacement. For solar homes, add one more step. Coordinate all trades before locking the start date.
A roof inspection after storm isn't just about finding missing shingles. It's about catching the damage that hides under accessories, around penetrations, inside the attic, and beneath systems that weren't part of older roofing conversations.
If you're in Dallas-Fort Worth or East Texas and want a clear next step, Hail King Professionals can inspect the roof, document storm-related findings, explain repair versus replacement options, and coordinate solar panel detach-and-reset when a reroof requires it.