


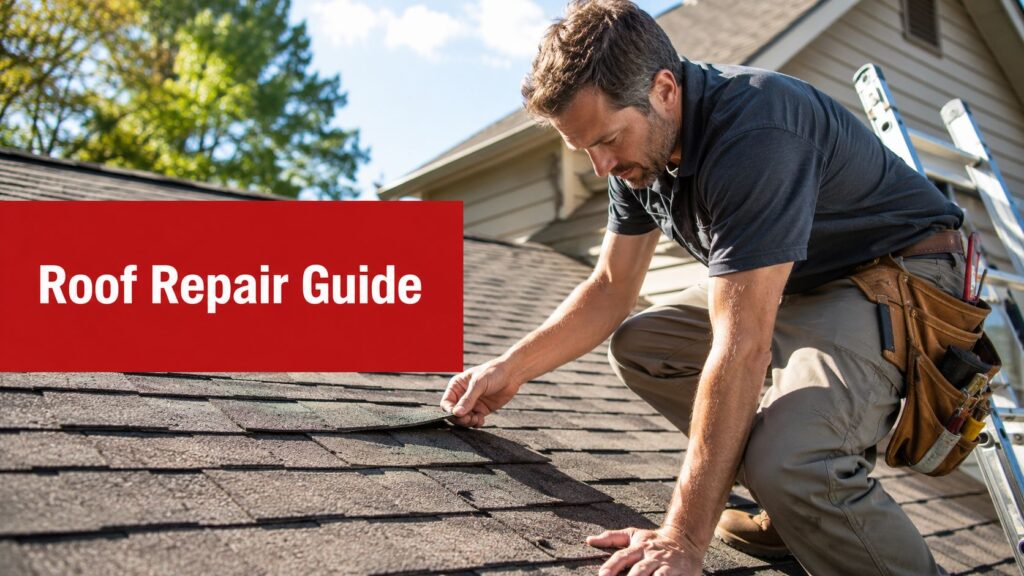
Asphalt Shingle Roof Repair: A DFW Homeowner’s Guide
A North Texas storm can move through fast. The hail stops, the wind dies down, and then you notice a water spot on the ceiling, shingles in the yard, or granules collecting near the downspout.
That's when most homeowners start asking the same questions. Is this a small asphalt shingle roof repair, or the start of a bigger problem? Can you stop the leak yourself tonight? Should you call your insurance company first, or a roofer first?
In DFW, those questions matter because heat, hail, and strong wind expose weak spots quickly. A repair that works on a mild day can fail when old shingles turn brittle or when disturbed seal strips don't bond back down the way they should. The right move is usually a calm one. Protect the house, document the damage, and make decisions based on what the whole roof system is doing, not just the first missing shingle you can see.
Your First Steps After the Storm A Safe Damage Assessment
The first rule is simple. Stay off the roof. After a storm, shingles may be slick, loosened, or lifted in ways you can't see from the ladder. In Texas weather, material condition also changes repairability. Cold shingles can turn brittle, and seal strips respond differently after heat exposure, which is one reason a “simple” patch on an older roof may not hold reliably, especially in storm-prone markets like Texas, as noted in this repairability and weather overview.
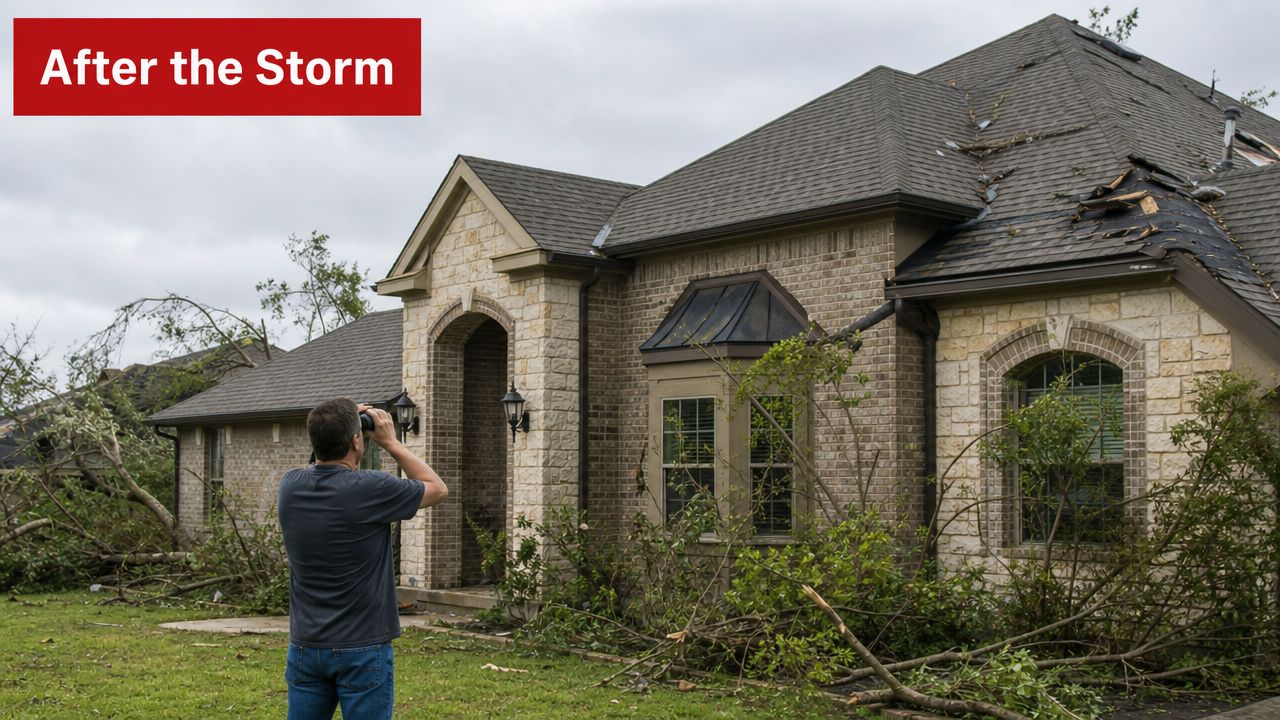
What to check from the ground
Use binoculars, walk the full perimeter, and look at every slope from more than one angle. Damage often shows up differently depending on light and viewing direction.
Look for these signs:
- Missing shingles that leave dark gaps or exposed underlayment
- Creased tabs where wind lifted a shingle and bent it sharply
- Dented vents, gutters, or metal flashing that suggest hail impact
- Uneven roof lines that may point to sagging or deck issues
- Granules in gutters and at downspouts, especially after hail or strong wind
- Debris impact areas from limbs or blown objects
Inside the house, check the attic if it's safe to enter. Follow the underside of the roof decking with a flashlight. Water rarely drops straight down from the exterior entry point, so look for dark staining, wet insulation, or fresh drip paths.
Practical rule: If you can see damage from the yard, there's often more going on than the one visible spot.
Document before anything gets moved
Take photos wide, then close. Photograph the whole roofline, the yard, dents on soft metal, any interior staining, and any debris that hit the house. Don't throw away damaged pieces right away if they fell to the ground. They can help show what happened.
A simple checklist helps:
- Take photos from each side of the house.
- Record the date of the storm.
- Note where you saw leaks inside.
- Save receipts if you buy anything for emergency protection.
- Write down what changed since before the storm.
If you want a second checklist to compare against your notes, this roof inspection after storm guide is useful for organizing what to look for before an inspection is scheduled.
Know when to call right away
Some situations aren't “watch and wait” issues. Call for professional help quickly if you see active leaking, exposed decking, lifted flashing, tree impact, or multiple damaged areas on different slopes. Those patterns often signal broader wind or hail stress, not just one isolated repair.
For a broader homeowner checklist on the first restoration steps after severe weather, FirstMention's storm damage guide is a solid reference. It's especially helpful if you're trying to think clearly while dealing with water intrusion, cleanup, and insurance calls all at once.
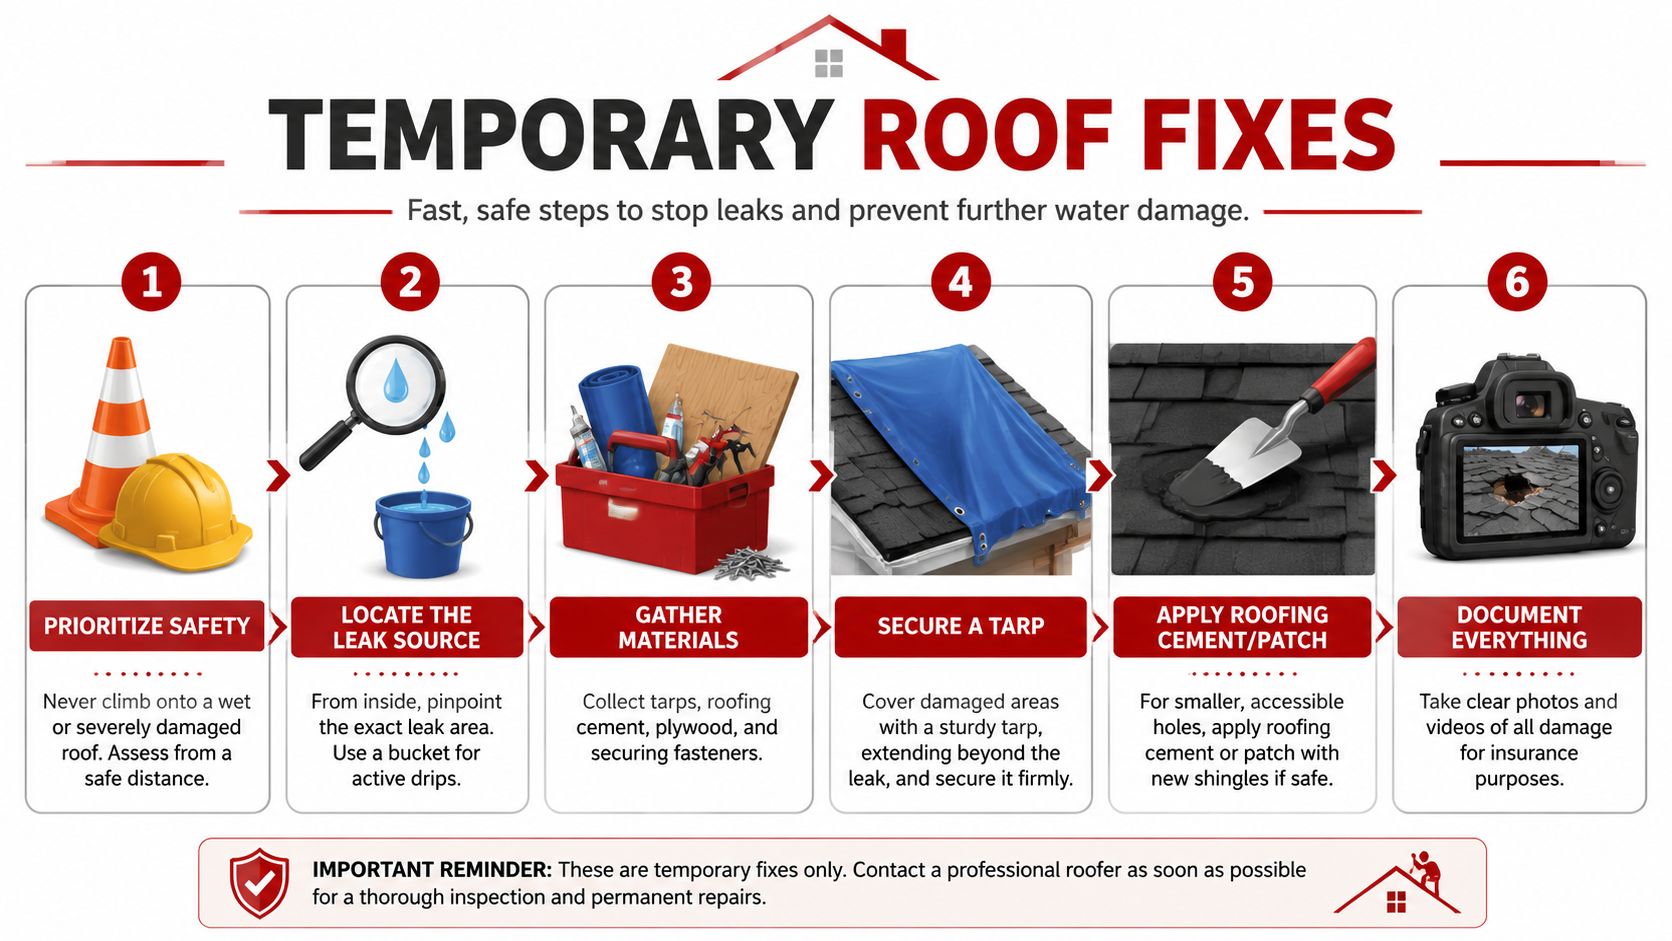
Temporary Fixes to Prevent Immediate Water Damage
A temporary fix is roof first aid. Its job is to slow or stop interior water damage until a proper repair can be done. It is not the same as a finished asphalt shingle roof repair, and treating it like one is where many homeowners get into trouble.
Start inside before you touch the exterior
If water is coming in, protect the living space first. Put a bucket under active drips. Move furniture, rugs, electronics, and wall art away from the wet area. If the ceiling is bulging with trapped water, that's a sign to proceed carefully and get help if you're unsure. The goal is to reduce interior damage while you line up the next step.
Two temporary fixes that make sense
If the roof is dry enough, low enough, and safely accessible from a stable ladder position, homeowners sometimes manage a limited short-term patch. Keep the scope narrow.
- Use a tarp for larger damaged areas. The tarp needs to extend beyond the visible damage so water sheds past the weak spot instead of under it. Secure it firmly so wind doesn't turn it into a sail.
- Use roofing cement only for a very small, accessible issue. This can help hold down a lifted tab or cover a small exposed point temporarily, but it won't correct hidden nail problems, broken seal lines, or damage under the surface.
A proper shingle repair takes more than sliding in a replacement piece. The process requires loosening adjacent shingles, removing the damaged shingle and hidden nails, installing the new one correctly, and then re-sealing the disturbed area. If sealing is incomplete, the patch may look fine from the ground and still fail under wind or water, as explained in this step-by-step shingle repair guide.
Here's a visual walkthrough of temporary roof protection methods many homeowners find helpful before the permanent work is scheduled:
What to keep in a storm kit
A basic roof emergency kit doesn't need to be fancy. It does need to be ready before storm season.
Keep these items on hand:
- Heavy-duty tarp sized large enough to cover beyond the damaged area
- Roofing cement for limited temporary use
- Work gloves to handle sharp debris and rough surfaces
- Utility knife for trimming tarp material
- Buckets and plastic sheeting for indoor leak control
- Flashlight for attic checks during power loss
A temporary patch buys time. It doesn't answer why the roof failed.
What not to do
Don't walk a wet roof. Don't nail random shingles back down without understanding where the nail line and overlap pattern belong. Don't smear sealant everywhere and assume the leak is solved. And don't ignore flashing just because the missing shingle is obvious. Water often gets in where metal transitions failed, not where your eye lands first.
DIY Repair vs Calling a Professional
Some asphalt shingle roof repair jobs are within reach for a careful homeowner. Most storm-related repairs in DFW aren't. The hard part isn't replacing a piece of material. The hard part is knowing whether that visible damage is the whole problem.
When DIY can be reasonable
DIY makes sense in a narrow lane. Think one accessible shingle, low roof slope, dry conditions, and no sign of widespread hail or wind damage. You also need the right replacement shingle, the right tools, and the patience to stop if the repair starts exposing more than expected.
If you're considering that route, read a grounded homeowner perspective first. This DIY roof repair article is useful because it frames the actual risks, not just the appeal of saving money.
When calling a roofer is the smarter move
Call a professional if any of the following is true:
- The leak is active inside. Water intrusion can travel and spread damage fast.
- The roof is steep or high. Access risk changes the decision immediately.
- Storm damage appears in multiple areas. That's often a system problem, not a single-tab problem.
- Flashing, valleys, ridges, or penetrations are involved. Those details cause many of the leaks homeowners misdiagnose.
- The shingles are older or brittle. Disturbing surrounding courses can crack more tabs than you started with.
Cost matters. A professional asphalt shingle roof repair averages $1,174, with most homeowners paying between $366 and $1,984, and labor commonly runs $45 to $75 per hour according to this asphalt shingle repair cost guide. Those numbers don't mean every job should go to a pro. They do give you a real benchmark when you're weighing material-only DIY against the risk of misdiagnosis, fall exposure, or a failed patch.
DIY vs Professional Shingle Repair Decision Matrix
| Factor | DIY Repair | Professional Repair (Hail King Professionals) |
|---|---|---|
| Best use case | One small, visible issue on a safe-to-access area | Storm damage, leaks, flashing issues, multi-area damage |
| Upfront cost | Lower if you already have materials and tools | Higher than materials-only, but includes labor and diagnosis |
| Safety risk | Homeowner takes the ladder and roof risk | Crew handles access and repair procedures |
| Damage diagnosis | Easy to miss surrounding failures | Includes evaluation of adjacent shingles and roof details |
| Material matching | Hard to match size, color, and exposure correctly | Better chance of matching and fitting the repair properly |
| Durability | Depends entirely on skill and roof condition | More consistent when the repair is done to manufacturer method |
| Insurance support | Limited documentation value | Better fit when claim documentation is needed |
| Long-term outcome | Can work for a truly small issue | Better choice when the real goal is preventing repeat leaks |
One other practical reality. Good contractors get busy after a major storm, and companies that support roofers behind the scenes often shape how quickly homeowners get called back. If you're curious how some roofing companies handle incoming demand during peak storm periods, roofing lead generation services give a useful look at that side of the business.
If you're not sure whether it's a repair or a claim, don't guess from the driveway. Get it inspected.
Understanding Professional Asphalt Shingle Repair Techniques
A professional repair starts by preserving the surrounding roof, not by tearing into it. That's the difference many homeowners don't see from the ground.
What a correct repair actually involves
The damaged shingle is usually not the only thing holding the repair together. The surrounding courses overlap it, seal to it, and may have nails penetrating into the section below. A correct repair means carefully breaking the seal bond on the shingles above, removing the nails from the damaged shingle and any upper-course nails that pin it in place, then sliding in a matching replacement.
Manufacturers also emphasize fastening and sealing details. One field guide notes four nails minimum, while another recommends six nails per shingle for better redundancy, and manually re-sealing the tabs with asphalt cement is preferred because waiting for weather exposure alone is unreliable, according to this manufacturer repair guidance.

Why Texas roofs complicate the work
North Texas roofs often have a mix of sun aging, storm stress, and heat-cycled sealant behavior. That changes how easily a tab lifts, whether an old shingle cracks during handling, and how well a disturbed area seats back down after repair.
A seasoned roofer watches for:
- Brittle tabs that split while being lifted
- Seal strips that don't re-bond well after disturbance
- Misaligned exposure that reveals prior installation issues
- Hidden nail paths that can leave future leak points if missed
What separates lasting work from a cosmetic patch
A cosmetic patch can make the roof look repaired. A lasting repair restores water shedding, fastening pattern, and seal integrity.
That means the roofer should check more than the replacement area itself:
- Is the new shingle aligned to the existing exposure?
- Were all trapping nails removed?
- Were broken seal lines re-sealed?
- Do nearby flashing edges need attention too?
When a homeowner asks what they're paying for, this is the answer. Diagnosis, controlled shingle removal, correct fastening, and proper re-sealing are what keep one missing shingle from becoming the next interior leak.
Navigating Hail and Storm Damage Insurance Claims in Texas
Insurance gets stressful when homeowners focus on the first visible symptom and miss the underlying issue. A single missing shingle may be all you notice from the yard. The actual question is whether the roof has localized damage or a broader failure pattern involving flashing, nail placement, underlayment, or even improper installation.
That matters because expert leak diagnosis starts with the whole system. Signs like incorrect exposure or misalignment can point to installation problems that aren't obvious until a storm exposes them, as explained in this roof installation warning-sign guide.
The order of operations matters
Homeowners often ask whether to call the insurer first or the roofer first. In practice, the cleaner sequence is usually to document the damage, make temporary protection if needed, and get a professional roof inspection so you understand what the adjuster is looking at.
This overview of the storm damage insurance claim process is helpful if you want a plain-language view of how those steps usually unfold.
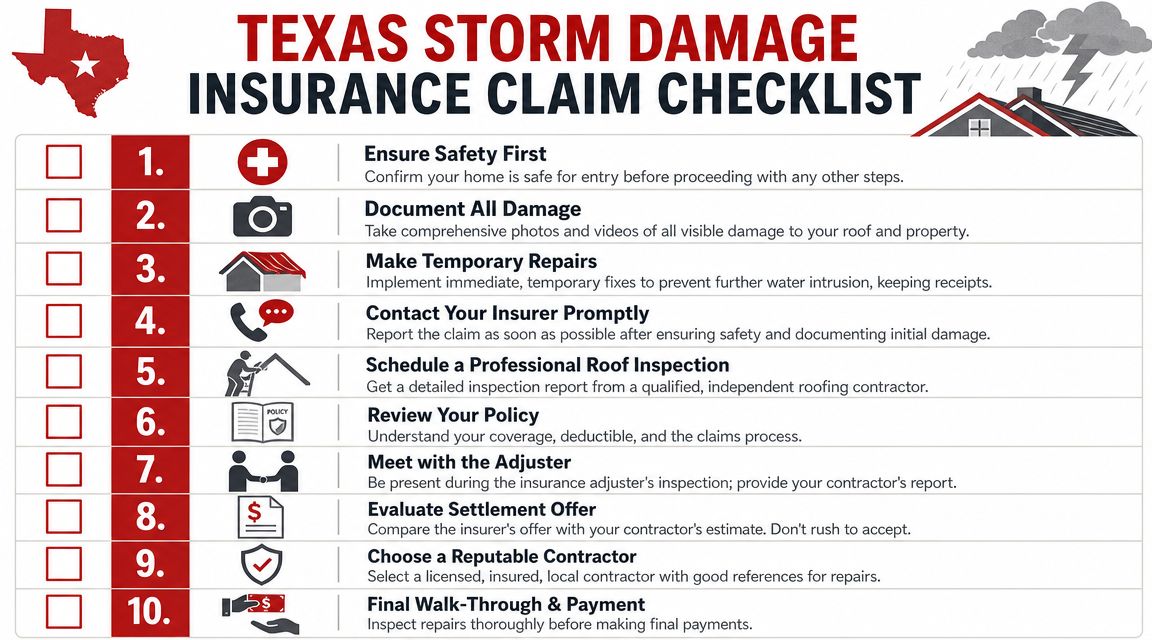
A workable claim process looks like this:
- Document the condition early. Take photos before cleanup changes the scene.
- Prevent additional damage. Use temporary protection and save receipts.
- Review your policy language. Know your deductible and how settlement paperwork is structured.
- Meet the adjuster with documentation ready. Organized photos and inspection notes reduce confusion.
- Compare scope, not just price. The issue is whether all damaged components were included.
Your roofer and the adjuster do different jobs
Often, homeowners misunderstand this point. The insurance adjuster evaluates the claim under the policy. The roofer evaluates the roof under field conditions. Those are not the same role, and they don't ask the same questions.
The adjuster may focus on covered damage. The roofer should be asking whether the roof system is repairable as-is, whether the shingle pattern matches after repair, whether flashing has been compromised, and whether the visible damage reflects a more widespread event.
The claim isn't just about proving one shingle blew off. It's about showing what the storm changed and what the roof now needs to perform properly again.
What to say and what to avoid
Be factual. Report what you observed and when you observed it. Keep your language clean and simple.
Use statements like:
- “We had a storm on this date, and I found these conditions afterward.”
- “There is active leaking in this room.”
- “I have photos of the roofline, gutters, and interior staining.”
Avoid guessing at cause if you don't know. Don't minimize visible damage because you hope it's small. Don't agree on scope before the roof has been inspected thoroughly.
Keep every piece of paper
Storm claims generate a trail fast. Save inspection notes, tarp invoices, interior mitigation receipts, claim emails, and photos in one folder. If the insurer asks follow-up questions, you want one clean record.
In DFW, the homeowners who manage claims best usually do three things well. They document early, they separate temporary protection from permanent repair, and they get a roof-level opinion before accepting a scope that only addresses the most obvious surface damage.
From Repair to Replacement Preparing for Your Roofing Project
The repair-versus-replace decision is usually financial, but it's also practical. Asphalt shingles hold about 73% of the U.S. residential roofing market, and a typical asphalt shingle roof replacement on a single-family home costs $5,000 to $10,000, according to this roofing market and replacement cost overview. That's why getting a repair decision right matters. A solid repair can extend service life and delay a major expense. A weak repair can waste money and leave you paying twice.
Prepare the property before work starts
A smoother project starts at ground level. Before the crew arrives:
- Move vehicles out of the driveway so material delivery and debris pickup are easier
- Protect patio furniture and fragile items near the house
- Keep pets and kids away from work zones
- Mark delicate landscaping if there are special areas you want the crew aware of
- Clear attic access if leak tracing or interior review may be needed
For homeowners comparing contractors, reputation research helps. A public review collection like this Testimonial platform for A1 Roofing shows the kind of details worth paying attention to in customer feedback, such as communication, cleanup, scheduling, and follow-through.
When replacement makes more sense
A repair makes sense when damage is limited, surrounding shingles remain serviceable, and the roof system is otherwise sound. Replacement usually becomes the better move when repairs would be scattered across multiple areas, when matching becomes unrealistic, or when the roof has enough age and weather stress that each new patch disturbs more weak material.
Texas homeowners should also think beyond today's leak. If a roof is already due for major work, it can be smarter to invest in a system that's better suited to hail and heat rather than paying for repeat patching.
One practical option many homeowners explore is a contractor that can handle the full scope without splitting the job across multiple trades. Hail King Professionals provides roof inspections, repair and replacement work, and related exterior services that often come up during storm recovery, such as gutters or detach-and-reset coordination for solar-equipped homes.
What to expect from a well-run project
Good roofing work should feel organized. You should know where materials will go, how access will be handled, what parts of the yard need protection, and what the cleanup plan is before the first bundle is moved.
If you're weighing asphalt shingle roof repair against replacement, don't make the call based only on what's visible from the street. Make it based on repairability, matching, leak risk, and what protects the home's value over the next storm season, not just the next week.
If your roof took hail or wind damage and you want a clear answer on repair versus replacement, Hail King Professionals can inspect the roof, document visible and hidden problem areas, and help you understand the next step without guesswork.