


Commercial Roof Inspection Services: Essential Guide 2026
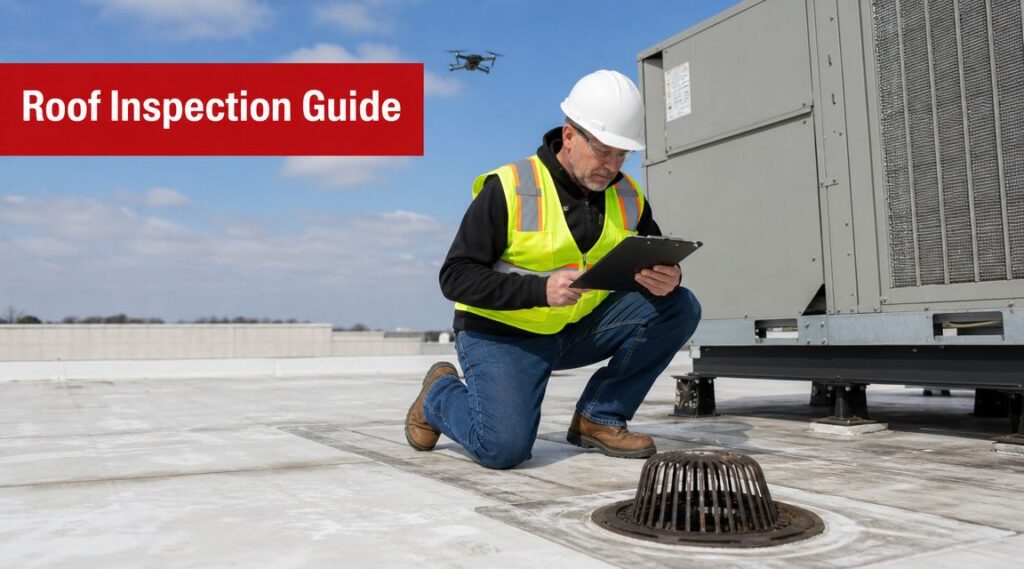
A facility manager usually starts thinking seriously about the roof at the worst possible moment. Water shows up over inventory. A ceiling tile bows. An employee sends a phone photo from a warehouse aisle. Then the scramble begins. Who do you call first, what failed, is it isolated, and can you prove whether this came from deferred maintenance or a recent storm?
That's why smart operators treat commercial roof inspection services as a decision tool, not a line-item chore. A good inspection gives you evidence. A bad one gives you vague photos, generic comments, and another problem six months later. If you manage a retail center, warehouse, office building, school, church, or industrial site, you need a repeatable inspection strategy that helps you prevent leaks, defend claims, and plan capital work with confidence.
Why Your Commercial Roof is Your Most Critical Asset
At 2 a.m., a roof leak is never just a roof leak. It can shut down a production line, soak inventory, trip electrical concerns, stain tenant space, and trigger a chain of calls to ownership, insurance, and vendors before sunrise.
That is why the roof deserves to be managed like a business asset, not a maintenance afterthought.
Your commercial roof protects far more than the deck and membrane. It protects revenue, tenant retention, safety, interior systems, and the usable life of insulation, drywall, and finishes below. Once water gets past the assembly, repair costs spread fast because you are no longer paying only for roofing work. You are paying for interior restoration, operational disruption, and often emergency response rates.
If moisture stays trapped, the risk expands again. Wet insulation loses performance. Indoor air quality can decline. Mold can start in concealed spaces long before staining appears on a ceiling tile. Facility teams dealing with chronic leaks should understand that downstream exposure early, and Restore Heroes' commercial mold guide is a useful reference on what happens when moisture problems move beyond the roof line.
Inspections protect budgets as much as buildings
A commercial roof inspection is a financial control. It helps you decide whether you need a simple repair, targeted moisture testing, a drainage correction, or a capital replacement plan. It also gives you dated documentation that matters when you are defending a budget request or supporting a claim after a storm.
Industry guidance from the National Roofing Contractors Association consistently points facility owners toward regular inspection and maintenance because commercial roofs fail at details, deferred repairs, and drainage points long before total replacement is obvious. That is the practical value of inspection services. They show you where money should go now, what can wait, and what needs to be tracked over the next budget cycle.
The inspection method matters too.
Drone surveys, infrared moisture scans, and hands-on visual inspections each answer different questions. A facility manager who picks the wrong type gets incomplete information and makes weaker repair and replacement decisions. The right inspection gives you evidence you can use for reserve planning, warranty discussions, insurance documentation, and long-term asset management.
A large asset deserves a higher standard of proof
Commercial roofing is a major property expense category, and the broader market reflects that scale. IBISWorld's roofing contractors market research shows a large, established U.S. roofing contractor sector, which means buyers should expect organized reporting, clear photo documentation, and defensible repair recommendations.
Do not accept a vague walk-through and a few cellphone photos.
A proper inspection should help you answer practical questions. What is actively failing? What needs repair this quarter? What condition issues can be monitored? Which findings justify capital planning instead of patching? And if a storm claim or ownership review lands on your desk, what evidence will hold up under scrutiny?
What a Thorough Commercial Roof Inspection Actually Covers
A proper roof inspection is like a full physical exam. If someone only glances at the roof surface, they're skipping the parts that often fail first. On commercial roofs, trouble regularly starts at transitions, terminations, drains, and penetrations.
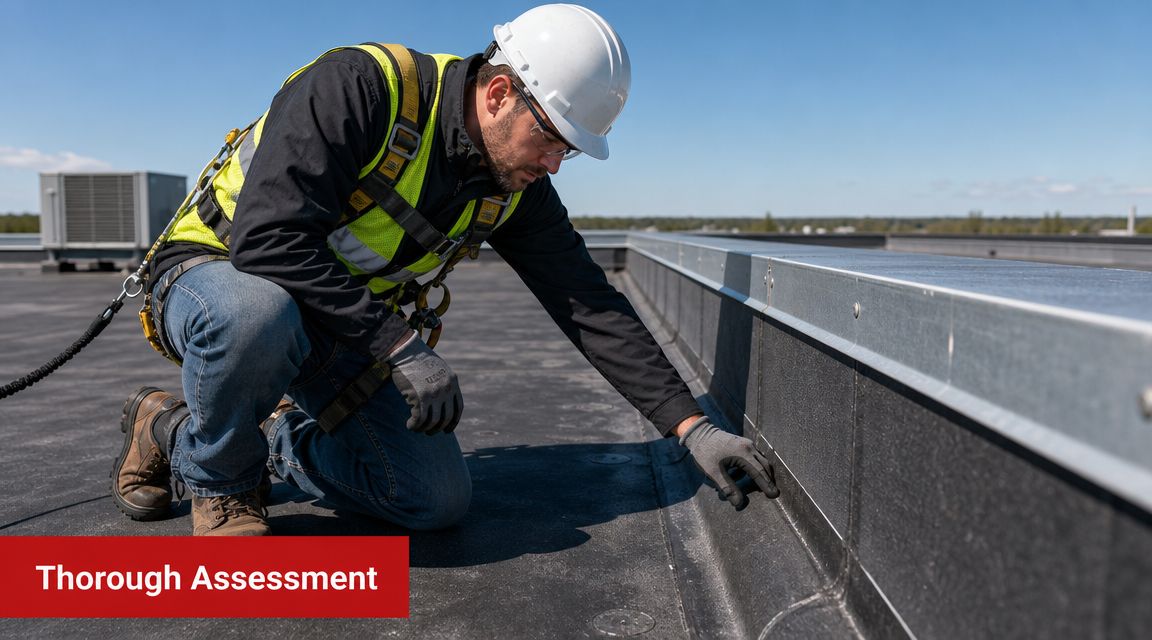
A technically thorough commercial roof inspection must document the full assembly because failures often originate at joints, flashings, drainage systems, and penetrations rather than in the field of the membrane, as explained by Viking Roofing's commercial roof inspection guidance.
The roof field is only one part of the story
Start with the membrane or roof covering itself. On a single-ply system, that means checking for punctures, open laps, shrinkage, surface wear, and previous patching quality. On metal, look for panel movement, fastener issues, failed sealant, and corrosion. On modified bitumen or built-up roofs, look for blistering, splitting, exposed reinforcement, and surface deterioration.
Then inspect the components that usually create leak paths faster than the field area does:
- Seams and laps: Open seams can admit water long before a broad membrane failure is obvious.
- Flashings: Base flashings, counterflashings, and transition details around walls fail under movement and weather exposure.
- Penetrations: Vents, pipes, conduit stands, skylights, and HVAC curbs need close review because seals break down at these locations.
- Edge details: Perimeters, terminations, and coping conditions matter because wind and water both exploit weak edges.
Drainage and attachment deserve special attention
A roof that doesn't drain well won't age well. Standing water stresses seams, exposes weak areas, and accelerates deterioration around drains and low spots. Inspectors should review:
| Area | What should be checked | Why it matters |
|---|---|---|
| Drains and strainers | Blockage, secure attachment, ponding around bowls | Drainage failure often turns a manageable issue into a recurring leak |
| Scuppers and gutters | Debris, slope, discharge path, overflow signs | Water has to leave the roof predictably |
| Fasteners and attachment points | Back-out, corrosion, loose plates, movement | Attachment failure can telegraph bigger system stress |
| Ponding zones | Surface wear, staining, algae, soft areas | Low areas often reveal hidden deterioration first |
Don't accept “looks good overall” as a conclusion. Ask what was checked, what was photographed, and what was physically tested.
The inspector should look inside the building too
A complete inspection doesn't stop at the roof hatch. Interior ceilings, upper walls, deck staining, and signs of moisture intrusion matter because leak entry points and visible interior symptoms often don't line up directly. If the inspector doesn't connect exterior findings with interior evidence, you may miss the actual path water is taking.
That's the difference between a cursory visit and a professional assessment. The first gives you an opinion. The second gives you a building-specific condition record.
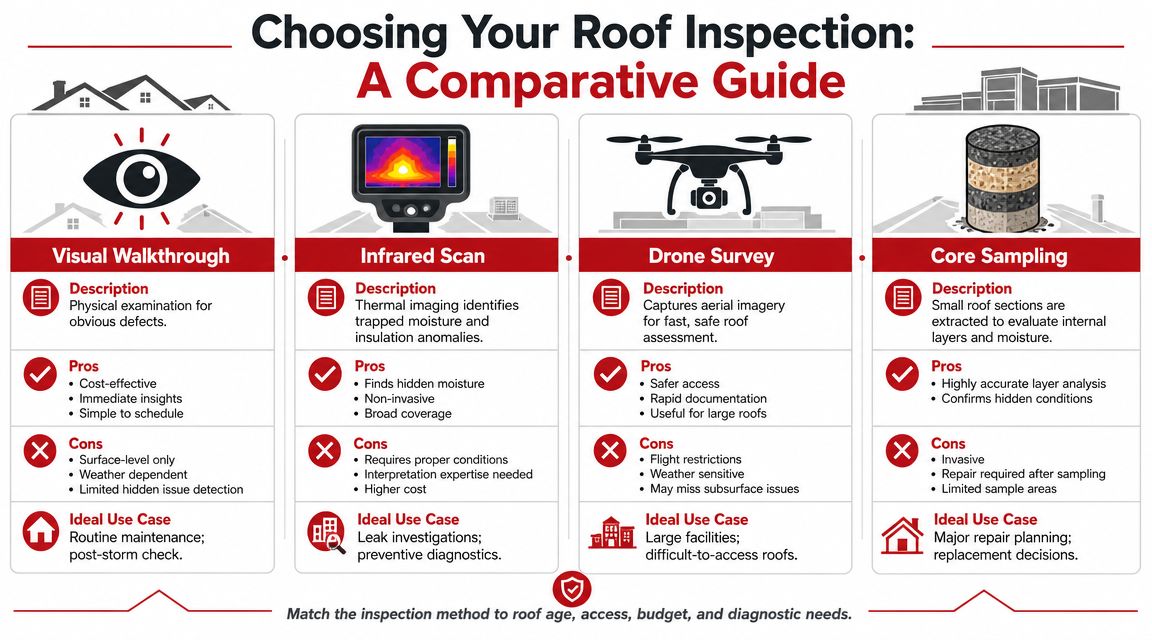
How to Choose the Right Type of Roof Inspection
Most facility managers make one mistake here. They ask for “a roof inspection” as if it's one thing. It isn't. Different inspection methods answer different questions, and if you pick the wrong one, you'll either miss hidden problems or spend money gathering the wrong kind of information.
Use a walk-through when you need condition awareness
A visual walk-through inspection is the baseline service. It works best for routine annual review, seasonal checks, visible leak complaints, and general maintenance planning. An experienced inspector can spot punctures, seam separation, flashing issues, drainage problems, and obvious wear patterns quickly.
Its strength is context. A person walking the roof can feel soft areas underfoot, check terminations up close, and compare visible defects with interior leak reports. Its weakness is just as obvious. Visual review won't reliably find trapped moisture under the membrane when the surface still looks acceptable.
Use a drone when access, scale, or safety is the issue
A drone or aerial inspection is the right choice when the roof is expansive, access is difficult, fall exposure is a concern, or you need fast visual documentation across multiple buildings. It's useful for large commercial sites and for preliminary review after storms.
This method shines when you need current imagery, measurements, and condition mapping without putting people everywhere on the roof. It's also useful when you're comparing roof sections on different buildings in a portfolio. If you're reviewing system types across properties before scoping repairs, this guide to commercial roofing system types helps frame what details matter on TPO, EPDM, metal, and other assemblies.
Drone inspection does have limits. It can show you condition at the surface, but it can't replace close-contact review of suspect seams, penetrations, or hidden moisture conditions.
Use infrared when moisture is the real question
An infrared thermographic inspection is the tool to use when you suspect hidden water in insulation or substrate. Advanced inspections use technologies like infrared thermography because trapped moisture can remain invisible to the naked eye while degrading insulation value, corroding the deck, and compromising the roof system over time, as described in Schulter Roofing's inspection overview.
That's the key point. If your goal is to determine whether a roof can be repaired, coated, or partially restored, moisture mapping matters more than surface appearance.
A dry-looking roof can still be a wet roof.
Sometimes the right answer is a combined workflow
Here's the decision guide I'd use:
- Routine upkeep and visible wear: Start with a walk-through inspection.
- Large site, limited access, steep safety concerns: Add drone documentation.
- Chronic leaks, suspected wet insulation, repair-versus-replacement decision: Order infrared.
- High-stakes budgeting or dispute support: Combine visual, aerial, and selective testing.
A combined approach usually gives the cleanest decision path. The visual inspection identifies obvious defects. The drone captures broad documentation and measurements. Infrared helps determine whether hidden moisture has already spread beyond what the eye can see.
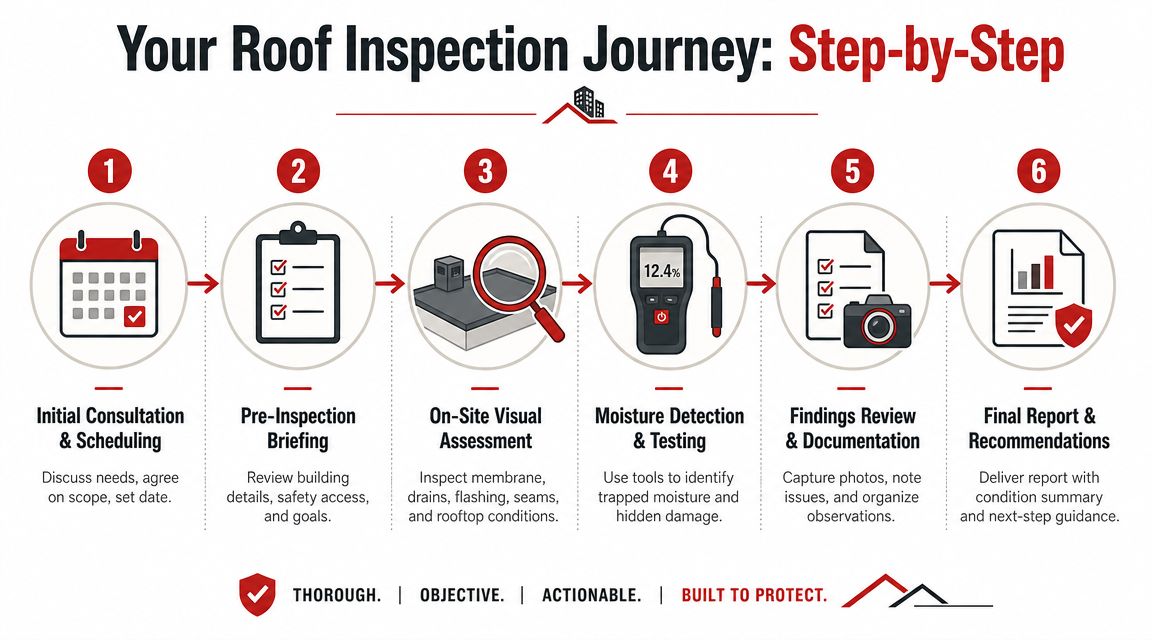
The Commercial Roof Inspection Process Step by Step
A good inspection day shouldn't feel chaotic. It should feel organized, methodical, and documented from start to finish.
Modern commercial roof inspections have evolved into a standardized risk-management service, with inspectors routinely reviewing and documenting interior ceilings, seams, drains, flashings, and penetrations, and spring and fall checks have become common practice, according to Procore's commercial roof inspection guidance.
What should happen before anyone climbs the roof
First comes scope confirmation. The inspector should ask why you called. Routine review, active leak, post-storm concern, warranty documentation, budgeting, and pre-purchase due diligence all lead to different inspection priorities.
Then comes access and safety. Roof access points, escort requirements, active operations, restricted areas, and any known hazards should be addressed before the inspection starts. If a contractor skips this conversation, that's a bad sign.
What happens during the field inspection
The inspection itself should move in a logical sequence, not random wandering with a camera. Expect the team to review interior signs of leakage first or at least early in the process, especially if occupants have reported active problems.
Then the roof review should move through key zones:
- Interior review for stains, deck moisture clues, wall damage, or leak pattern history.
- Perimeter and edge scan because wind-related issues often show there first.
- Field review for open seams, punctures, membrane wear, surface deformation, and prior repair quality.
- Detail review around penetrations, curbs, drains, expansion joints, and flashing transitions.
- Documentation with photos, notes, and marked locations.
To see the process in action, this short video gives useful visual context:
What the debrief should include
Before the inspector leaves, you should get a plain-language verbal summary. Not a final diagnosis for every issue, but a direct read on what appears urgent, what needs further testing, and whether immediate protection is necessary.
Look for these signs that the process was handled well:
- Clear site notes: The team recorded where issues were found and tied them to specific roof areas.
- Photo discipline: Images show context and close-up detail, not random snapshots.
- Interior-exterior correlation: Reported leak locations were compared against roof details above.
- Next-step guidance: The inspector identified whether you need repair, moisture testing, monitoring, or a capital planning discussion.
That transparency matters. A structured process usually produces a useful report. A rushed process usually produces guesswork.
How to Read Your Inspection Report and Make Decisions
A leak hits the same tenant suite for the third time, and now you have a fresh inspection report on your desk. This is the point where a good report saves money, or a vague one drives another round of waste. Your job is not to admire the photos. Your job is to decide whether to repair, monitor, file a claim, set next year's budget, or start planning replacement.
Too many reports fall apart at that point. They stack images in a PDF, add broad comments, and leave the facility manager to sort out risk alone. A useful report gives you a clear basis for action, especially when it includes moisture testing, remaining-life estimates, and code-related findings that affect whether patching, restoration, or replacement makes financial sense, as explained in Delta Services' commercial roof inspection discussion.
Read the report in decision order, not page order
Start with the part that answers the business question. You need three categories right away:
- Urgent issues that need action now
- Defects that need repair soon
- Conditions to monitor at the next review
If the report does not sort findings by priority, send it back for clarification. You should not have to infer urgency from a pile of unlabeled photos.
Next, study the roof map, making the report useful for asset management. A marked diagram shows whether problems are isolated to one section, tied to specific equipment, concentrated around drainage paths, or spread across the system. That distinction matters because localized failure supports targeted repair, while widespread deterioration points to capital work.
The best reports help you rank risk and spending in the same document.
What each report component should tell you
Each section of the report should answer a different question. If one piece is missing, your decision gets weaker.
| Report element | What it should tell you | How to use it |
|---|---|---|
| Photo log | Exact condition at each defect location | Support claims, maintenance planning, and contractor scope review |
| Roof diagram | Pattern and distribution of issues | Decide whether problems are localized or systemic |
| Condition narrative | What failed and likely why | Separate symptom from root cause |
| Testing results | Moisture, core data, or technical confirmation | Compare repair, coating, restoration, and replacement paths |
| Recommendations | Repair, monitor, restore, replace | Set priorities, budgets, and timelines |
If your contractor includes aerial measurements or annotated takeoff documents, review them carefully before you compare bids. This guide can help roofing contractors read measurement reports, and it is useful for owners who want to catch scope gaps before they sign anything.
Match the report to the decision you need to make
For insurance claims, demand precise language. You need dated photos, exact locations, condition notes tied to the affected areas, and documentation that separates current storm damage from older wear. General wording weakens your file. Specific wording gives your adjuster something to work with.
For maintenance planning, the report should separate leak-entry repairs from lower-priority service items. If every item is written with the same level of urgency, the report failed. You need a repair queue, not a wall of text.
For capital planning, focus on four points. Remaining service life. Extent of trapped moisture. History of repeat failures. Code upgrades that could expand replacement scope. If the report suggests major work within the planning horizon, this breakdown of commercial roof replacement cost factors will help you frame budgets before you request proposals.
Know when patching stops being a smart decision
Some reports describe a roof that still deserves repair dollars. Others describe a roof that has become a holding pattern for recurring expense. Learn the difference.
Repeated failures at multiple details, wet insulation across broad areas, poor drainage, and layers of aging repairs usually point to systemic decline. At that stage, another patch may buy a little time, but it does not solve the problem. It delays the larger decision while maintenance costs keep stacking up.
Use a simple rule. If the report shows isolated defects on an otherwise serviceable roof, approve focused repairs and document the follow-up date. If the report shows widespread deterioration, stop treating patches as strategy and move the conversation to restoration or replacement planning.
One practical note. Hail King Professionals is one example of a contractor that offers commercial inspections along with repair, coating, and replacement options. That can be useful if you want one vendor to inspect the roof and price several paths. What matters is not the logo on the truck. What matters is whether the recommendation matches the documented findings and gives you a defensible operating or capital decision.
Your Commercial Roof Inspection Checklist and Contractor Guide
You'll get better results from commercial roof inspection services if you prepare for the inspection and hold the contractor to a higher standard. Most problems in this process aren't technical. They come from vague scope, poor documentation, and weak follow-through.

Facility manager checklist
Use this before, during, and after the visit:
- Gather prior records: Pull old inspection reports, repair invoices, leak logs, warranty documents, and any storm claim paperwork.
- List problem areas: Note recurring leak locations, dates, weather conditions, and whether interior damage appeared in the same place more than once.
- Prepare access: Make sure the contractor can reach the roof safely and inspect interior areas tied to leak reports.
- Ask for the method upfront: Don't just request an inspection. Specify whether you want visual review, drone documentation, infrared, or a combination.
- Require photo-based reporting: If there's no organized photo log, you're paying for memory instead of evidence.
- Attend the debrief: Walk through urgent findings before the crew leaves.
- Set action deadlines: Decide what gets repaired now, what gets budgeted, and when the next follow-up review happens.
For teams that want a simple operational template, this roof inspection checklist guide is a practical starting point.
What to demand from the contractor
Don't hire based on a handshake and a low number. Vet the inspection provider the same way you'd vet a major repair contractor.
Here's the minimum standard:
- Commercial system experience: They should know the roof type you have, whether that's TPO, EPDM, modified bitumen, metal, or coated flat roofing.
- Insurance and safety documentation: They should carry proper coverage and have a clear roof access and jobsite safety process.
- Inspection method capability: If you may need drone imagery, infrared, or technical testing, confirm they can provide it or coordinate it.
- Documentation quality: Ask to see a sample report before you hire them.
- Storm and claim familiarity: If the inspection may feed an insurance claim, use a contractor who understands documentation standards and scope support.
Documentation separates good contractors from weak ones
A strong contractor documents findings in a way that another decision-maker can understand later. That includes ownership groups, asset managers, insurance representatives, and future service vendors. If you've ever managed field teams in other trades, you already know how important customer photo records are for avoiding disputes and preserving context. This piece on customer photos and mobile service documentation makes that point well, even outside roofing.
If the contractor can't show you what they found, where they found it, and why it matters, don't trust the recommendation.
The short version
If you manage commercial property, annual inspection is the floor, not the ceiling. Add inspections after severe weather. Use visual review for routine condition checks, drone support for access and documentation, and infrared when moisture detection affects financial decisions. Then use the report to rank urgency, support claims, and decide whether you're maintaining an asset or postponing an inevitable replacement.
If you need a documented commercial roof inspection, repair scope, or replacement evaluation in Texas, Hail King Professionals can help you assess the roof condition, review practical options, and move quickly on leak, storm, coating, or capital-planning decisions.