Expert Residential Roof Replacement: DFW & East Texas 2026
A Texas storm doesn't give you much warning. One evening you're listening to hail hit the windows in Fort Worth or Arlington. A day later, you notice shingle pieces in the yard, a stain on the ceiling, or water showing up around a vent after heavy rain in Tyler or Longview. That's when roof questions turn urgent.
Most homeowners don't replace a roof often, so the process can feel murky fast. You're trying to figure out whether the roof can be repaired, whether insurance will help, what materials make sense in Texas heat and hail, and how to avoid getting stuck with surprise costs halfway through the job. If your home has solar, there's another layer to coordinate.
This guide walks through the full residential roof replacement process the way an experienced Texas roofer would explain it at the kitchen table. It covers inspection, storm damage, insurance claims, material choices, decking issues, solar panel logistics, budgeting, and final inspection so you can make decisions with a clear head.
Your Guide to Roof Replacement in North and East Texas
In Texas, roofs wear out differently than they do in milder climates. Hail, high winds, heavy rain, and long heat exposure all put stress on shingles, flashing, sealants, and ventilation details. A roof can look mostly fine from the driveway and still have enough impact damage or water entry to justify a closer inspection.
That's part of why residential roof replacement is rarely just a material swap. It's a chain of decisions. First, determine whether the damage is repairable or widespread. Then figure out whether the damage came from a sudden storm event or from age and gradual wear. After that, choose materials that match your home, your budget, and your local weather risk in places like Dallas, Fort Worth, Plano, Frisco, McKinney, Garland, Irving, Mesquite, Marshall, San Antonio, Austin, New Braunfels, San Marcos, Boerne, Round Rock, and Georgetown.
A good roof replacement starts before a single shingle comes off. It starts with a correct diagnosis.
Texas homeowners also face a practical issue that many online guides skip. Roofing, insurance, and solar often collide on the same project. If hail damages the roof under a solar array, the replacement plan has to account for detach-and-reset timing, decking condition, material selection, and insurer paperwork in the right order. If those pieces aren't coordinated, the project slows down and costs become harder to predict.
The rest of this guide stays focused on what matters on real jobs. What damage signs count. What an adjuster is looking for. Where surprise costs usually appear. Which upgrades make sense in hail country. And what separates a clean, code-compliant job from one that only looks good from the street.
Is It Time for a New Roof? Signs and Inspection
A failing roof usually gives warnings before it fully gives out. Some signs are obvious. Others are easy to dismiss until the next storm turns a small issue into interior damage.
What homeowners usually notice first
The most common replacement triggers are not cosmetic. Leaking causes 33% of roof replacements, storm damage causes another 33%, and 25% of homeowners replace because they expect imminent failure according to RubyHome's roofing statistics. That lines up with what shows up across North and East Texas after hail, wind, and hard seasonal rain.
Watch for signs like these:
- Ceiling stains or attic moisture: Brown spots, wet insulation, or a musty smell often point to active water entry.
- Missing or lifted shingles: High winds can break the seal strip or tear shingles free, especially at ridges, hips, and edges.
- Granule loss in gutters or downspouts: Asphalt shingles shed granules over time, but hail and prolonged sun exposure can accelerate that wear.
- Cracked, curling, or brittle shingles: Texas heat can dry out shingles and make them more vulnerable during the next storm.
- Damaged flashing: Problems around chimneys, valleys, skylights, pipe boots, and wall transitions often cause leaks before the field shingles fail.
- Sagging roof lines: A dip or soft-looking section can indicate deck damage or long-term moisture intrusion.
What you can check safely from the ground
A homeowner can do a useful first pass without climbing a ladder. Walk the perimeter after a storm. Look for displaced shingles, exposed underlayment, bent metal, debris impact, and shingle fragments on the ground. Inside, check the attic during daylight for staining or visible light around penetrations.
If your energy bills seem unusually high, roof condition and attic performance can overlap. For a simple explanation of how the top of the house affects comfort and efficiency, this guide on understanding roof heat loss is a helpful companion read.
Practical rule: If you can see damage from the yard, there's often more damage that you can't see from the yard.
Why a professional inspection matters
A professional roof inspection does more than confirm that shingles are damaged. It separates repairable issues from full-system problems. That means checking shingle condition, ridge caps, flashing, underlayment exposure, ventilation details, penetrations, soft decking areas, and signs of hail bruising or wind-lift that don't show up clearly from the ground.
It also matters for safety. Homeowners get hurt every year climbing roofs that are steep, slick, heat-soaked, or storm-damaged. Even on a walkable roof, impact damage can weaken surfaces in ways that aren't obvious.
An experienced roofing contractor near me search will bring up plenty of names. What you want is someone who documents what they find clearly, explains whether spot repairs are realistic, and shows you where the roof has crossed from nuisance issues into replacement territory. That keeps you from paying for repeated repairs on a roof that's already near the end of its useful life.
Navigating Texas Storm Damage and Insurance Claims
Insurance questions usually start with one sentence. “Will my policy pay for this?” The answer depends less on whether the roof is old and more on whether you can prove a sudden storm event caused covered damage.
What to do right after the storm
The first hours matter. If there's active leaking or visible openings, protect the home from further water intrusion. Temporary tarping or other emergency roof repair measures can help limit interior damage while the claim gets started.
Then document everything carefully:
- Photograph the roof from the ground and capture any visible missing shingles, dented vents, damaged gutters, or fallen branches.
- Take interior photos of ceiling stains, wet drywall, flooring damage, or attic moisture.
- Save storm timing details such as the date and when the damage was first noticed.
- Review your policy language before speaking with the adjuster so you understand deductibles, exclusions, and any cosmetic damage limitations.
For homeowners who want a broader insurance lens on how carriers price storm risk, this overview of understanding hurricane insurance pricing gives useful context on how insurers think about exposure and underwriting, even though Texas roof claims have their own policy specifics.
The tipping point insurers care about
Many homeowners are surprised that insurance coverage for roof replacement requires proof of a sudden storm event. Homes with roofs that are 15+ years old and only minor granule loss are denied in 70% of claims, while homes of the same age with severe leak penetration are approved in 85% of cases, based on State Farm's roof replacement guidance.
That distinction matters in Dallas, Plano, San Antonio, and everywhere else in Texas. Age alone doesn't usually win a claim. Neither does ordinary wear. Insurers want to see covered damage tied to a storm, not a roof that aged naturally.
Here's the practical breakdown:
| Claim factor | More likely to help | More likely to hurt |
|---|---|---|
| Cause of loss | Clear hail or wind event | General aging or maintenance issues |
| Damage severity | Leak penetration, functional damage | Minor cosmetic wear |
| Documentation | Photos, inspection notes, storm date | Vague description with no evidence |
| Scope clarity | Specific damaged components identified | Broad claim with no itemization |
The strongest claims are the ones that connect visible storm damage to functional roof failure. That's why inspection notes and photo documentation matter so much.
A useful next step is reviewing a clear claim walkthrough like this guide to the roof insurance claim process, which lays out the paperwork and timing homeowners usually face.
This video gives a visual overview of the storm claim journey from damage to repair:
What a contractor should do during the claim
A roofing company near me search after a hailstorm often leads to a lot of sales language. Focus on process instead. The contractor should inspect the roof, identify storm-related damage, prepare a line-by-line scope, and be ready to meet the adjuster if needed.
That adjuster meeting matters because small line items often decide whether your final scope is complete. Flashing, ridge components, accessory metals, and code-related items can be missed if no one points them out on site. A contractor who understands storm damage roof repair and residential roof replacement can help make sure legitimate damage is documented the first time instead of argued later through supplements.
Your Residential Roof Replacement Project Step-by-Step
Once the roof is approved for replacement, most homeowners want to know the same thing. What exactly happens at the house, and in what order? A clean project follows a clear sequence, not improvisation.
The sequence that keeps a project on track
A standard residential roof replacement follows a 7-step process, from inspection and planning through tear-off, deck review, underlayment, installation, cleanup, and final inspection, according to this step-by-step roof replacement process guide. That same guide notes the full process typically spans 2 to 6 weeks, while the actual on-roof work commonly lasts 1 to 3 days, and dry-season timing can reduce weather interruptions by up to 40%.
On the homeowner side, the sequence usually looks like this:
Assessment and approval
The roof gets inspected in detail, the scope is written, and repair versus replacement is settled.Planning, permits, and material coordination
Shingle type, color, accessory components, delivery timing, and permit requirements are confirmed before work starts.Tear-off day
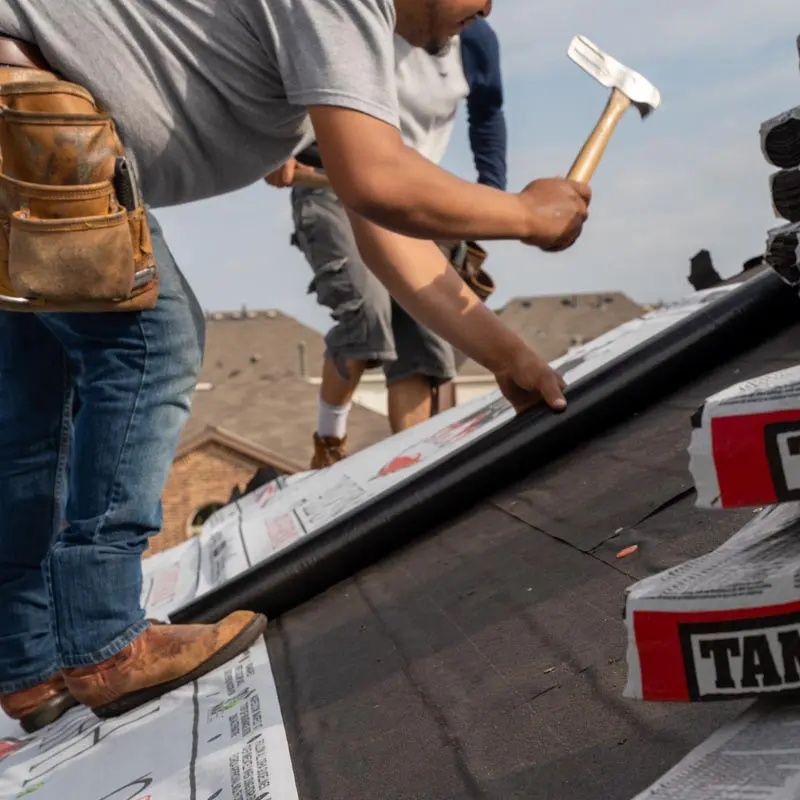
Crews remove the old shingles, underlayment, and flashing down to the roof deck. This is the loudest part of the project.Deck inspection
With the roof stripped down, the decking is checked for rot, soft spots, moisture damage, or impact damage.Dry-in protection
Synthetic underlayment and ice-and-water protection go in where required, especially at vulnerable areas like eaves and valleys.Installation of the new roof system
Starter materials, drip edge, shingles or other roofing products, ridge components, and ventilation are installed to manufacturer specifications.Cleanup and final review
Debris is removed, magnetic nail sweeps are performed, and the final inspection checks flashing, penetrations, and finish details.
The decking decision that catches people off guard
The most common hidden issue on a replacement job is bad decking. Homeowners often hear “we'll inspect the deck” and assume that means no extra work is likely. That's not how it plays out on many Texas storm jobs.
The Texas Department of Insurance reports that 40% of roof replacement projects in high-wind zones involve unexpected decking replacement due to hidden damage, as noted in the TDI roofing FAQ. That's why decking inspection is a real decision point, not a formality.
If the deck is soft, rotted, or impact-damaged, no good contractor should roof over it.
When the old roofing is removed, damaged decking may need repair or full replacement before new materials can go on. That can affect cost, schedule, and in some cases the fastening pattern and panel type used to bring the roof back into code-compliant condition.
Solar panel detach and reset
Solar changes the workflow, but it shouldn't derail the project if it's planned correctly. Panels and racking usually need to be detached before tear-off and reset after the roof is complete. The key is sequencing. Roofing crews, solar technicians, and the homeowner all need the same schedule.
A few points matter here:
- Protect the warranty path: Don't let roof work happen around mounted panels without a clear detach-and-reset plan.
- Inspect beneath the array: The covered sections can hide moisture issues, fastener penetrations, or decking problems.
- Coordinate reinstall timing: Panels should go back only after the roof is fully installed and final details are complete.
For homes in Arlington, McKinney, Frisco, and similar solar-heavy neighborhoods, this is one of the biggest reasons to choose a contractor who's used to managing more than the shingle install itself.
What homeowners should do before crew arrival
You don't need to overprepare, but a few steps help:
- Move vehicles away from the work zone: Dump trailers, material deliveries, and falling debris make driveway access tight.
- Clear the perimeter: Patio furniture, potted plants, grills, and lightweight décor should be moved back from the house.
- Plan for noise: Tear-off and nail guns are loud. Pets, babies, and remote workers will notice.
- Protect attic-stored valuables: Dust and vibration can shake loose debris during tear-off.
Some property owners prefer one point of contact for roofing, gutter replacement, and related exterior protection details so the schedule stays cleaner. Hail King Professionals handles residential reroofing, storm restoration, gutter work, and solar panel detach-and-reset within the same project flow, which can simplify coordination on Texas homes with storm-related damage.
Choosing Materials and Budgeting for Your New Roof
Material choice isn't only about curb appeal. In Texas, it's a durability decision. The roof has to deal with hail, wind-driven rain, long heat exposure, and sharp temperature swings that punish cheaper components.
The three options most homeowners compare
Asphalt shingles are still the default choice for many homes. They're familiar, widely available, and fit a broad range of budgets and architectural styles. They also dominate the market. Asphalt shingles account for over 70% of the total global roofing market share, according to Custom Market Insights' residential roofing market report.
Class 4 impact-resistant shingles deserve serious consideration in North Texas. They cost more upfront, but they're built for harsher impact conditions and are a logical upgrade in hail-prone areas.
Standing seam metal is the premium path for homeowners who want a different look and a stronger long-term storm profile. It carries a much higher initial investment, so it's usually chosen by owners planning to stay put or prioritizing that performance and appearance.
What the numbers look like in DFW
For budgeting, local pricing is more useful than national averages. In Dallas-Fort Worth, a standard architectural shingle roof replacement for a typical 1,800 to 3,000 square-foot home costs $11,000 to $20,000 in 2026, and upgrading to Class 4 impact-resistant shingles adds about $100 to $150 more per square, based on DFW roof replacement cost guidance.
For larger homes and premium systems, quality architectural shingle roof replacement for homes with 2,500 to 3,000 square feet of living space runs about $12,000 to $20,000, while standing seam metal ranges from $34,000 to $58,000+ according to JRH Construction's DFW cost breakdown.
A simple comparison helps:
| Material | Budget profile | Storm performance | Best fit |
|---|---|---|---|
| Architectural shingles | Lower upfront cost | Solid, but more vulnerable than upgraded options | Most standard replacements |
| Class 4 shingles | Moderate premium over standard shingles | Better hail resistance | North Texas hail exposure |
| Standing seam metal | Highest initial investment | Strong durability and modern appearance | Long-term owners, premium projects |
Budget note: A cheap bid can get expensive if it leaves out accessories, code items, or likely deck work.
How to compare estimates without getting fooled
Roof estimates can look similar on page one and differ a lot in the details. Check whether each quote includes tear-off, underlayment type, flashing replacement, starter materials, ridge ventilation, permit handling, cleanup, and how decking is billed if damage is found.
If you're comparing offers as part of a sale, purchase, or investment decision, this guide on verifying real estate roof repair estimates is useful because it shows how scope gaps can distort pricing.
For a local cost discussion specific to residential roofing, this overview of residential roof replacement cost can help you benchmark line items before you commit.
Financing can also be part of the decision, especially when the roof wasn't in the budget this year. The right financing setup can help a homeowner avoid delaying a needed roof while still choosing durable materials instead of dropping to the bare minimum.
Choosing Your Contractor and Protecting Your Investment
The contractor you hire matters as much as the shingle brand you choose. Good materials installed poorly still leak. Average materials installed correctly usually perform much better than homeowners expect.
What to verify before signing
Use a short checklist and take your time.
- Confirm insurance and business stability: Ask for proof of insurance and make sure the company has a real local operating presence in Texas.
- Review storm claim experience: If your project involves hail damage repair or wind damage repair, the contractor should understand adjuster meetings, supplements, and scope review.
- Ask how they handle decking and change orders: You want a clear answer before tear-off begins, not after bad wood is exposed.
- Check installation details: Ask what underlayment, flashing methods, ventilation components, and cleanup procedures are included.
- Look at communication habits: Fast callbacks, written scopes, and direct answers usually predict a smoother job.
Warranties are not all the same
Homeowners often hear “it has a warranty” and assume that covers everything. It doesn't. A manufacturer warranty generally covers the roofing product itself. A workmanship warranty covers how the contractor installed it.
Those are different protections. If shingles fail because of a product issue, the manufacturer warranty may apply. If the roof leaks because flashing was installed incorrectly around a vent or wall, that's usually a workmanship issue. The practical value of a workmanship warranty depends on whether the contractor is organized, reachable, and still operating locally when you need service.
Ask one direct question: “If this roof leaks around a penetration next year, who handles it, and how fast?”
Simple habits that help a new roof last
Once the replacement is done, ongoing protection is mostly about catching small issues early.
- Keep gutters and downspouts clear: Backed-up drainage can push water where it doesn't belong.
- Look after big storms: Check the yard for shingle pieces, metal fragments, or fallen limbs.
- Watch roof penetrations: Pipe boots, vent flashings, and seal points are common leak locations.
- Trim overhanging limbs: Branches scrape shingles and increase storm impact risk.
- Schedule inspections when something changes: A small stain, a lifted shingle edge, or new attic moisture is worth checking before the next heavy rain.
A roof replacement should leave you with fewer worries, not new ones. The right contractor, the right scope, and the right materials make that possible.
If your home in Dallas, Fort Worth, Arlington, Plano, Frisco, McKinney, Garland, Irving, Mesquite, Tyler, Longview, Marshall, San Antonio, Austin, New Braunfels, San Marcos, Boerne, Round Rock, or Georgetown may need a residential roof replacement, contact Hail King Professionals for a roof inspection, storm damage assessment, and a clear explanation of your repair, replacement, insurance, and solar panel detach-and-reset options.